


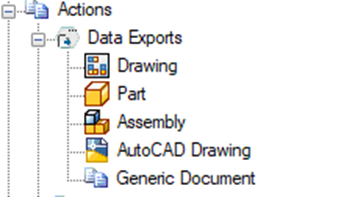
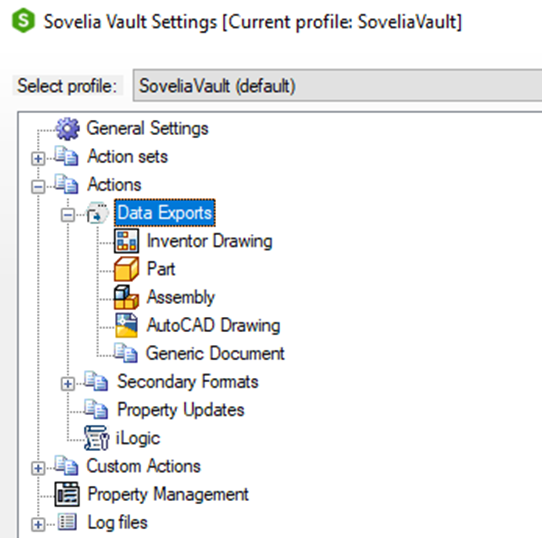
Data Exports
Data can be exported from drawings, parts, assemblies, AutoCAD files, Items and generic documents. From single files it will be a metadata export, whilst from an assembly we can also export a BOM, in different formats.
NB: Exports from assemblies or Drawings with assemblies should always use "download to workspace" set to True when using apprentice server.
BOM from file can be exported with “All model states” and specific model state selection. Sovelia Vault will export all model states that have a unique part number or a specific modelstate selected in the configuration.
We have added the model state option because Autodesk Vault doesn’t handle model states at file level and then the BOM export is not controlled. This means that the BOM exported will be from last checked in model state if we don’t specify this in the Sovelia Vault configuration.
Data exports from files can be a combination of Vault properties and BOM data
Since an export can be build from only Vault data we can create an export from any file within the Vault and files with no BOM data. A Generic document can be just any file that has properties. Any such exports need to be discussed with the supplier/administrator of the recieving system in order to find a format the reciever can import or read.
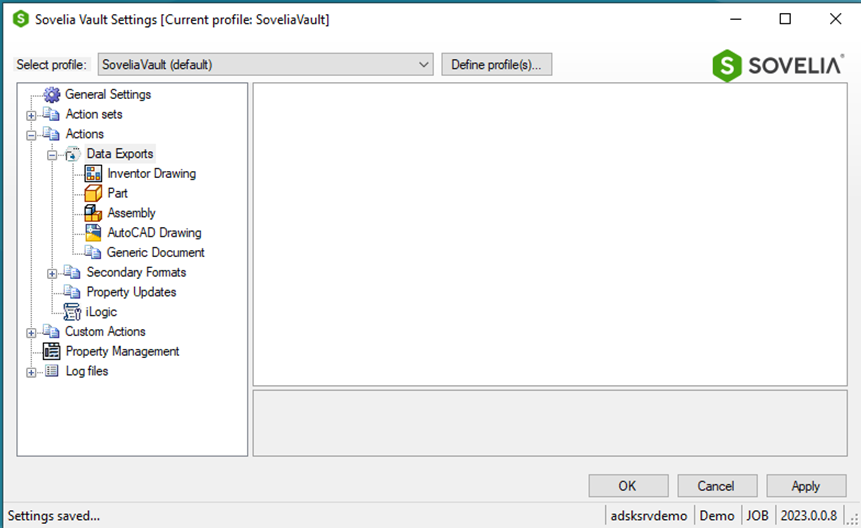
For each format to be exported different export information can be set up in the configuration
Export file formats
Set up an file data export
How to set up an export from a file format? The choices will be different based on which file type is selected.
- Right Mouse click on a file and select "New Data Export"
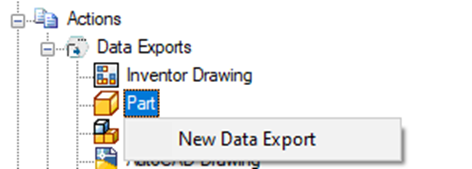
- Select the new node and give it a name

-
Set Job Creation Condition
Conditions can be set up for the creation of the job. If the condition is not met, no job is created. More information about conditions here -
Set up execution conditions
Conditions for the execution of the job can be set up . If the condition is not met, the job will not run. More information about conditions here -
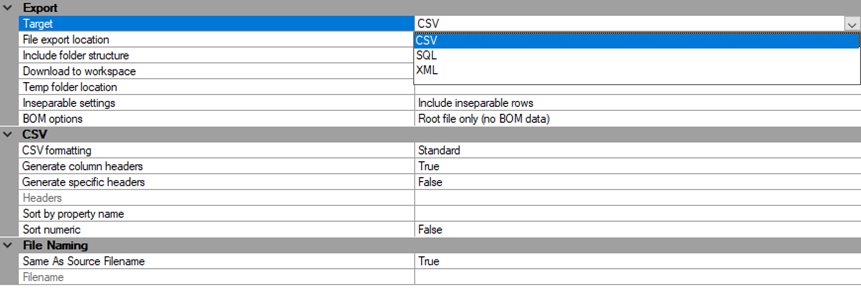
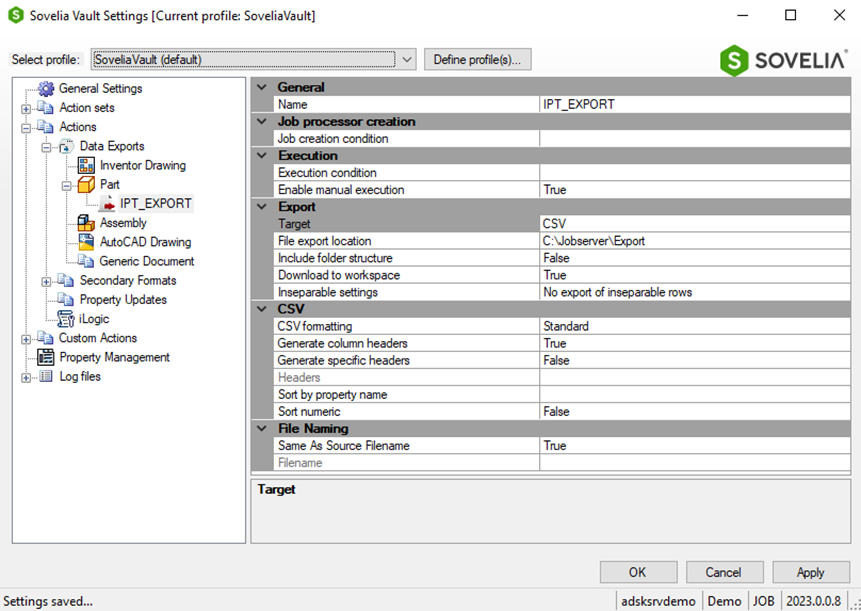
Set up the basics as below. In this example a CSV file will be created. For more details about the other file types see the chapters in General functions
- Create the list of properties and data to be included in the export by right click and select "Add new Property"
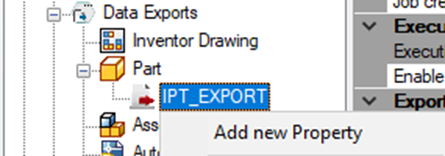
- Select what to add from the menu
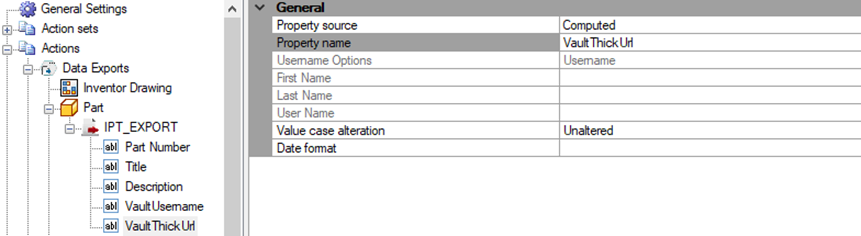
- Property Source: Select Vault or Computed
- Property Name: Select any Vault Property or computed value available for the file type.
- Value case alteration: Uppercase, lowercase or unaltered.
- Set date format: Specify date format string when the target property name is Date data type. dd.MM.yyyy=24.12.2023

- Build the export by adding the data to export
Quite often an export is built from a combination of computed, BOM (if exists) and Vault properties
- Run the export and check the data
- Save the setup by selecting "Apply" from the configurator.
- Restart Job processor and any vault client or cad application with a vault client.
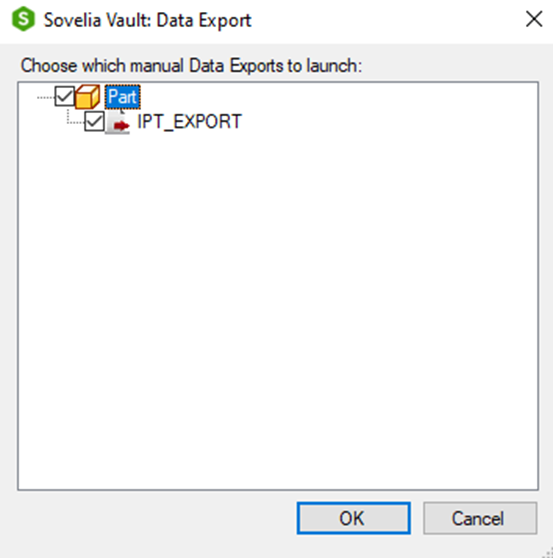
- Right mouse click on a part file in Vault and select "Export data"
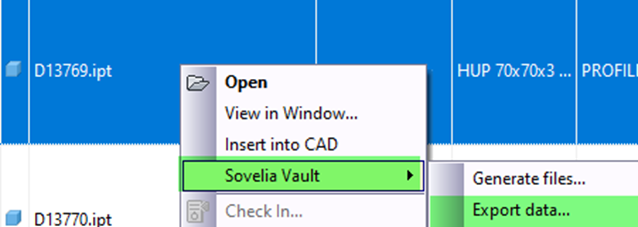
- Select the data export and then select "OK"
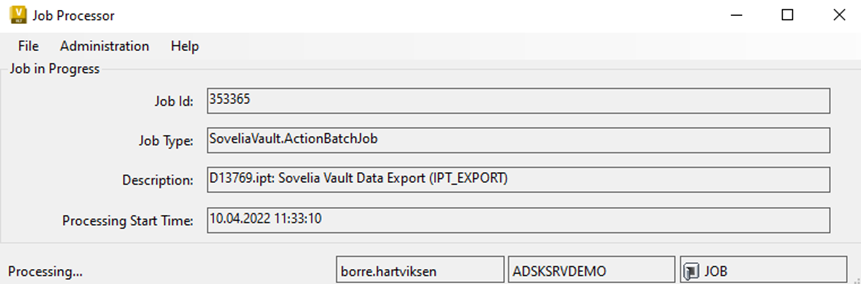
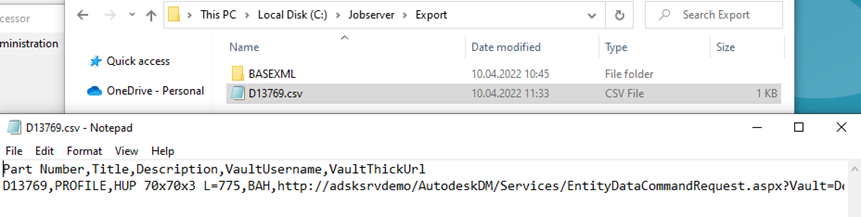
- After the Jobprocessor is finished, check the output
Now is the time to check that it can be imported to the recieving system.
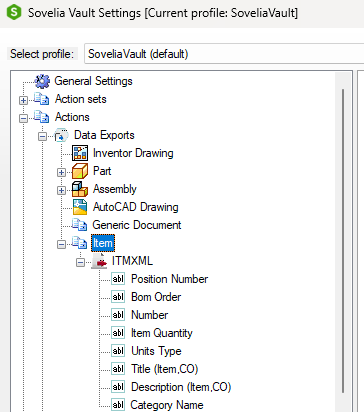
Set up an Item data export
How to set up an export from a Item format.
You can also run Item Export on save Item. This will send a BOM everytime an item is updated.
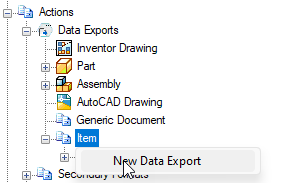
- Right Mouse click on the Item node and select "New Data Export"
- Select the new node and give it a name

-
Set Job Creation Condition
Conditions can be set up for the creation of the job. If the condition is not met, no job is created. More information about conditions here -
Set up execution conditions
Conditions for the execution of the job can be set up . If the condition is not met, the job will not run. More information about conditions here -
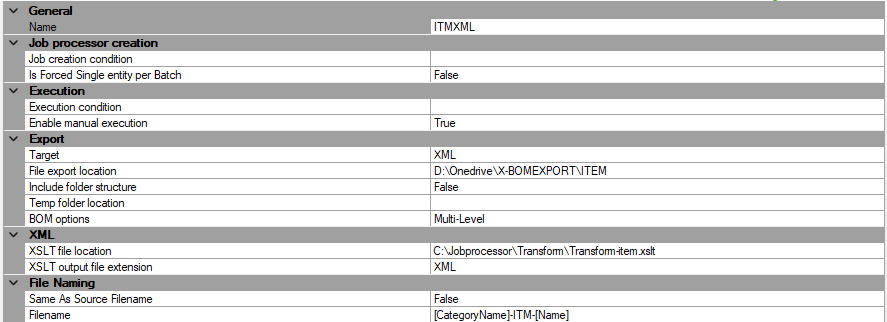
Set up the basics as below. In this example a XML file will be created. For more details about the other file types see the chapters in General functions
This functionality was added in Sovelia Vault 2024.1.
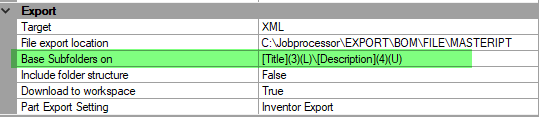
Example
(3); 3 characters from the left of the property
(L); Set to Lowercase
(U); Set to uppercase
Example; Title(L)Description(U)
- Create the list of properties and data to be included in the export by right click and select "Add new Property"
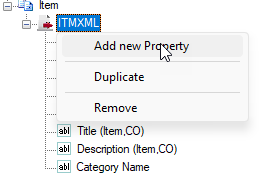
- Select what to add from the menu
- Property Source: Select Vault, Item BOM or Computed
- Property Name: Select any Vault Property or computed value available for the file type.
- Value case alteration: Uppercase, lowercase or unaltered.
- Set date format: Specify date format string when the target property name is Date data type. dd.MM.yyyy=24.12.2023

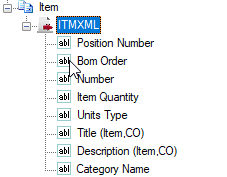
- Build the export by adding the data to export
Quite often an export is built from a combination of computed, BOM (if exists) and Vault properties
- Run the export and check the data
- Save the setup by selecting "Apply" from the configurator.
- Restart Job processor and any vault client or cad application with a vault client.
- Right mouse click on a Item in Vault and select "Export data"
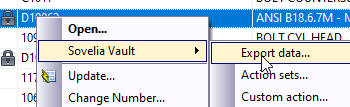
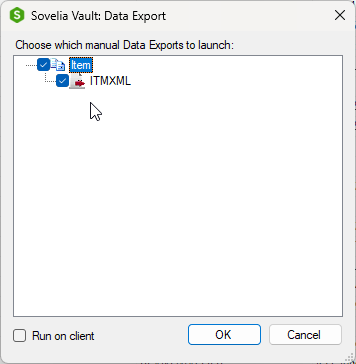
- Select the data export and then select "OK"
- After the Jobprocessor is finished, check the output
Now is the time to check that it can be imported to the recieving system.
ERP Connections with Sovelia Vault
Please follow the link to read more about Connections to ERP or other systems