Overview
View representations (view reps) can be seen as saved filters in an Inventor assembly. They allow the saving of different visibilities of components - for example, making all steel parts to be visible, and all plastic parts invisible in a view rep. Another example - make all parts purchased from ACME inc. visible, and all other parts in the assembly invisible. Saving multiple view reps in an assembly allows filtered, structured viewing in assemblies and easy diagnosis of problems.
View reps can also be used downstream in drawing views, and also for filtering drawing parts lists.
Creation and maintenance of view reps can be a real chore. Adding and removing components from view reps manually (and the user error that results) is eliminated with the Assembly Filter Tool, as all the view reps you have created can be updated to reflect the current assembly components with a single click at any time.
Creating View Representations

The Manage button will bring up the main ‘build’ form to allow construction of view reps in three different ways – see buttons below:

Button (1) allows the creation of a single managed view rep using up to 2 iProperty values.

For instance – if the ‘Add’ button is hit as shown above, a single view rep will be added to the list, and only components with ‘LG’ in their Description iProperty will be made visible in that view rep.
Note the use of the ‘And’ and ‘Or’ buttons allows 2 criteria to be defined for whether a component should be visible. E.g. Part Number contains ‘600’ And Description contains ‘Plate’
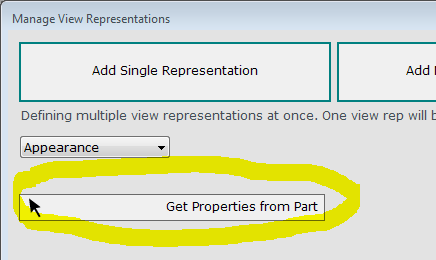
Note: the properties that are available in the drop-down initially will be all the main standard iProperties (such as Part Number, Description etc.) and all the custom iProperties found in the active assembly file itself. If other custom iProperties are required these can be accessed using the ‘Get Properties from Part’ button (see ‘Other Buttons’ section below).
Button (2) allows the creation of multiple view reps in one operation.

For instance, if the ‘Add’ button is hit in the example above, then one view rep will be created for each appearance that is found in the assembly. i.e. all the ‘White’, ‘Polished Steel’, ‘Racing Green’ and ‘Anodized Blue’ components will each be sorted into their own view rep.
Button (3) allows the creation of a view rep for each line in the assembly bill of materials (BOM)
For example, if there are 30 rows in the structured bill of materials in the assembly, then 30 view reps will be created. This allows easy isolation of all occurrences of a unique component.
Note that this button will only create a view rep for each row in the Top Level of the assembly (even if the assembly BOM is set to ‘All Levels’ rather than Top Level Only) *
* All the current settings in the structured BOM are honoured when creating view reps. Children (sub-components) of ‘Phantom’ sub-assemblies that have been ‘promoted’ to the top-level of the structured BOM will appear as separate line items, and therefore will be sorted into their own view rep.
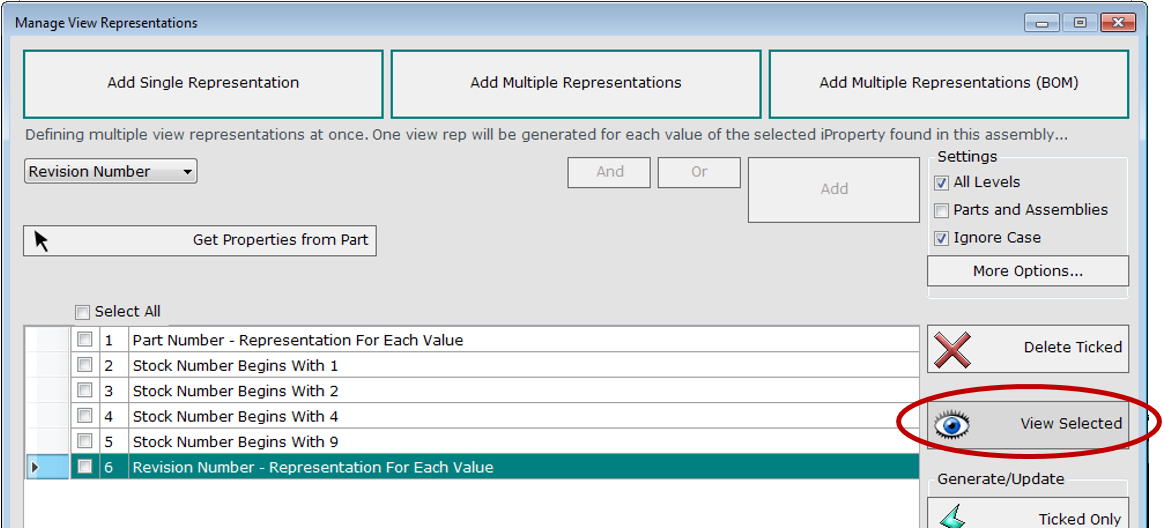
 Each view rep you specify will be added to the form. View reps that have been freshly added will automatically be ticked, and appear as bold in the list.
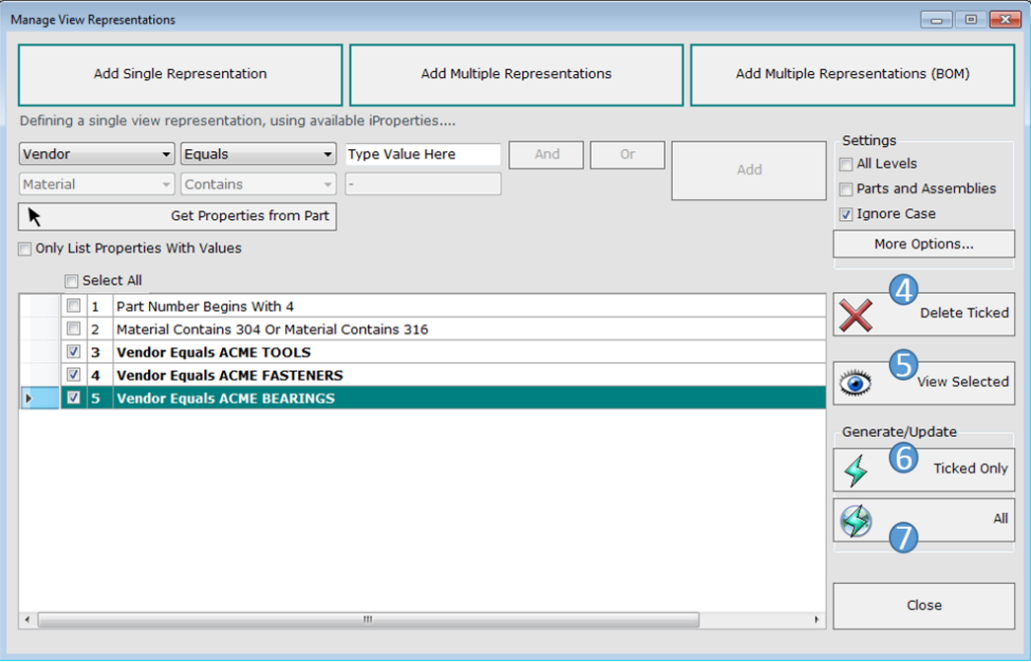
Delete Ticked (Button 4)
This button will delete all the view reps relating to rows that have been ticked in the form. Note that view reps can also be manually deleted as normal using the Inventor browser if this is preferred.
View Selected (Button 5)
Allows user to view all the reps relating to the currently selected (not ticked) row in the form. If there is more than one related view rep then they can be ‘played through’ in turn using buttons (8) and (9) shown below. Hitting button (10) will return to the main ‘Manage’ form.
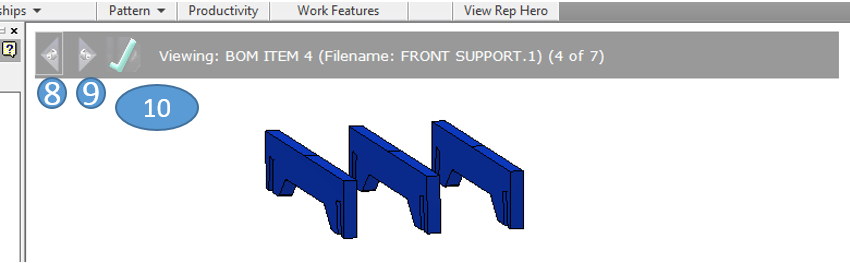
Note if only one view rep is related to the currently selected row, then the ‘Play Through’ controls 8 and 9 are not available.
Ticked Only (Button 6)
Will create (or update if they already exist) only view reps relating to ticked rows in the form.
All (Button 7)
Will create (or update if the already exist) all view reps relating to all rows on the form.
Choosing Properties
The ‘Get Properties from Part’ button will minimise the form and prompt user to select a single part in the Inventor graphics window. The property drop-down list will then be populated with all the custom iProperties (as well as the standard ones) found in the selected part.
It is worth mentioning that the ‘Exists’ and ‘Does Not Exist’ conditions are only available in the ‘Contains’ drop down list when a custom property (not a standard property such as Part Number) has been selected. This allows the user (for instance) to create a view rep showing only components that contain a custom iProperty called G_L (for Frame Generator components).
The ‘Only List Properties with Values’ checkbox will remove all properties that are empty in the current assembly file (or manually selected part) from the drop down list.

Settings and Options
For information about each option in the ‘Settings’ section of the form, the user can hover with the cursor to see the tooltip displayed.

Tips for using the Settings/Options:
- Don’t tick the ‘All Levels’ tick box unless you actually need it (it will take longer to process all levels of the assembly).
- Generally, ‘Parts and Assemblies’ should remain un-ticked (unless ‘All Levels’ is not ticked, in which case you may want to control visibility of top-level subassemblies)
- If ‘Ignore Case’ is ticked, components with Part Number ‘Steel’ will be considered the same as components with Part Number ‘STEEL’ for example. Note if this setting is changed, the view reps will need to be updated to reflect this (using the Update button).
- Don’t tick ‘Include Virtual Components’ unless you specifically need to filter a drawing parts list and see the virtual component rows on it. Having virtual components visible in the assembly model is useless otherwise as they contain no geometry. Ticking this option will slow down the processing of the view reps for large assemblies.
- Be careful with the ‘Renumber BOM Automatically’ tick box. This will automatically renumber your BOM starting from 1 (if you have added BOM reps to your list of view reps in the ‘Build’ form) every time you click the ‘Update’ button – which you may not want!
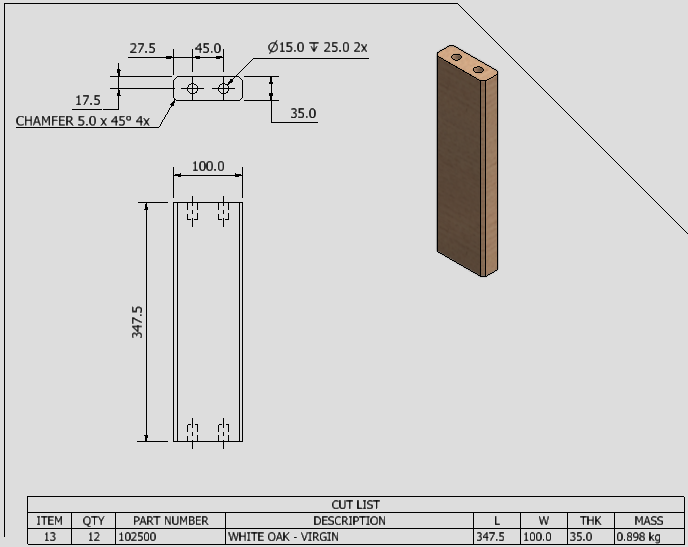
- ‘Include One Occurrence Only’ applies only to BOM reps. It is useful in the case that you want to create a detail drawing view of a single part from the assembly (using the view rep of that BOM row), then place a parts list of the assembly on the same sheet, and then filter the parts list by the view rep. This will allow QTY and Item Number from the top-level assembly to be shown on a single piece part drawing view.
- Note that any settings changed in the Options dialogue will be saved for next time, and between Inventor sessions. Any settings changed in the Options dialogue will also be instantly reflected when using the ‘Update’ button.
Updating View Reps

This button updates all the view reps you have created using the ‘Manage’ dialogue box, with one click. The options you have set in the ‘More Options’ dialogue box will be honored.
Note: for fastest updates to view reps – the ‘Fast Update’ checkbox should be ticked in the ‘More Options’ dialogue box. This prevents the screen from refreshing during processing, which can be confusing for the unprepared! If this is the case, then please un-tick this option.

Using View Reps for Drawing Views
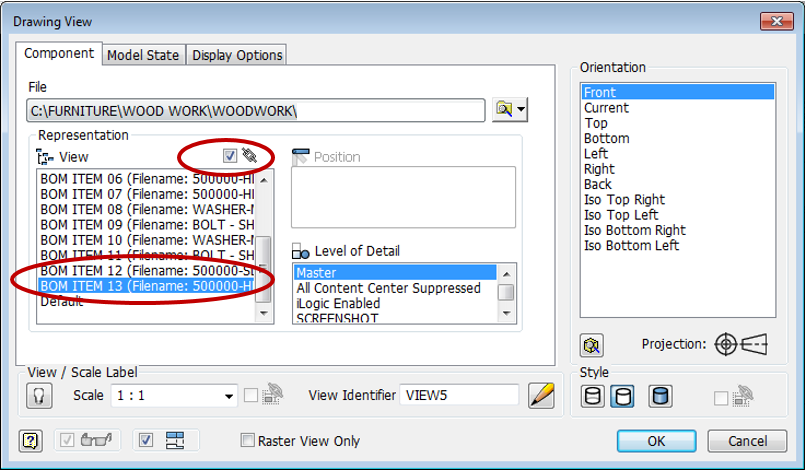
Simply select the desired view rep in the view placement dialog box. Tip: it is very important to tick the box circled below, in order to make the drawing view associative to the model – i.e. ensure any updates to the view rep in the model are automatically reflected in the drawing view of that view rep.
Using View Reps to Filter Parts Lists
Inventor allows filtering of parts lists in drawings by view representations. This means a parts list will only show rows that are visible in any assembly view rep. The method for this is as follows:
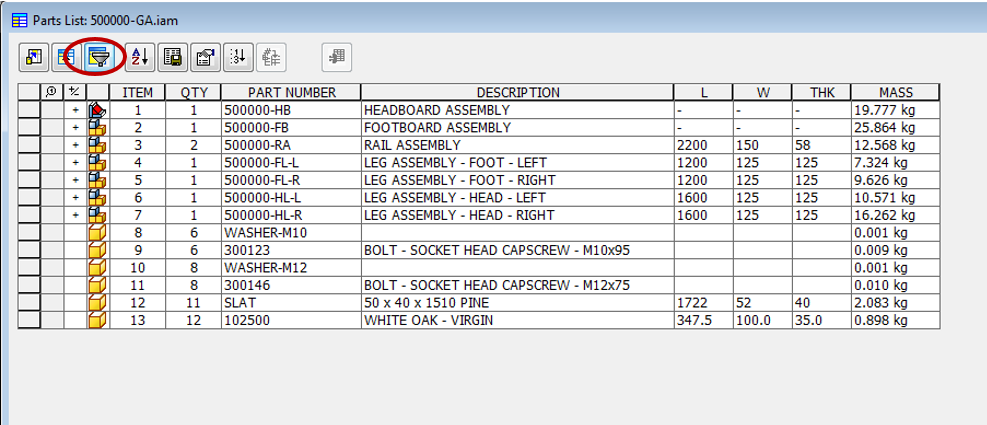
- Place drawing parts list on sheet as normal.
- Double click on the parts list to edit it.
- Hit the ‘Filter’ button.
4. Tick ‘Filter’ and select ‘Assembly View Representation’
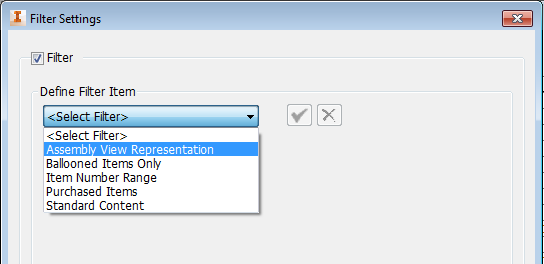
5. Choose desired view rep to filter by and hit ‘Add Filter’
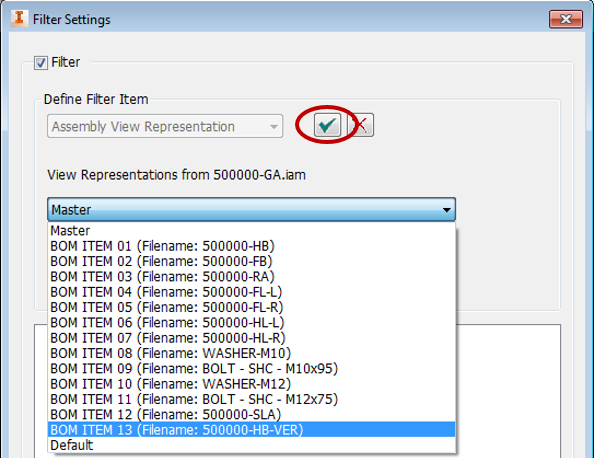
6. Hit ‘OK’ and parts list will be filtered.

Note. This filtering is associative, so any changes to the referenced view rep will automatically be reflected in the parts list.
Tips
- Always make view rep drawing views associative to the model.
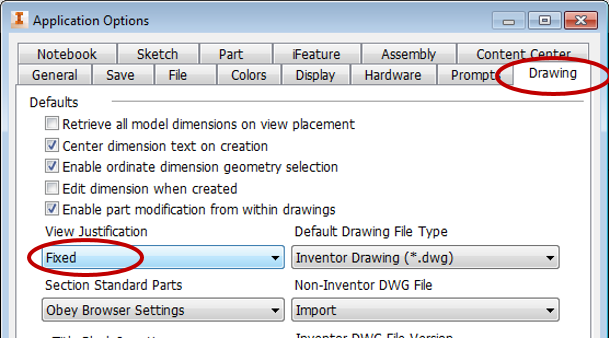
- Set your drawing views to be ‘Fixed’ rather than ‘Centered’ justification in Inventor Application Options.
Notes (FAQ)
Q. Can I save a template of the view reps I require?
A. Yes, you can. Simply edit your company assembly template file and build the view reps you require. These will be empty view reps, but they can be saved with the template and they will be automatically updated when the assembly contains components and the Update button is hit.
This means you can ‘set and forget’ the view reps in the template, and they will be automatically ‘updateable’ in every new assembly file created with that template.
Q. How can I use the BOM reps for sub-components that aren’t in the top level of the assembly?
A. At present the BOM reps only control visibility of top-level components. However – making subassemblies ‘Phantom’ in the Bill of Materials will ‘Promote’ the child components, which will then be recognised by the BOM reps. Note that you can make a whole chain of sub-assemblies ‘Phantom’ in order to promote child parts from several levels deep in the assembly to the top level if required.
Q. Why does the screen flicker when I use the ‘Update’ button?
A. If the screen is flickering, you have got the ‘Fast Update’ checkbox ticked in the ‘More Options’ form. This will make the updates faster, but at the expense of the screen flickering (no screen refreshing during updates). To prevent this, un-tick this option.
Q. How can I easily view created reps?
A. Use the ‘View Selected’ button on the ‘Manage’ form. See Here.