Spec Editor - To manage your pipe specifications
Use the Spec Editor to create and modify pipe specs. You can create multiple specs to better control your standards and in the Spec Editor you can also define Bending Machines, Collars, Insulations and Weld Gaps.
Properties are defined on database level which means that properties will apply for all specs.
Create database
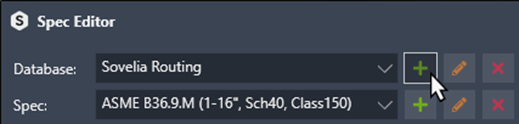
Create a new database by clicking on the + icon and type a name.
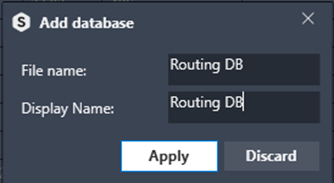
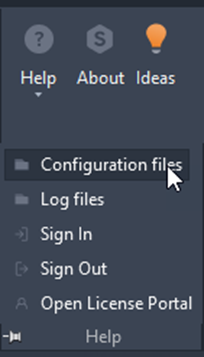
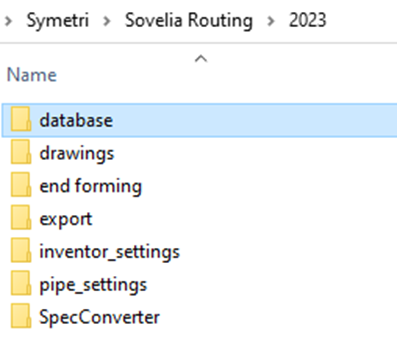
The database is an .sqlite-file which is stored in the database folder in your configuration path.
Configuration files button in Help-flyout menu opens folder location.
Create spec
In your database you can create Pipe Specs.
Create a new Pipe Spec by clicking on the + icon. If you have more than one thickness per Pipe ND, you should consider splitting it to separate specs which will give you better control of your specs.

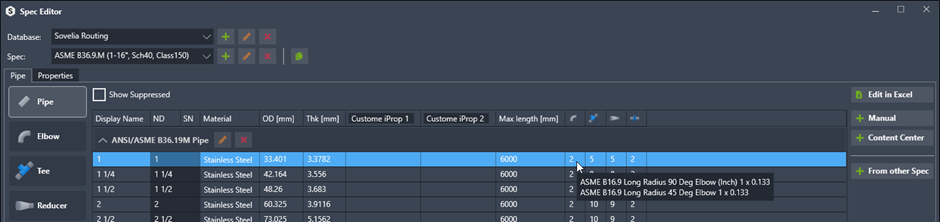
You will now continue adding content to your Spec. During this process, verify that your spec is configured correctly. You have an overview of which pipes and fittings are connected. Verify by hovering your curser over one of the cells.
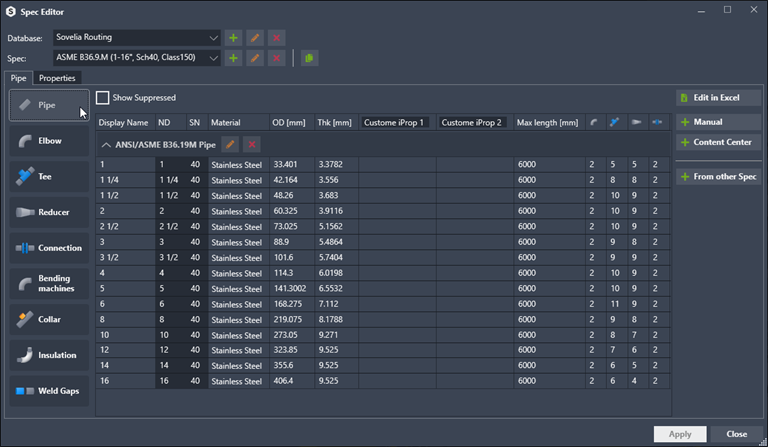
Add pipes
Import pipes from Content Center
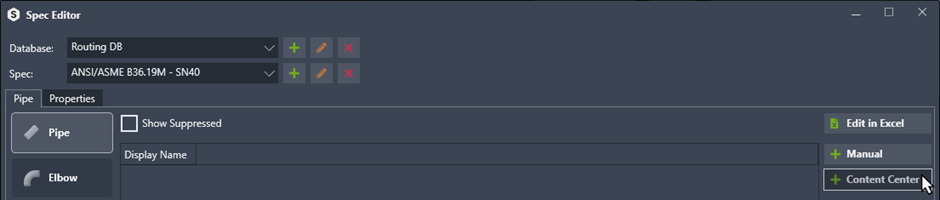
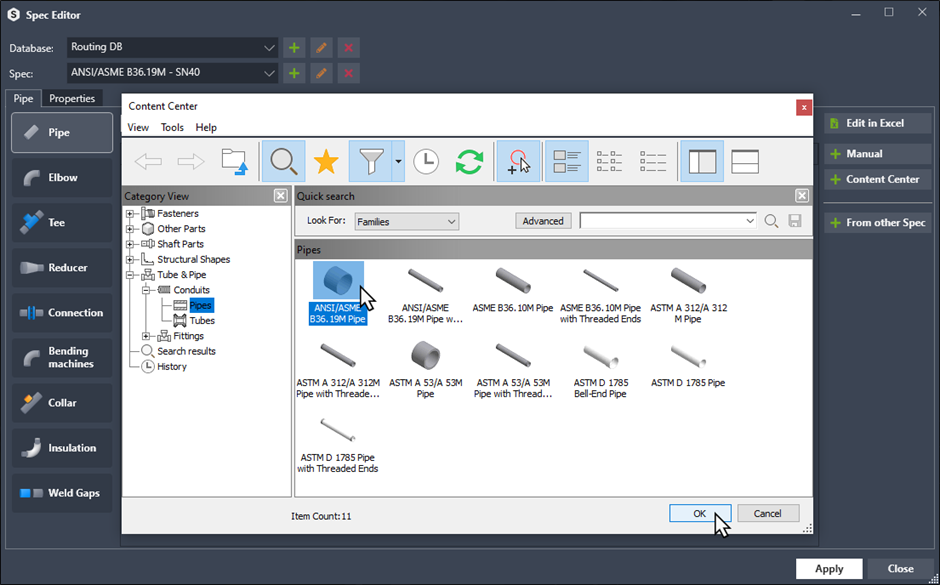
Click on + Content Center to import pipes from Content Center to your active spec.
Find the family you want to import and click OK.
In each column header, choose the Content Center column to import the data from. If you can’t find a Content Center column, set the column to “calculate”. Spec Editor will calculate these values for you.
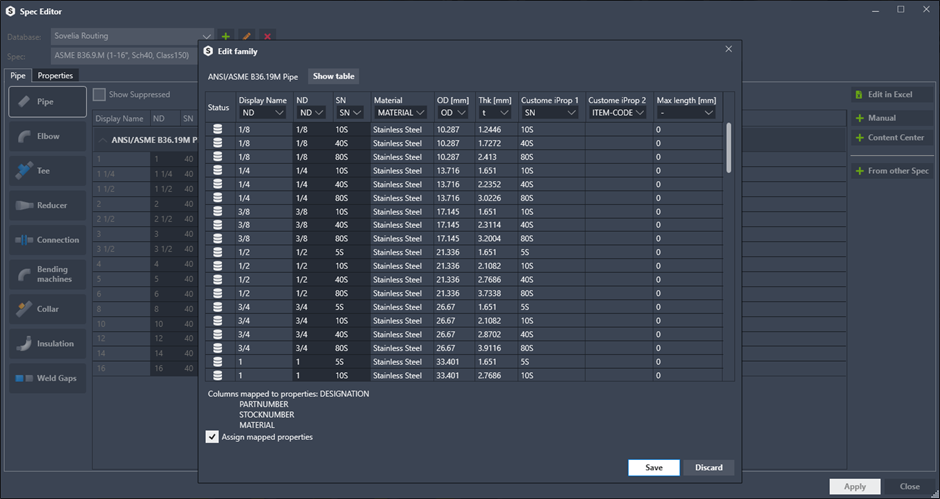
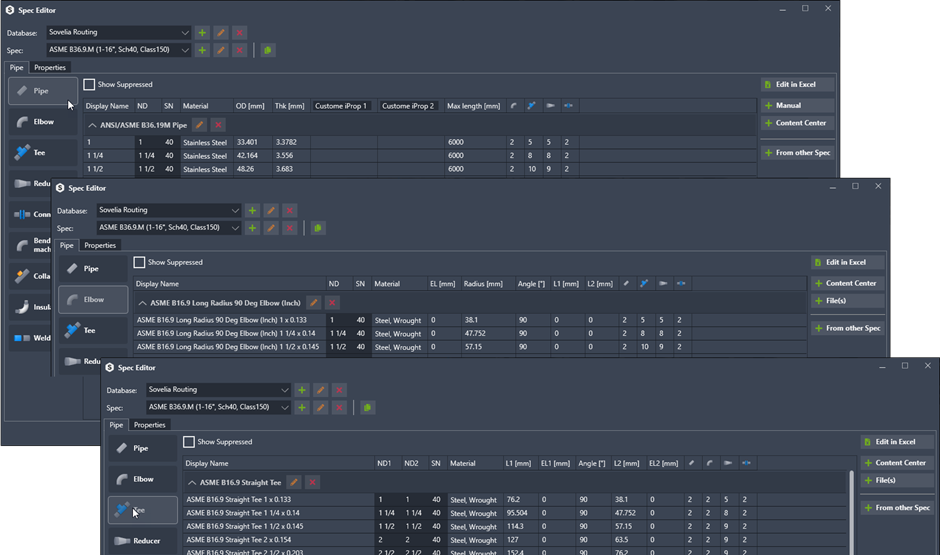
Pay extra attention to the first three columns: Display Name, ND and SN.
Display Name column is the name that is used in User Interfaces.
ND and SN columns from pipes and fittings table must match for Sovelia Routing to know which pipe and fitting can be combined.
If you choose to have one spec for each schedule you can keep the SN column empty.
Calculate/Save to import data into your database.
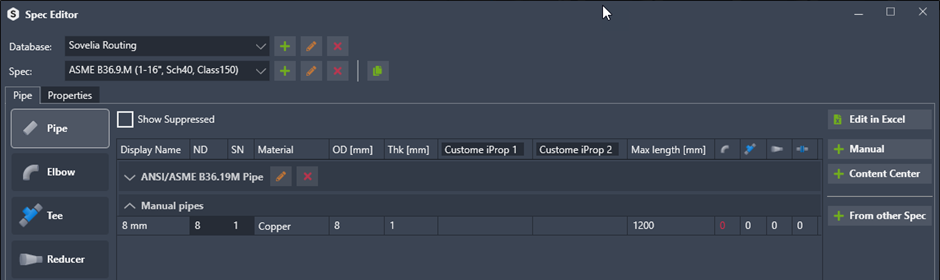
Add pipes manually (if you don’t have your pipes in content center)
Click + Manual to add a row in the pipe table. Fill cells with data needed or use Edit in Excel to do this more efficient.
Add fittings
Add Elbows from Content Center
Click on + Content Center to import Elbow family from Content Center to your active spec. Find the family you want to import and click OK.
In each column header, choose from which Content Center column to import data. If you can’t find a Content Center column, set the column to Calculate. Spec Editor will calculate these values for you.
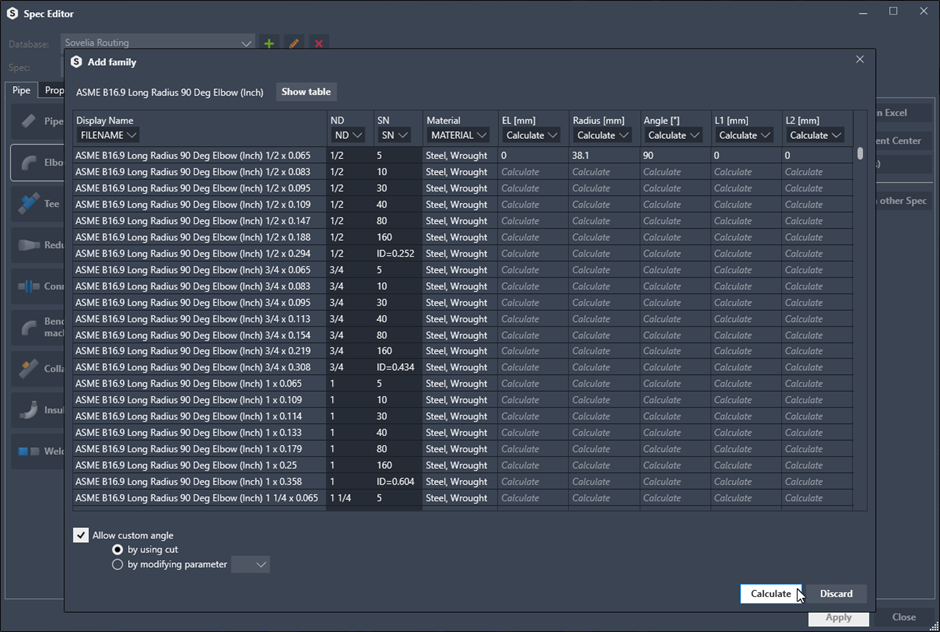
Pay extra attention to the first three columns: Display Name, ND and SN.
Display Name column is the name that is used in User Interfaces.
ND and SN columns from pipes and fittings table must match for Sovelia Routing to know which pipe and fitting can be combined. If you choose to have one spec for each schedule you can keep the SN column empty.

You can tick the box “Allow custom angle” to allow the Sovelia Routing to route with different angles of bend than standard.
Calculate/Save to import data into your database.
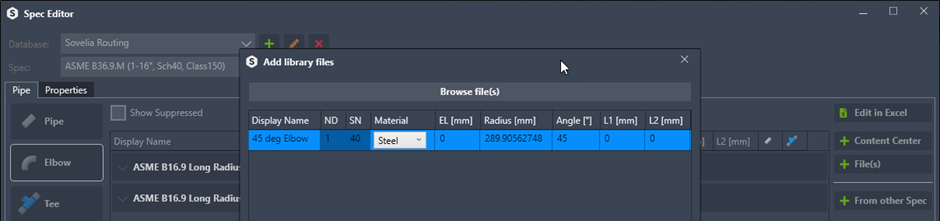
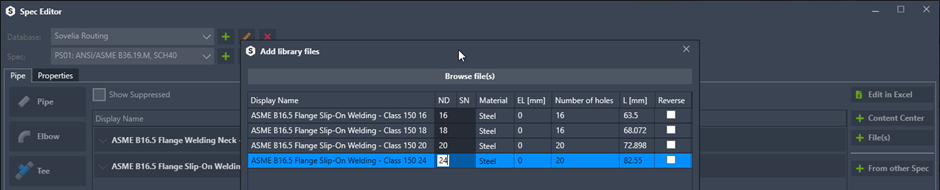
Add Elbows from file explorer
Click on + File(s) to browse files in your file explorer, select file(s) and Open to import data from model.

Update data in cells if necessary and Save to import.
Add Tees from Content Center
Click on + Content Center to import Tee family from Content Center to your active spec. Find the family you want to import and click OK.
In each column header, choose the Content Center column to import the data from. If you can’t find a Content Center column, set the column to Calculate. Spec Editor will calculate these values for you.
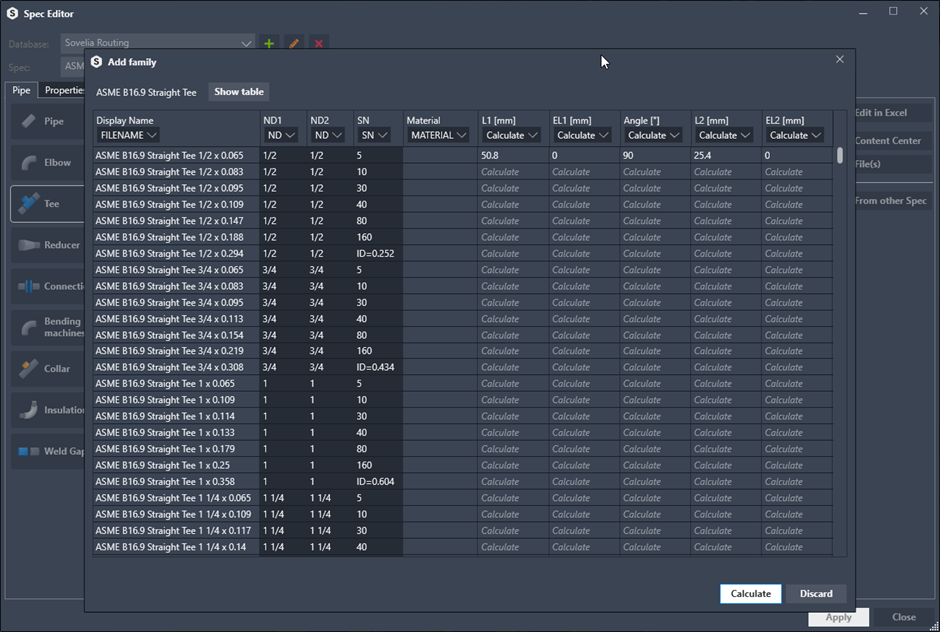
Pay extra attention to the firs three columns: **Display Name, ND, **and SN.
Display Name column is the name that is used in User Interfaces. ND and SN columns from pipes and fittings table must match for Sovelia Routing to know which pipe and fitting can be combined. If you choose to have one spec for each schedule you can keep the SN column empty.
Calculate/Save to import data into your database.
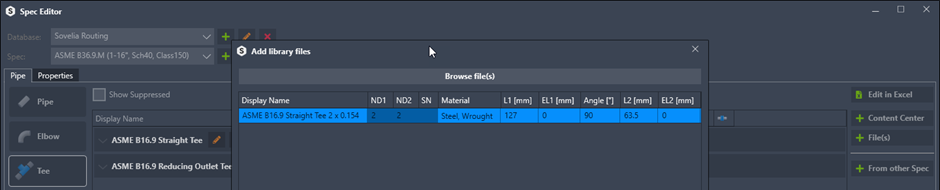
Add Tees from file explorer
Click on + File(s) to browse files in your file explorer, select file(s) and Open to import data from model.
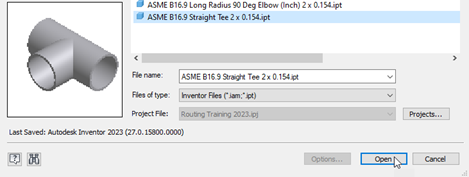
Update data in cells if necessary and Save to import.
Add Concentric Reducers from Content Center
Click on + Content Center to import Concentric Reducers family from Content Center to your active spec. Find the family you want to import and click OK.
In each column header, choose the Content Center column to import the data from. If you can’t find a Content Center column, set the column to “calculate”. Spec Editor will calculate these values for you.
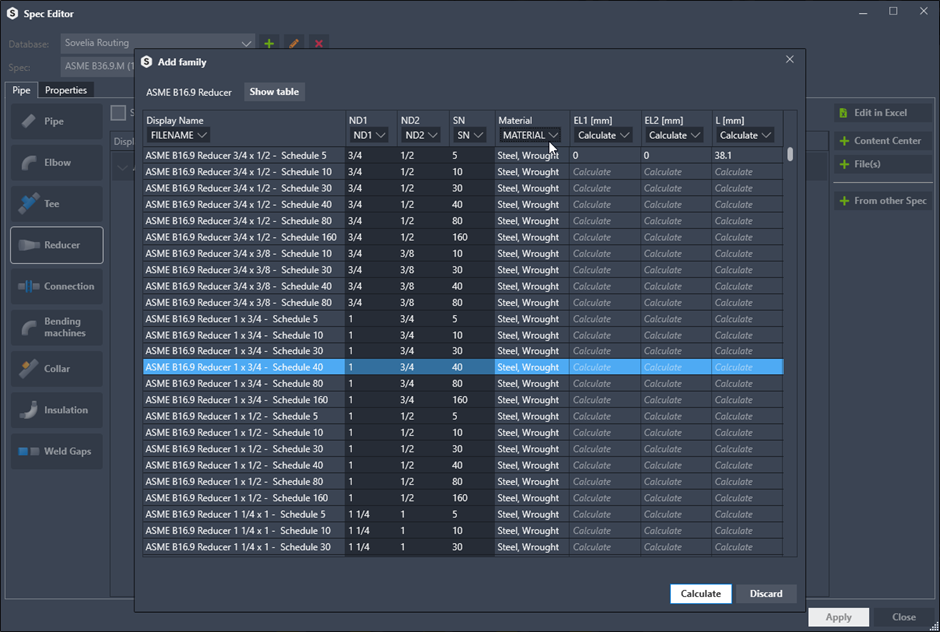
Pay extra attention to the firs three columns: Display Name, ND, and** SN. **
Display Name column is the name that is used in User Interfaces. ND and SN columns from pipes and fittings table must match for Sovelia Routing to know which pipe and fitting can be combined. If you choose to have one spec for each schedule you can keep the SN column empty.
Calculate/Save to import data into your database.
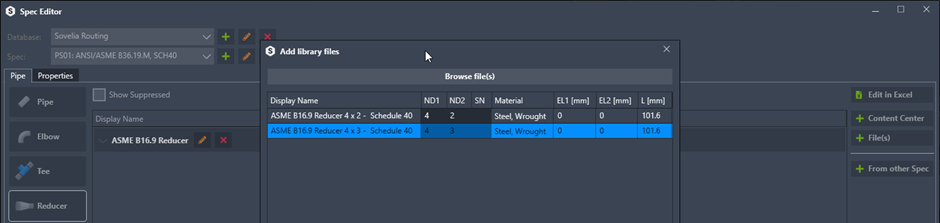
Add Concentric Reducers from file explorer
Click on + File(s) to browse files in your file explorer, select file(s) and Open to import data from model.
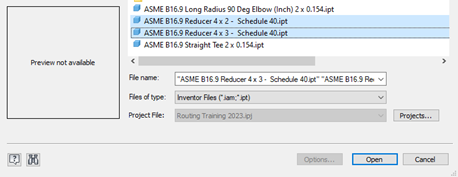
Update data in cells if necessary and Save to import.
Add Connections from Content Center
Click on + Content Center to import connections from e.g., Flange family from Content Center to your active spec. Find the family you want to import and click OK.
In each column header, choose the Content Center column to import the data from. If you can’t find a Content Center column, set the column to “calculate”. Spec Editor will calculate these values for you.
Only single part connections are possible to add to database. For multi part connections you can create an assembly of any combination and use + File(s) to import it.
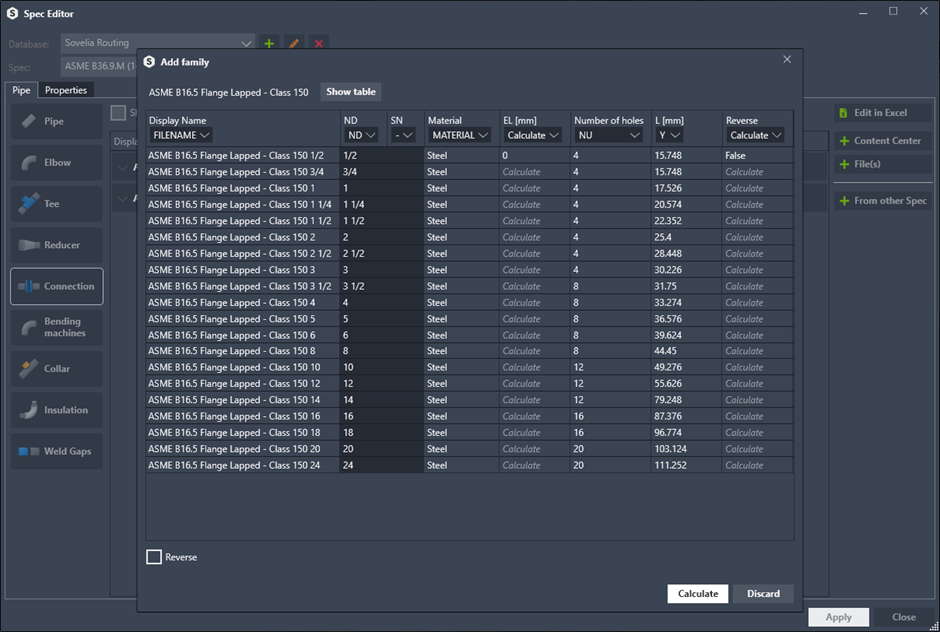
Pay extra attention to the firs three columns: Display Name, ND, and SN.
Display Name column is the name that is used in User Interfaces. ND and SN columns from pipes and fittings table must match for Sovelia Routing to know which pipe and fitting can be combined. If you choose to have one spec for each schedule you can keep the SN column empty.
**Calculate/Save **to import data into your database.
Reverse checkbox can be used if connections are constrained on the opposite side of the connection.
Add Connections from file explorer
Click on “+ File(s)” to browse file(s) in your file explorer and import to active spec. Fill cells with data.
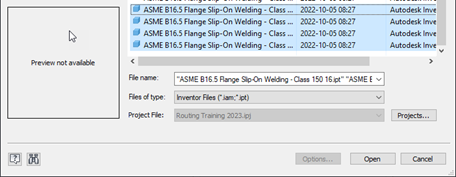
Update data in cells if necessary and Save to import.
Reverse checkbox can be used if connections are constrained on the opposite side of the connection.
Add operations
Add Bending Machines
Create a new “Bending Machine” by clicking on + Add and type a name. Click on the checkbox “Use in current Spec” to active the pipe/tube bending possibility for active spec.
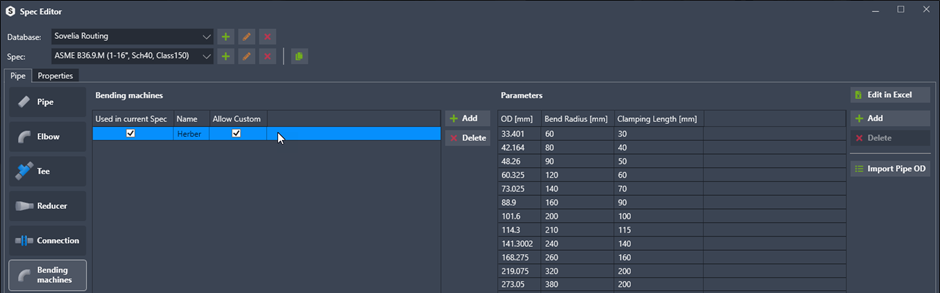
Select the bending machine, Import Piped OD to populate OD[mm] column with data from pipe outer diameter in active spec.** Edit in Excel** to fill the two other columns with data or do this directly in active view.
Allow custom option will allow users to type other bend radius than the predefined.
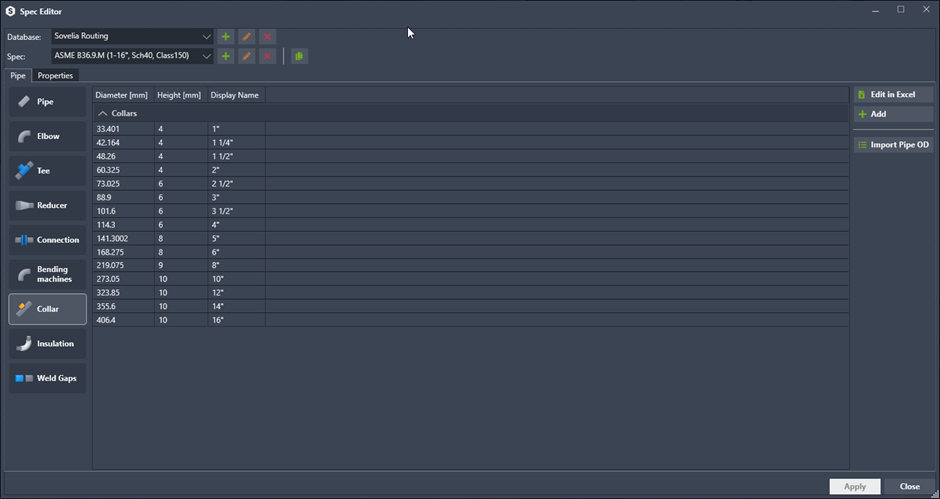
Add Collars
To add predefined collars, Import Piped OD to populate OD[mm] column with data from pipe outer diameter in active spec. Edit in Excel to fill the two other columns with data or do this directly in active view.
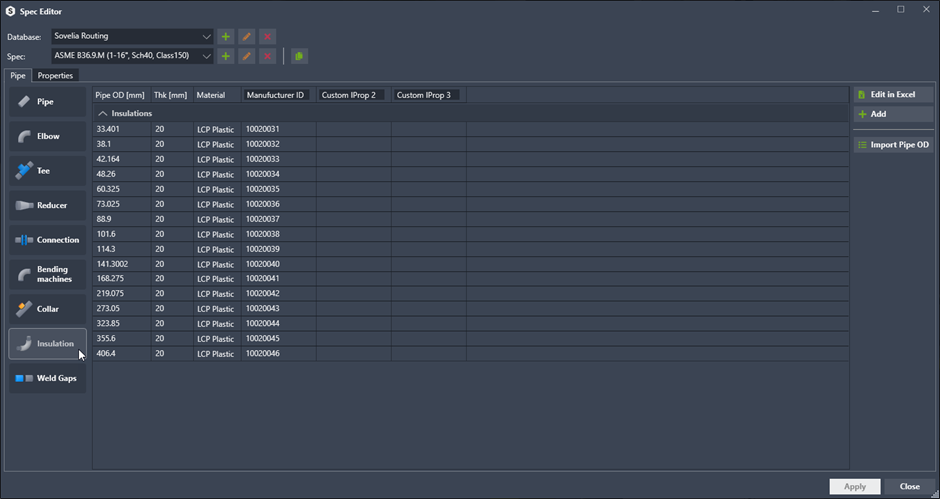
Add Insulations
To add insulations material, Import Piped OD to populate Pipe OD[mm] column with data from pipe outer diameter in active spec. Edit in Excel to fill the two other columns with data or do this directly in active view.
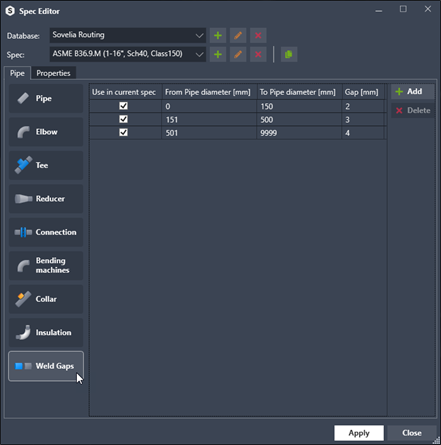
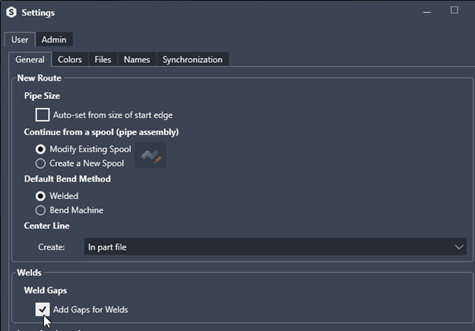
Add Weld Gaps
Weld Gaps are added in intervals. As in the example below you can set different intervals and what the gap size for specific interval should be set to. By default, the Weld Gap functions is disabled. You can enable the Weld Gap function in **Settings. **