Pipes
In the pipe table you will add the dimension and material for each pipe size.
You can do this manually or by importing the dimensions and material from a Content Center Family.
To populate your pipe table from a Content Center Family, click + Content Center.
Then browse to the Content Center Family and Double-Click to import the dimensions to pipe table.
For each column in Pipe table select from which content center column to get the data from.
To manually add and a row in the pipe table, click + Manual and add the necessary data in the table row.
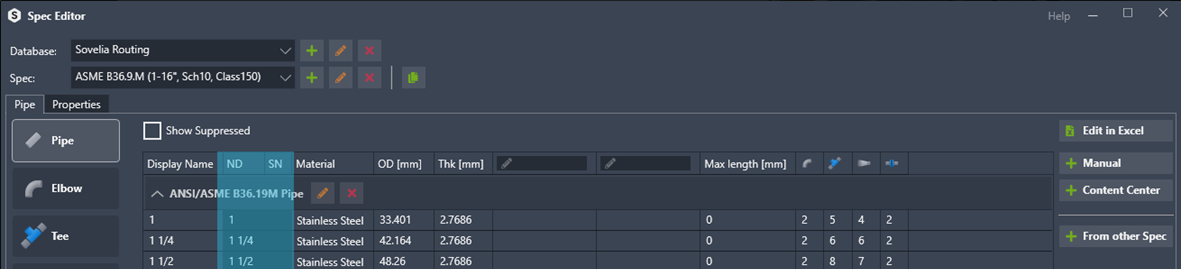
The columns
Display Name is what is used when selecting which size to work with.
In general, it’s enough to have pipe diameter (DN, inch or mm values).
ND and SN columns are used to ensure that the corresponding fittings are linked.
It’s an “AND” statement which means both columns must match to link it correctly.
SN (Use for pressure class, schedule or thickness) column can be left empty if there is only one thickness/pressure class per size in active spec.
Material can be set differently from what’s in the Content Center Family. For other fittings this is not possible, because fittings are not created, they are reused.
OD (Outer Diameter) of the pipe.
Thk (Thickness) if there are more than one thickness for a pipe size, SN column can be used to differentiate these and to link with corresponding fitting.
On the right side of the table, you have an overview of the linked pipes and fittings. Hower on the numbers to see the display name of the linked pipe or fitting.