Special instructions for Sovelia Plant V2024.2 and later
Due to a change in the file format of report files a special step is necessary when using ACC with Sovelia Plant 2025.1. All reports under RelatedFiles\CQ\ReportFiles must be removed, and then added back before uploading to ACC.
Template projects in Sovelia Plant version 2024.2 and later are already prepared for ACC , and as such chapters 1.0 -1.2 can be ignored.
1.0 Prepare project for ACC
1.1 Preparation before adding to server
Make sure to use the correct template project provided to you by Symetri. This will ensure you have the latest settings and configuration files available for your Plant 3D version.
You will find the latest templates under “C:\Users\Public\Documents\Symetri” from 2023 and forward, or “C:\Users\Public\Documents\Naviate” prior.
Use the function called “rename/copy project” to make a copy of the template before continuing.
1.2 SPEC Sheets
There are a few pipe specifications that are not added into the Plant 3D project but must instead be linked. These specs are
SymetriEnScripts
Axelerator
TRANSAIR_BSP_ISO
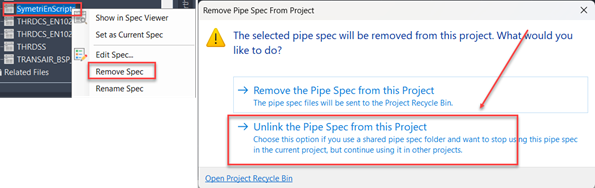
If these specs are present in the project they need to be Unlinked before continuing.
The “SymetriEnScripts” is prematurely added back to the project during the upload to ACC or Vault, which we need to prevent. This is done be either moving or renaming the spec during the upload phase. The spec is found under ”C:\AutoCAD Plant 3D 20XX Content\CPak Common\CustomScripts” (in the standard installation*) , and renaming the spec to “SymetriEnScripts_X” will prevent this. The spec will be added back in chapter 2.4.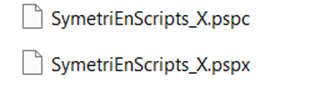
*Note: The spec location might differ depending on the firm specific setup. If the standard location does not contain the spec-file, contact your internal IT to find the correct file path.
1.3. Removing files
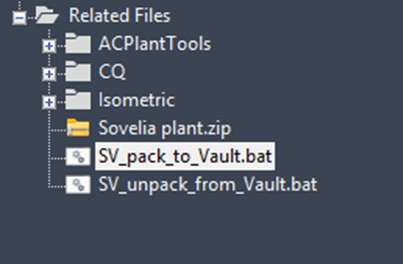
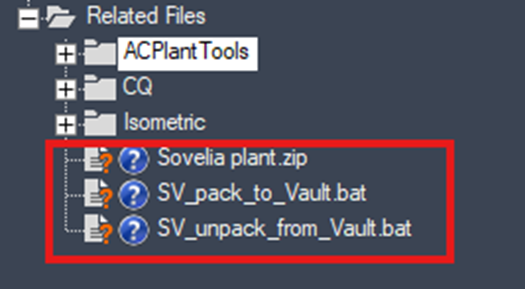
Before uploading to ACC there is a Zip-file and two .bat files under the Related Files folder we need to remove. These files are only needed for Vault projects and should be removed in an ACC project to minimize confusion.
You are now ready to upload your project to ACC (Se chapter 2).
2.0 Working with ACC
Now when you are all set with Sovelia you can go ahead and upload your project to ACC.
 Make sure you have the correct project opened and click on “Share Project” in the “Collaborate” tab.
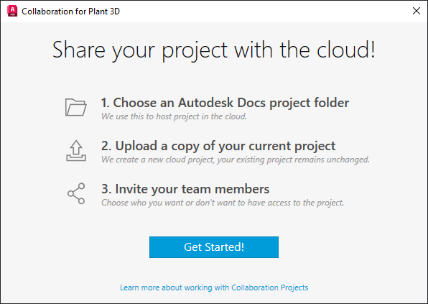
Click on “Get Started”
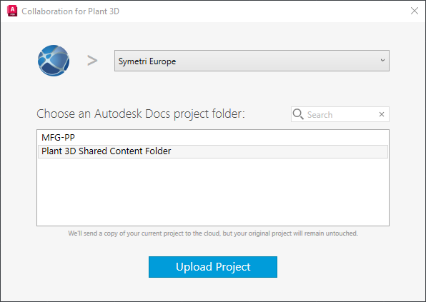
Select your “HUB” in the top and then the Projects location in Docs.
Click “Upload Project”
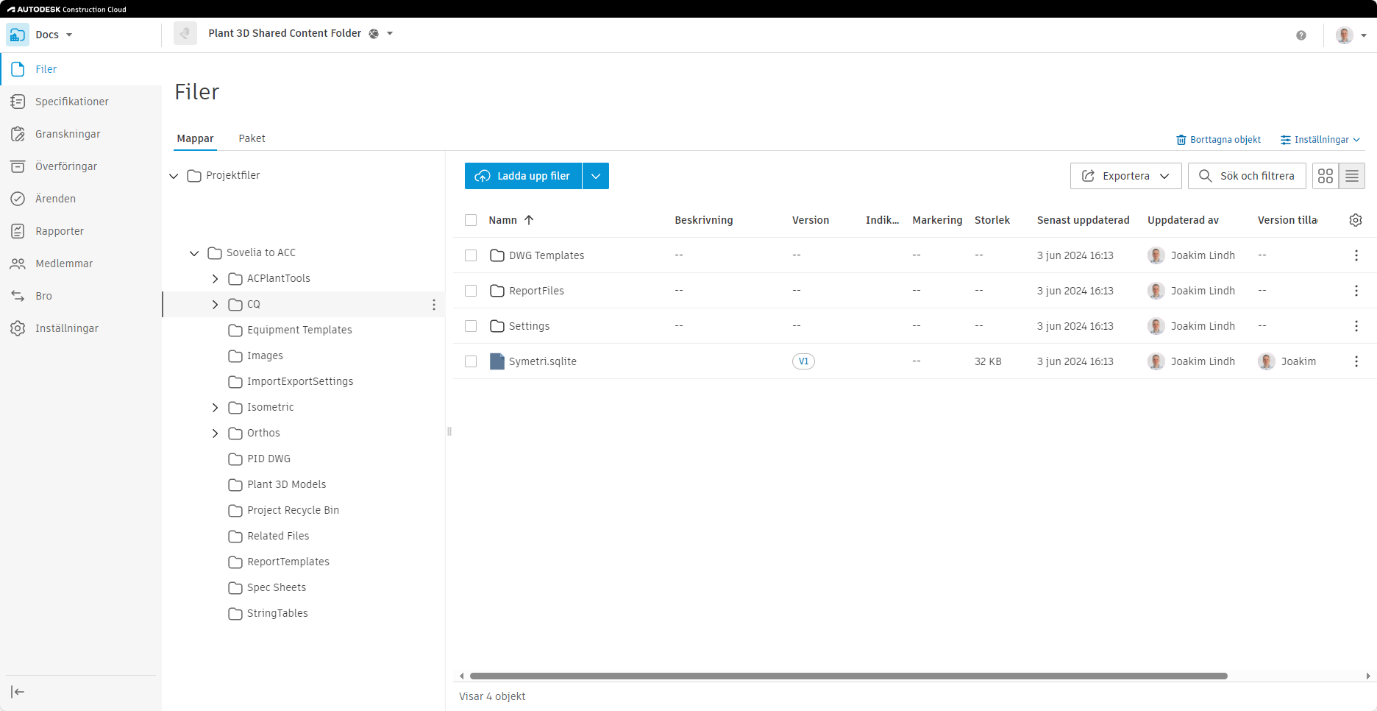
Once the upload is complete make sure to verify that all files have been added to “acc.autodesk.eu” or “acc.autodesk.com” depending on your hub’s location for your company.
If you encounter an error during the upload, you can just wait a few minutes and try again. The corrupted project will be automatically deleted if the upload failed.
Congratulation your project is now in the cloud.

Close or invite your team!
This is how a fully uploaded project should look like.
2.1 Opening an ACC project
2.1.1 Before opening
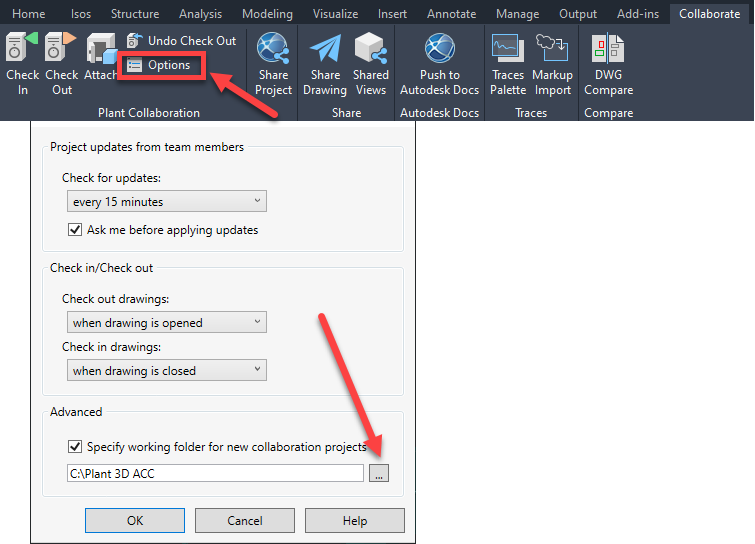
First, the working folder needs to be set up.
It is good practice to have the same working folder as everyone else in the project. This is so that “Xrefs” will work across all platforms and devices that are used in the project.
To set up your local cache working folder click on “Options” under the “Collaborate” tab and navigate to the folder path provided to you by the project manager. This path can easily be changed if needed later in your project.
2.2 Open your first project
To start working with ACC Plant 3D projects that make use of Symetri Tech Sovelia Plant, there are one important step to do after you have opened the project.
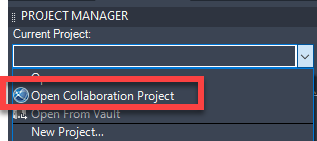
Start by opening the project from ACC by selecting “open collaboration project.”
Select hub and project location.
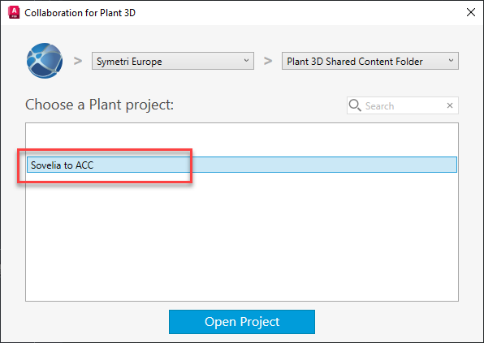
Select your project to open.
The project is now opened in Plant 3D.
2.3. CQ and ACplant folders
When you download (open) a project from ACC, it will only download the necessary files for the project to open and not include any drawings or extra documents that you have manually uploaded to the project.
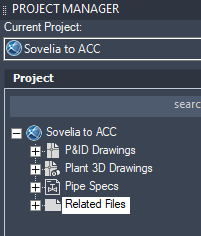
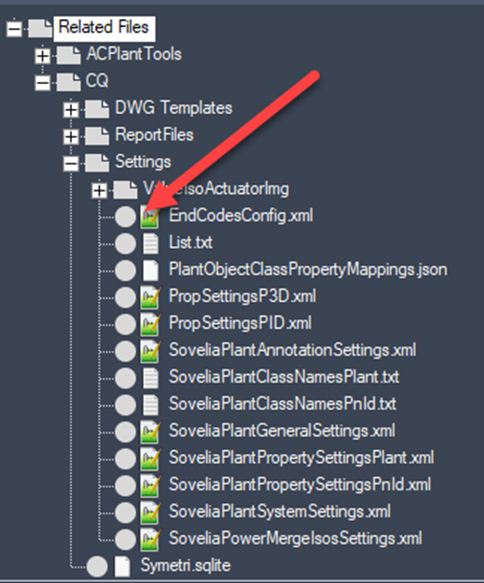
So, if we expand the tab for “Related Files” you will now see that there is a “?” on a few files, for example in the “/CQ/Settings folder”.
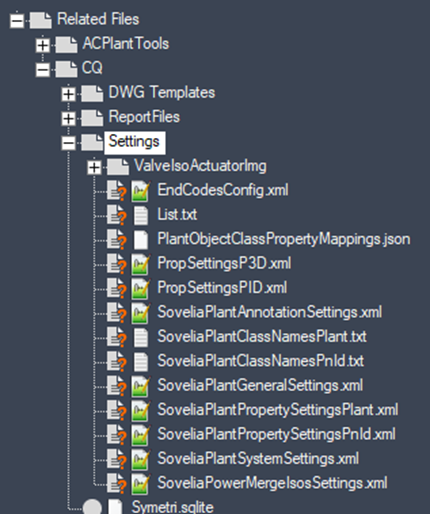
These files are critical for Sovelia Plant to work properly.
To download these files to your local drive we will use the “Check out” option when we right click in the folder “Related Files”.
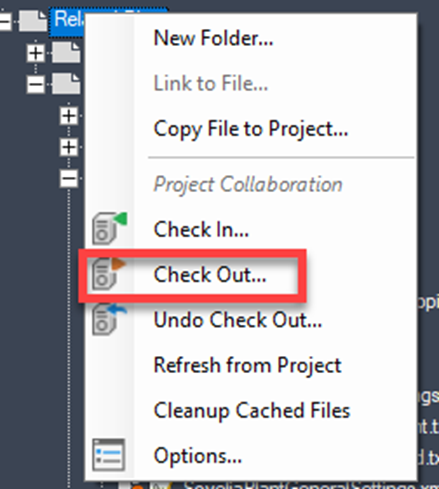
Right click on Related files and check out
Check the box for “Related Files”
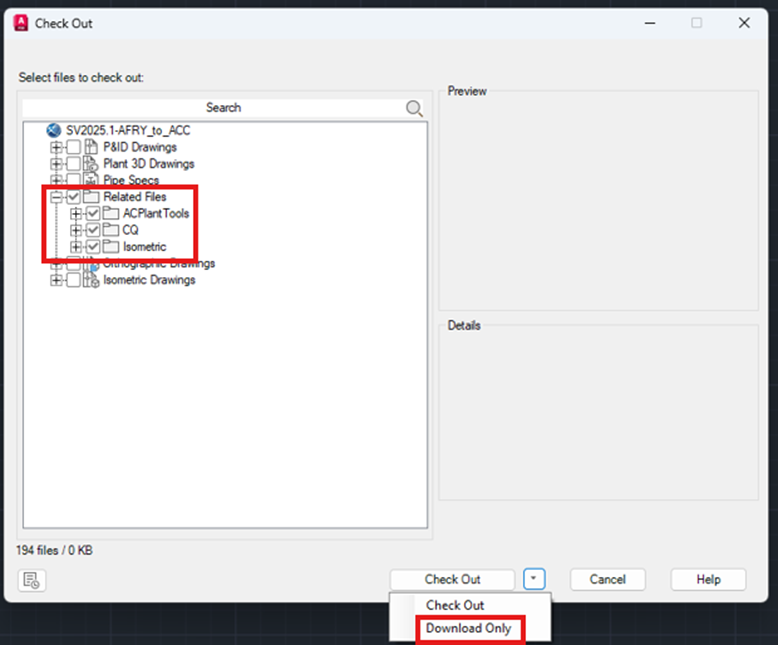
Make sure to only download by clicking on the dropdown arrow and select “Download Only”. If you accidentally check the files out, you can do “Undo Check Out” on the entire folder “Related Files”.
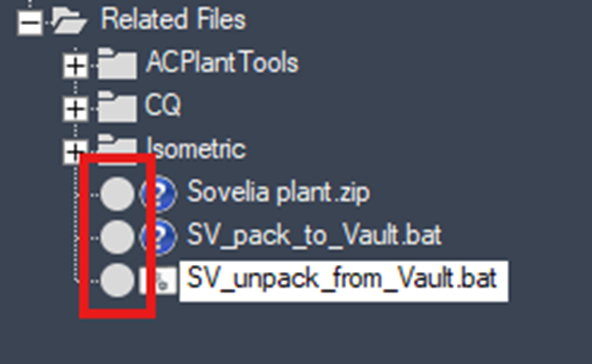
Once everything is downloaded you will see all files with a grey circle in front of the file names.
Congratulations you have now successfully opened a Plant 3D ACC project with Sovelia addon fully functional
2.4. Getting Sovelia Plant setting files
We are now ready to restore the name of the spec called SymetriEnScripts under the folder path “C:\AutoCAD Plant 3D XXXX Content\CPak Common\CustomScripts”.

The next time you open your project this file will be added back to your project automatically. Make sure to NEVER UPLOAD THIS FILE to ACC.
3.0 Working with Vault
3.1 Preparations before adding to server
When using Vault, make sure to use the correct template project provided by Symetri. This will ensure you have the latest settings and configuration files available for your Plant 3D version.
You will find the latest templates under “C:\Users\Public\Documents\Symetri\Sovelia\Plant 202X\SV202X.X-AFRY” Replace X with your version. Remember to unblock the .zip file before you extract it!
Use the function called “rename/copy project” under the Sovelia tab to make a copy of the template before you continue. It is important to place your copied project in your Vault working folder. Otherwise, the upload to Vault function will not work correctly. See 3.2.
There are a few pipe specifications that are not added into the Plant 3D project but instead linked. These specs are:
SymetriEnScripts
Axelerator
TRANSAIR_BSP_ISO
If these specs are present in the project they need to be Unlinked before continuing. Right click on the spec and select “Remove Spec” and select “Unlink” option.
The following dialog opens up:
This creates a new Sovelia plant.zip file.
Once this is done, you are ready to upload your project to Vault (see 3.2).
3.2 Upload project to Vault
Now you are ready to upload your project to Vault.
Make sure you have the project opened and run the command “PLANTPROJECTTOVAULT” to initiate the upload procedure.
Depending on your company standards and servers this may look a bit different from the information in the example below:
Once you click “Start” this dialog should open:
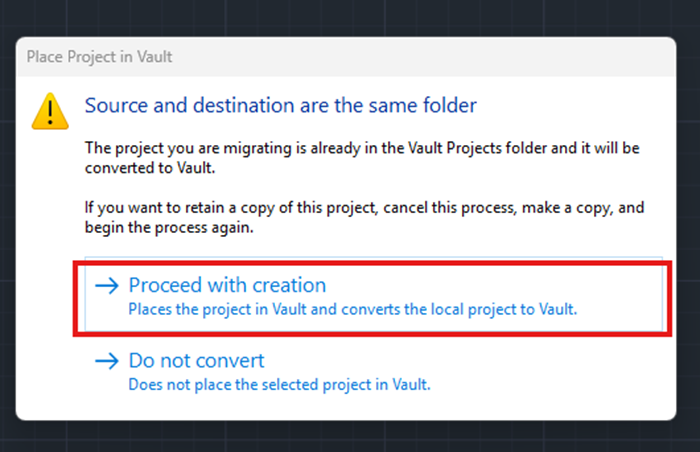
This dialog confirmations that you have copied your new project correctly to your local working folder.
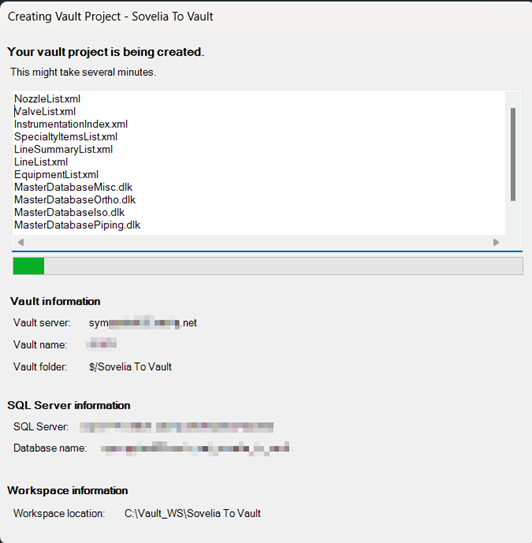
Now your Vault project is being created.
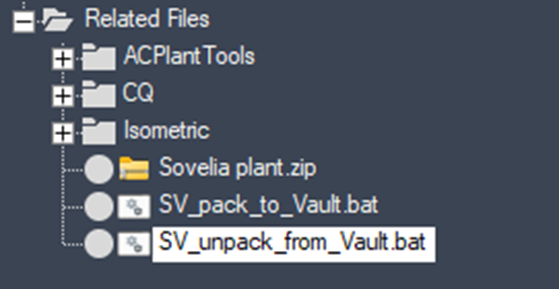
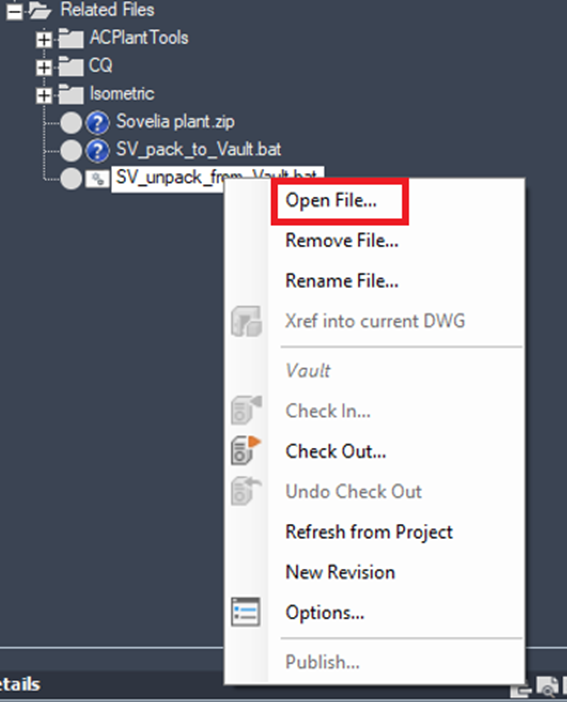
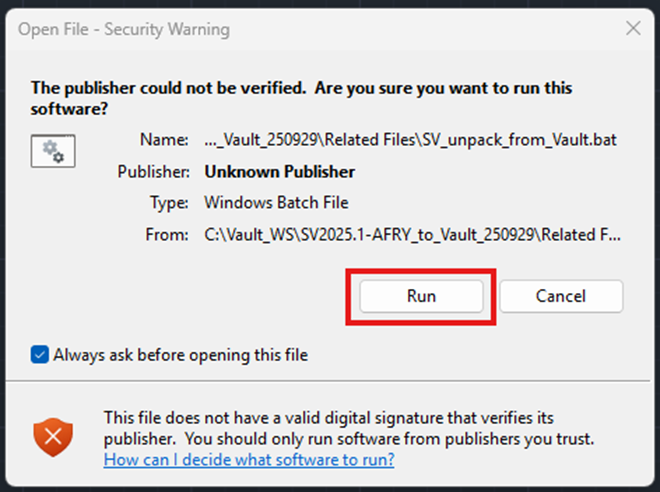
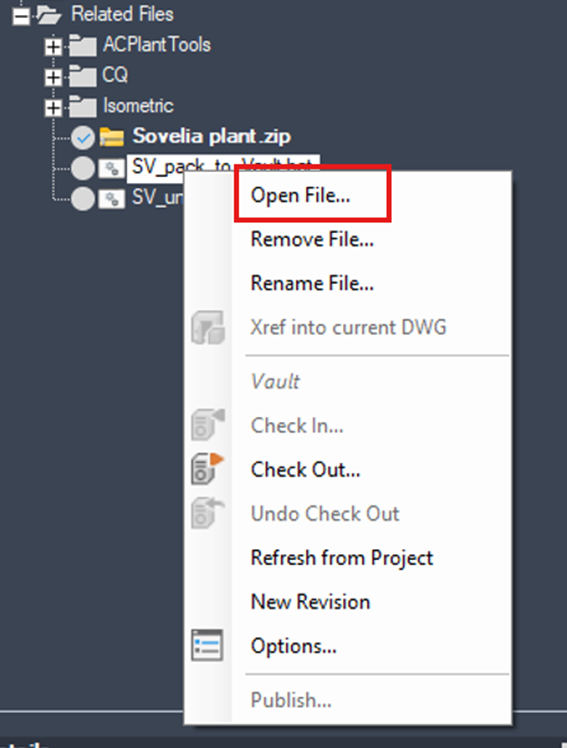
Once your Vault project is created you must run the “SV_unpack_from_Vault” .bat file. Right click and select “Open file”.
This dialog opens up:
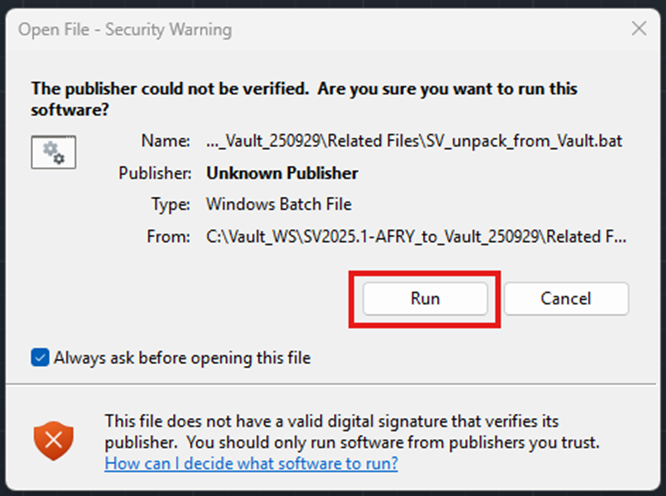
This unpacks the “Sovelia plant” zip fle to your local working folder and replaces the existing files.

The final step in creating your new Vault project is to close Plant 3D and reopen it again. This is to make sure that Plant 3D uses the correct settings files (the ones you unpack earlier).
Now you are all set to start working with your new Vault project!
3.3 Open your first Vault project
When you download (open) a project from Vault for the first time ther are a few things that needs to be done to get the project to work correctly.
First, we can see that the .bat files and the “Sovelia plant” .zip file are not downloaded when you open the project from Vault for the first time.
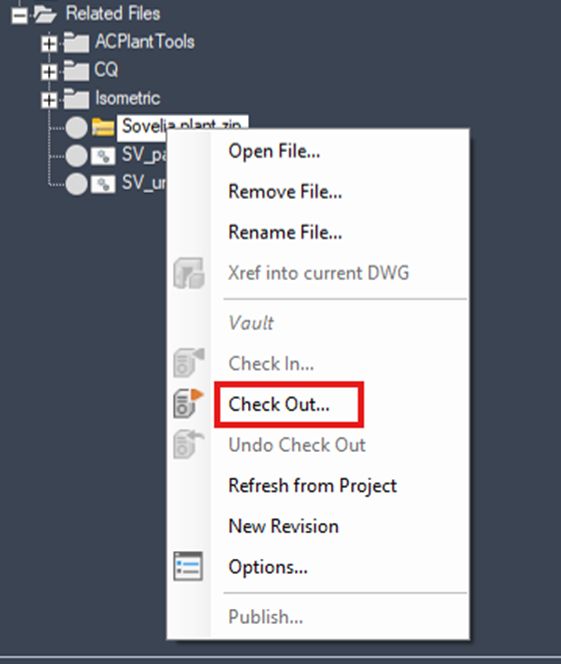
 Right click on the “Related Files” folder and select “Check Out”.

The “Select files to check out” dialog appears:
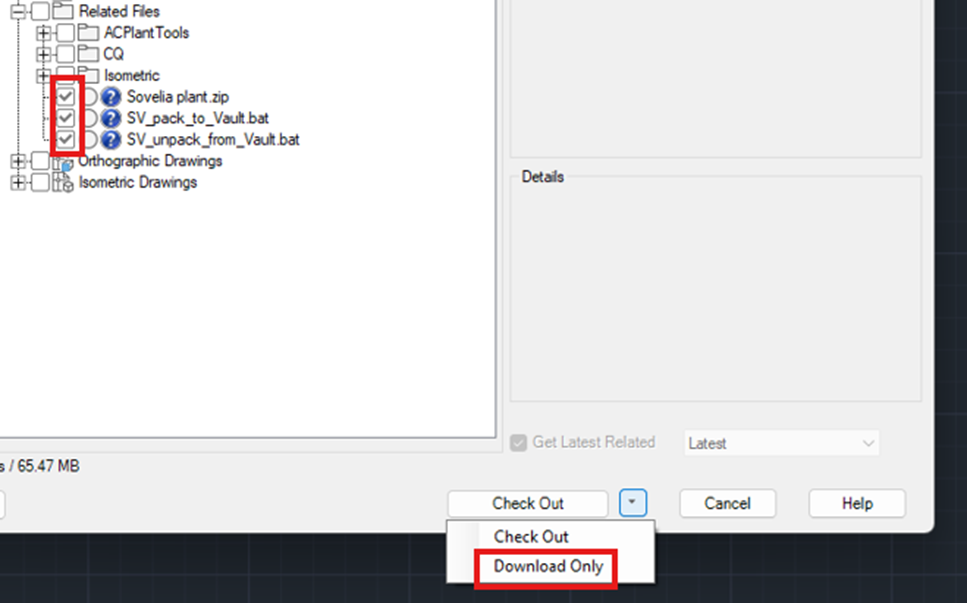
Select the two .bat files and the zip file. In the drop-down menu choose “Download Only”. If you accidentally check out the files you can just “Undo check out”.
When the files are downloaded, a grey circle appears next to the files.
Now you run the “SV_unpack_from Vault” .bat file by right clicking on it choose “Open file”.
The dialog pops up:
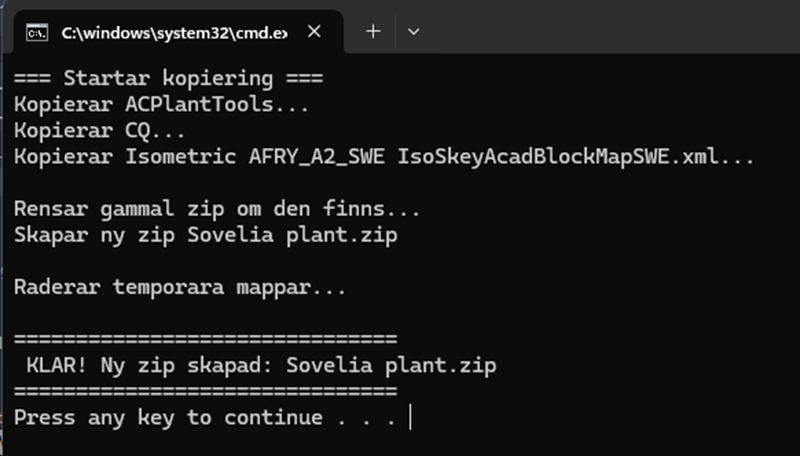
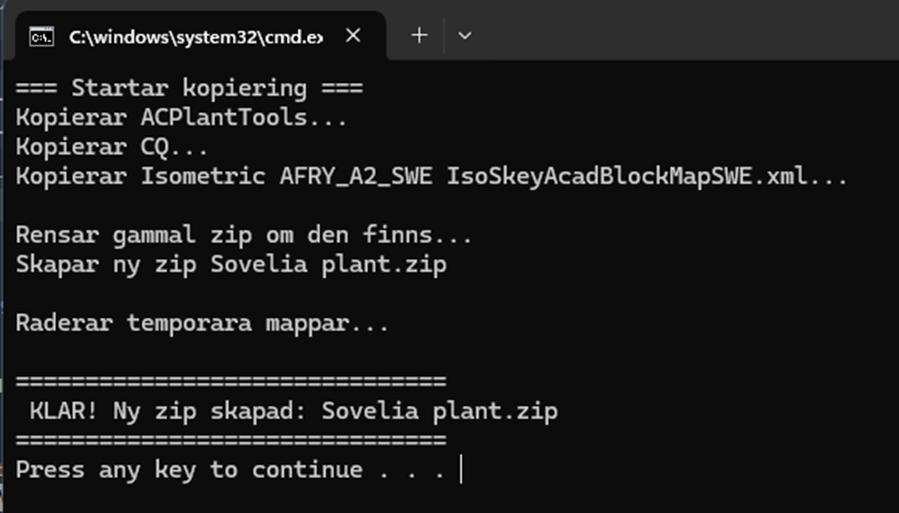
If the unpacking was successful, the command prompt should look like this:

You are now set up and ready to work on your Vault project.
3.4 Modification on Related Files in Vault
When you have modified a Sovelia setting in your project the “Sovelia plant” .zip file needs to be updated in vault if you would like other users in the project to get these settings.
First you need to check out the “Sovelia plant” .zip file from Vault
Then you need to run the “SV_pack_to Vault” .bat file
This replaces to old “Sovelia plant” .zip file with a new one that includes your changes.
Once this is done you can check the “Sovelia plant” .zip file back into Vault again.
The .zip file is then ready for other users to download and unpack using the “SV-unpack_from Vault” .bat file.
Note that when working with Sovelia in a Vault environment you may sometimes encounter synchronization issues, files are shown as being “not latest version” inside Plant 3D. This error can be ignored.
4.0 Getting Sovelia Plant setting files
4.1 Missing IsoSkeyAcadBlockMapSWE
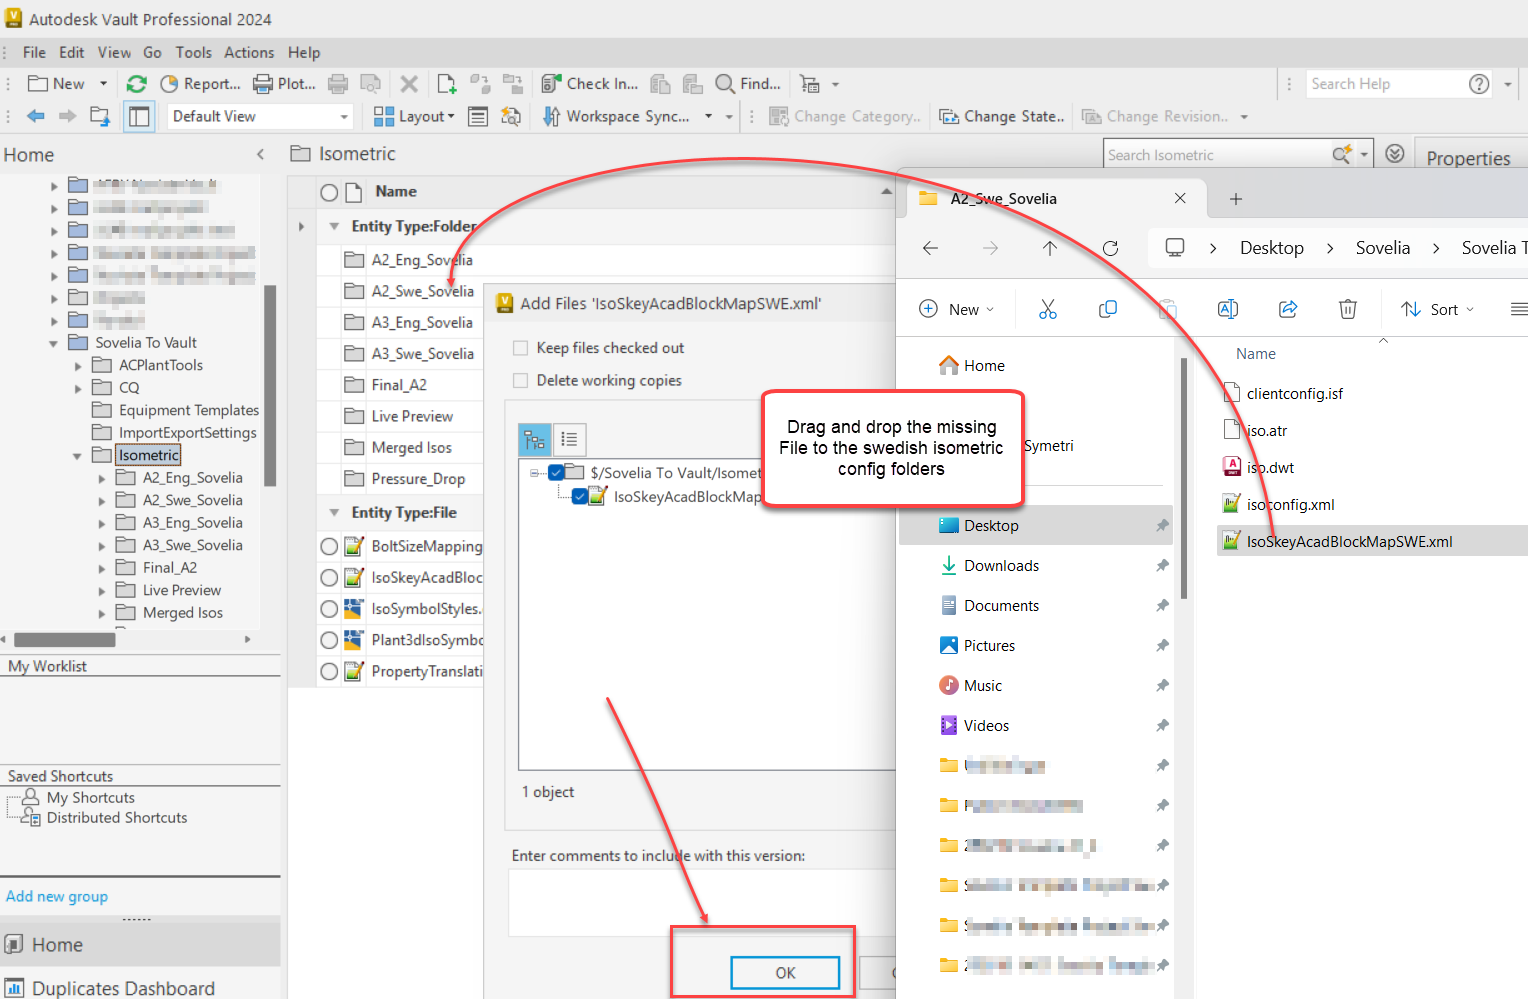 In some cases the file “IsoSkeyAcadBlockMapSWE” might be missing from your project. If you are going to use the Swedish Isometric drawings when you are working with Vault or ACC, you will need to manually oversee the missing file by dragging and dropping it to the Swedish isometric config folders.
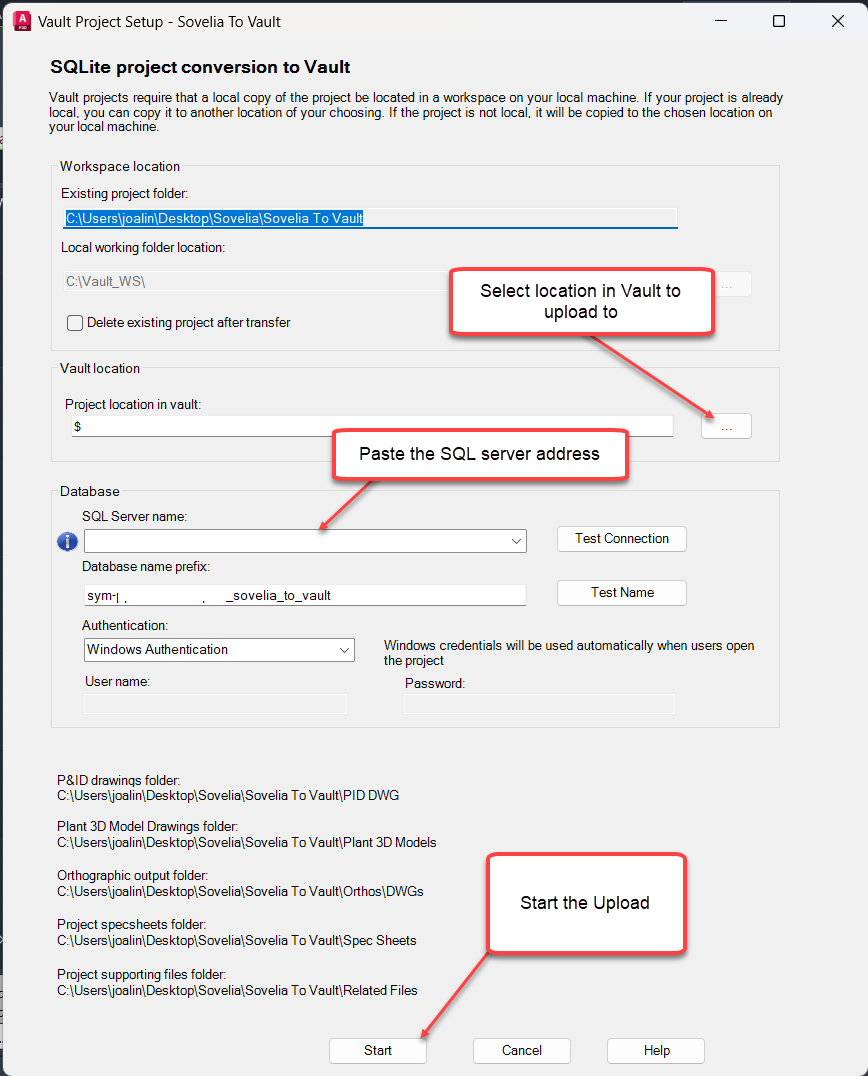
5.0 SQL Project Conversion
If using the SQL solution for web-based collaboration instead of ACC or Vault a separate set of steps are required. Navigate to the article on Sovelia Plant Help, or click the link, “Instructions for SQL Project conversion Sovelia Plant 2024.2 and 2025.1”.
6.0 Do’s and don’ts in ACC
There are a few things we need to clarify when it comes to the workflow for Plant 3D projects in ACC that is differ significantly from other Autodesk software’s like Revit or Civil 3D. The tips in this section will make sure you have a fully functional Plant 3D project without synchronization issues.
6.1 Collaboration Cache
The collaboration backup is where your project is downloaded to your local hard drive.
Standard folder path is “C:\Users\username\AppData\Local\Autodesk\AutoCAD Plant 3D\CollaborationCache”.
This can be set to any location on your C drive.
Depending on your administration rights we recommend not setting this to C:\ root folder but instead use “C:\Users\Public\Documents” as your working folder.
6.2 Restore and backup
6.2.1 Restore a deleted file
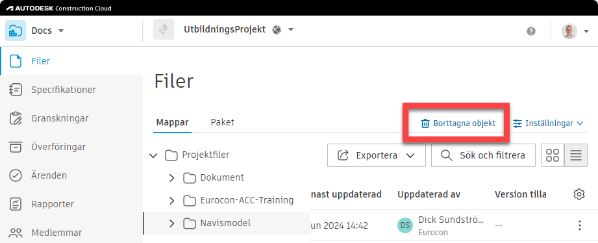
Any file deleted in ACC will be saved under “Removed Objects” folder in the files area on your ACC website. This will be the number one location to restore your deleted files. You will see who deleted the file and when. Click on Restore for the selected file to restore it.
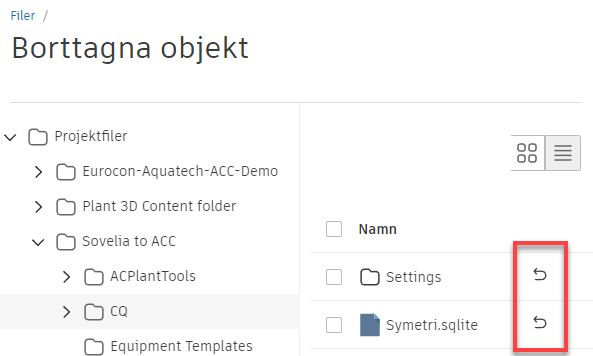
 Tips: If you have deleted any folder with several files you need to restore the folder first, then the files.
6.2.2 Backup from ACC
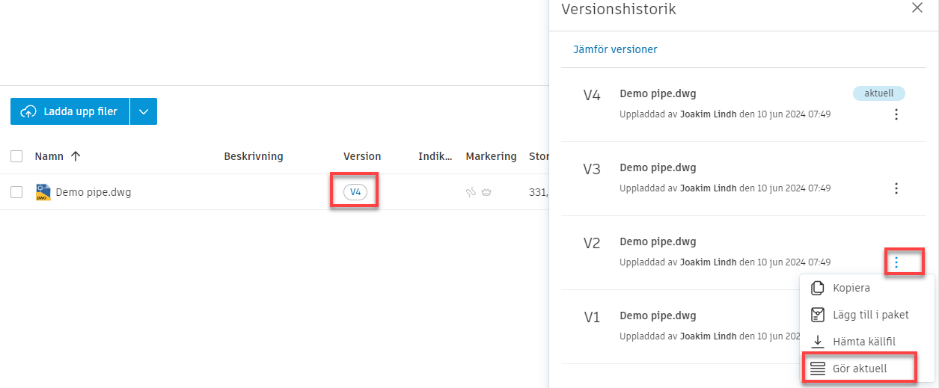
Every time you check in a drawing to the ACC it creates a new version of the file for you. These versions can easily be restored and accessed by clicking on the version number, then click on the 3 dots if the version you want to restore and select “make active”
6.2.3 Backup from local drive
Sometimes if you have had a database crash or the files cannot be restored from ACC server you can use the local files created .bak (backup) or .sv$ (autosave)
.bak is found adjacent to the dwg file in your project.
.sv$ is found under C:\Users\username\AppData\Local\Temp.
Follow these steps to back up from drive.
Check out the file in Plant 3D which you want to create a backup on.
This step is extremely important if this is not done your file will not be restored on the SQL server and there for not properly backed up.
Finde your file to use as backup
Rename the file so it has the exact same name as the file in plant 3D project manager and change from .bak or .sv$ to .dwg
Replace the file in the folder of your local project
Open the file in Plant 3D and make sure it works correctly
Save the file and check it in
6.3 Autodesk Docs (desktop connector)
This is a representation of the files from the cloud on your local drive.
This is indicated by the cloud-status icon. If this turns to a green check marker it means its downloaded locally to your C: drive.
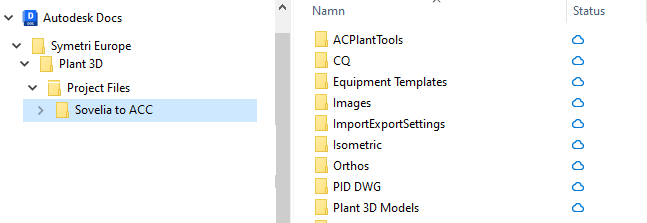
When working with Plant 3D project files it is extremely important to not tamper with these files in this location. It might seem harmless to edit your files this way, but it will just make your plant 3D SQL and ACC not synchronize correctly.
6.4 Navisworks and other documents
You can use docs for Navisworks and documents not inside a Plant 3D project SQL.
This is the perfect platform for project managers or non-designers to view and share files and documents with everyone in the project.
Make sure to create the folder under the project root.
From here you can work normally with Navisworks.
6.4.1 Navisworks Add-in
Navisworks® Coordination Issues Add-In | Navisworks | Autodesk App Store
This add-in will make it easier for you to connect your models to ACC within the software. You can also issue requests and problems with the design directly to ACC and assign them to users. Easly keep track of the design as a 3D model coordinator.
This addon works a bit differently than using desktop connector.
You will not see all properties of components in this environment.