


Getting started
This is a Quick-Start guide that will explain the basics of Sovelia Vault and give an introduction of the Sovelia Vault Administration Tool.
Start with installing Sovelia Vault Download & Install Sovelia Vault
When doing changes to the configuration using Sovelia Vault Administration Tool you need to disconnect / sign-out from all Autodesk Vault connections in order to reload the updated configuration.
Sign out from Autodesk Vault Client, Vault add-ins for Inventor and AutoCAD, the JobProcessor and other connections you might have.
Start Sovelia Vault 202# Administration Tool
Use your Vault administrator account when signing in to Vault.
First Action: Create a PDF from an Inventor drawing
One of the most useful and simple first steps to gain a feel for the tools is to create a PDF version of an Inventor drawing.
Create the Action
- On the left pane Expand Actions and then Expand Secondary Formats
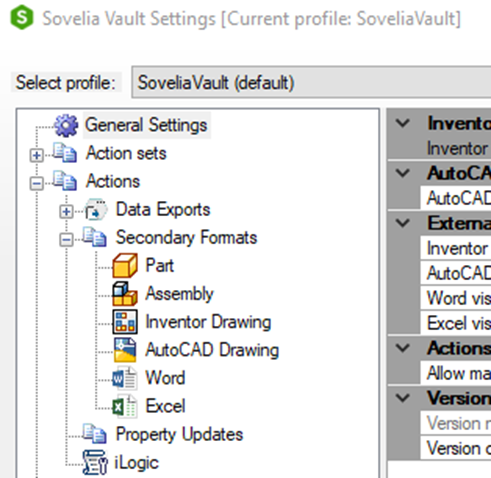
- Right mouse click on the Inventor Drawing node and select PDF
Note: you can create multiple actions for each of the document types listed in the Secondary Formats node.
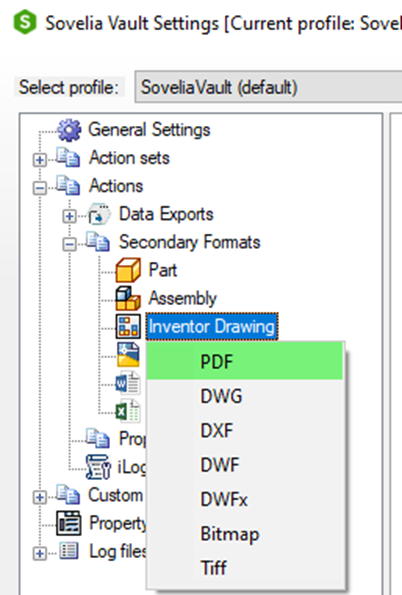
- On the right Pane the relevant options will be shown for PDF creation.
For a detailed description of all the menus please refer to the Sovelia® Vault Help manual.
Configure the Action
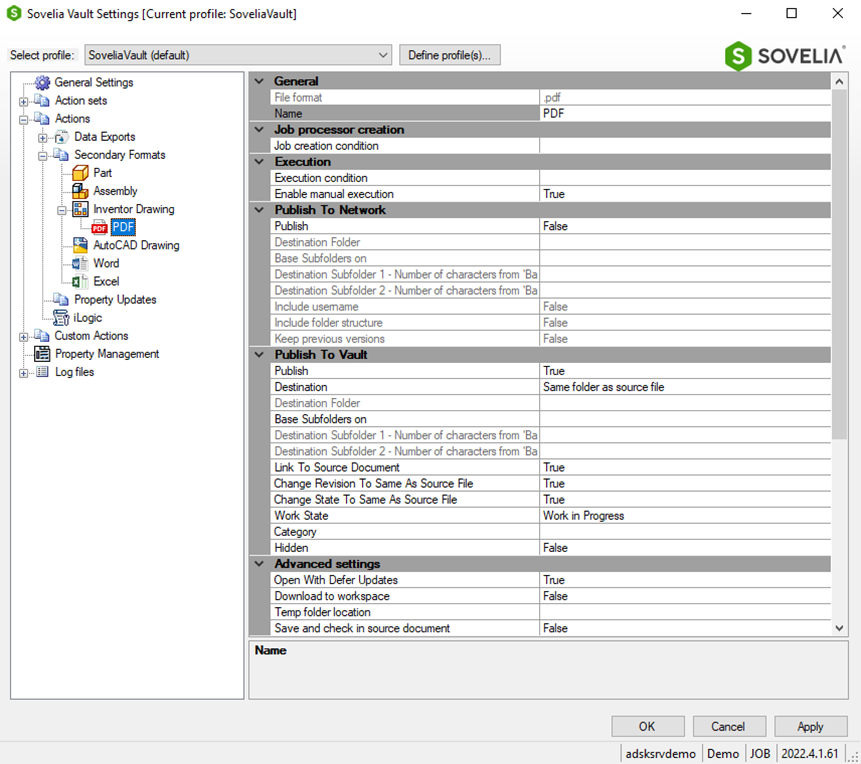
Next step is to define exactly how Sovelia Vault will create and place the PDF.
1. General - Name the action
This is where the Acton is named so it can be recognize in the future. There can be multiple PDF actions with different configurations and results.
Set Name to ; "PRELIMINARY_PDF"

2. Publish to Network
This example creates a simple PDF and saves it to a network location or like in this case, local disk on the the JobProcessor.
Set Publish to True
And Destination Folder to C:\TEMP\pdf
3. Don't publish to Vault
Set Publish to False

4. Apply the changes and restart any Vault application that is open.
- Restart Autodesk Inventor and other CAD application with the Vault addin
- Restart Autodesk Vault client
- Restart Autodesk JobProcessor

5. Log into Vault and create a pdf
Locate an Inventor drawing in Autodesk Vault Client, Right-Click on the drawing to display the context menu - Click Sovelia Vault and then Generate Files. Choose the PDF action by ticking the box and run with OK.
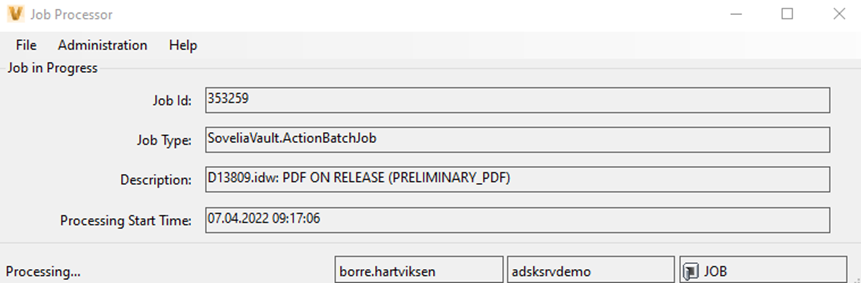
JobProcessor running the job
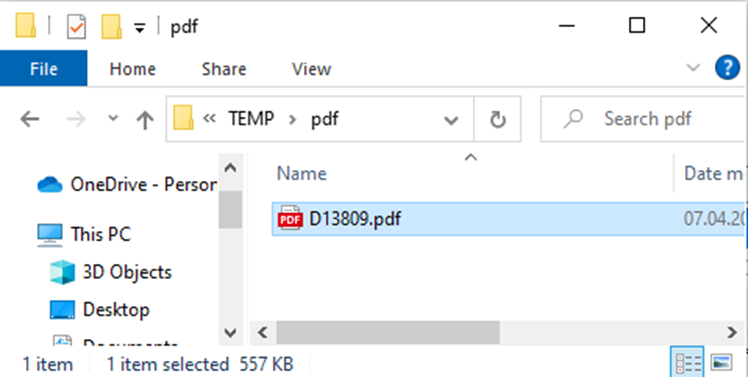
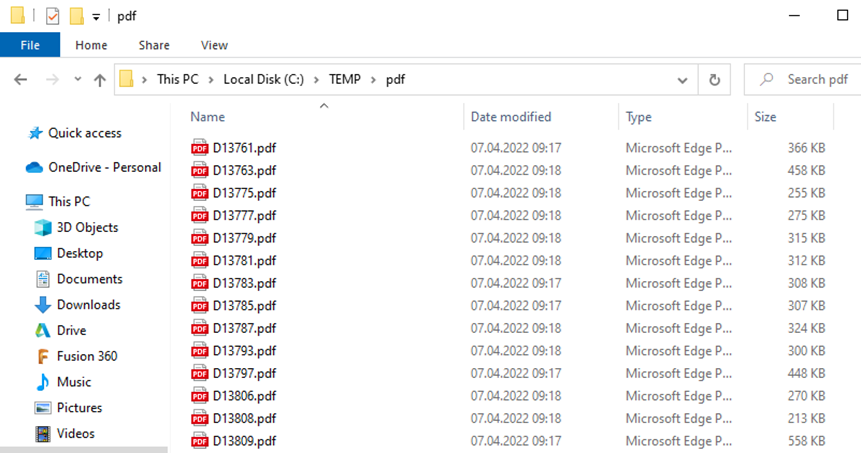
6. Locate the pdf
When the job is completed the PDF will be found in the path you defined. In this case on the machine where jobprocessor runs.
First Action Set: Run actions on lifecycle state change
Action Sets are use to define triggers for the actions. A common trigger is lifecycle state change.
When the lifecycle state of a file is changed jobs are created to run on the Jobprocessor - in this case the PDF Action.
Here is how you define a trigger in the Action Sets for the PDF Action we created. This action will be triggered automatically when the Inventor drawing file's lifecycle states changes to Released.
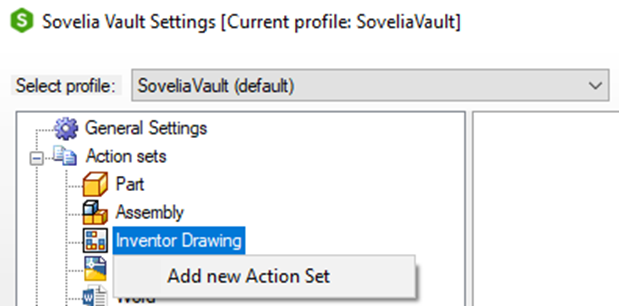
1. Expand the "Action Sets" node
Right click on the "Inventor Drawing" and select "Add new Action Set".
2. Name the Action "PDF ON RELEASE"

3. Set up a trigger
There are many options for triggers, but we will use the "On state Change" to "Released state".
*Set up as below
4. Set up the Action Set to run on Jobprocessor
The Action Set can run several actions in a sequence. Keep in mind that the Jobprocessor vault user needs to have both Read and Write access to change the files in the states where actions are done. For example, in a Released state, the file may be locked for edit and no write action can be performed for a normal user.
Use the "Preliminary PDF" action that you created in "First Action" and run it on state change.
5. Apply and restart any Vault application that are open.

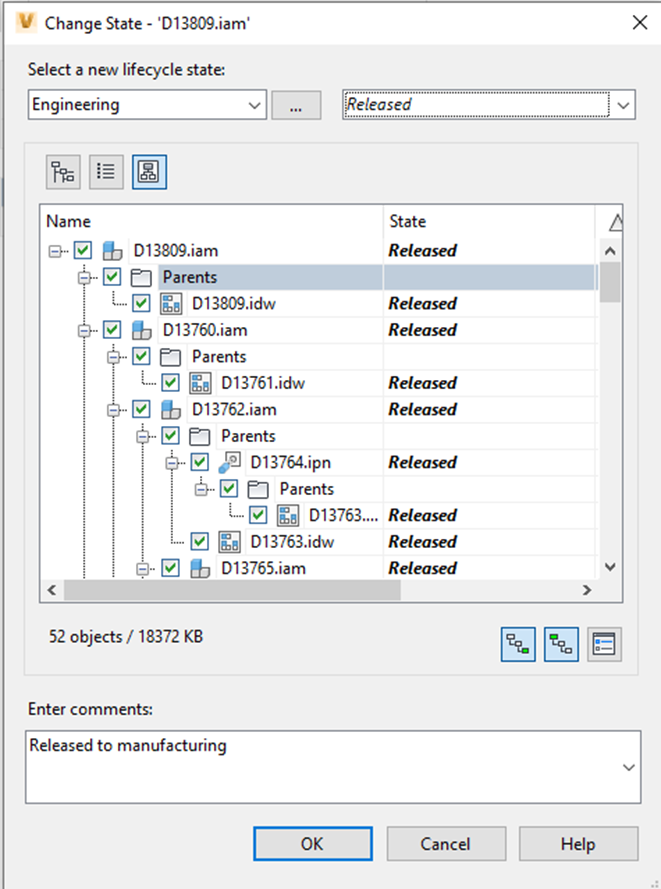
6. Release an Inventor drawing
When releasing an Inventor model, the PDF job will be triggered to run on the job processor for all drawings that are released.
7. Check the PDF files in the folder
After a configuration is complete, the Vault client, the CAD programs with Vault add-ins and the jobprocessor all need to be logged out and back in again in order to load the configuration changes.
Third Setup Action: set up the JobQtools
Install the JOB Q tools as described in download and install the software, then do a basic setup as described in the JobQtool chapter in the help manual.