Overview
As an administrator, you control whether the AI Assistant is available, which LLM it connects to, what content it can access, who can use it, and how it is tailored to your organization. Configuration consists of four steps:
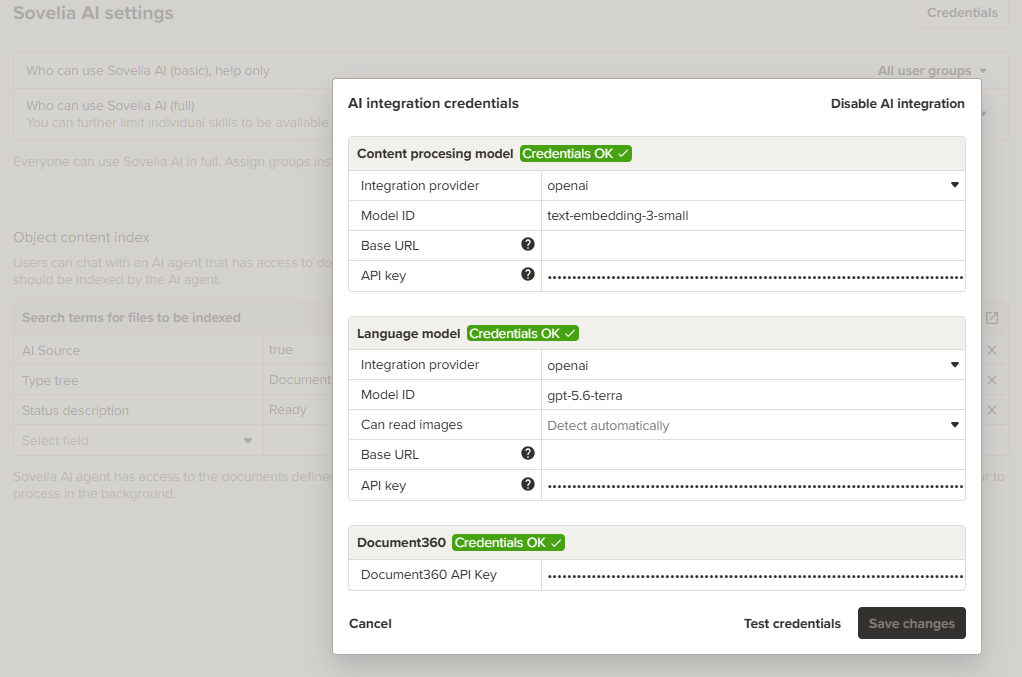
- Provide credentials — connect a locally hosted or external LLM
- Designate AI sources — choose the documentation the Assistant can use
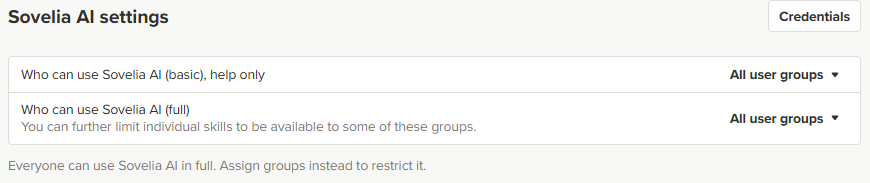
- Assign access — specify which user groups can use the Assistant and its tools
- Add Skills — adapt built-in templates or create custom Skills
Each step is covered in its own section below.
Connecting an LLM
Choose either a locally hosted LLM or an external API-based provider.
- Local — provide hardware that the Sovelia server can access directly. Data remains within your environment.
- External — connect to a supported provider, currently OpenAI, Azure OpenAI, Anthropic (Claude), or Groq.
For an external provider, you need at least an API key, a chat model, and an embedding model. Depending on the provider, the chat and embedding models may be the same. Some providers also require a base URL or instance name.
Note: Maintaining your LLM provider account and contract is your organization's responsibility.
Enabling access and assigning user groups
The AI tab remains hidden until the Assistant is enabled and assigned to at least one user group.
- Enable the AI Assistant in the Administration module.
- Grant access to the relevant user groups.
- Optionally, configure tool access for each group. For example, one group can receive guidance only, while another can use the full toolset.
Defining AI source documentation
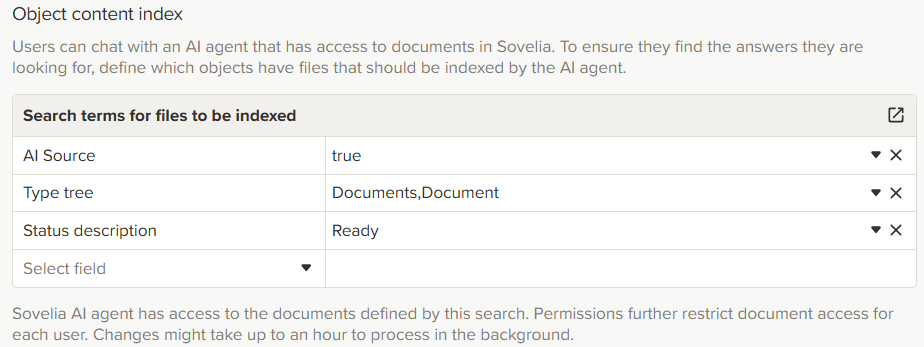
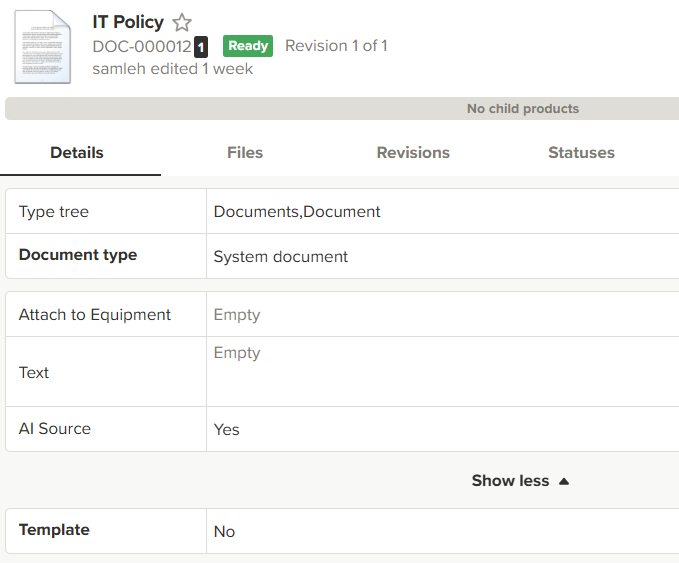
The Assistant uses only the documentation that you explicitly designate as an AI source.
The criteria to find the documents is defined in the administration.
- Open the document you want the Assistant to draw on.
- Mark it as an AI source.
Managing Skills
Skills teach the Assistant your organization's processes and terminology. Manage them as plain text in the Sovelia Admin tool; no development work is required.
Each Skill has four parts:
- Name — identifies the Skill and lets users invoke it directly with /name
- Description — helps the Assistant recognize when to use the Skill
- Assignment — specifies which user groups can use the Skill
- Instructions — explains in plain language how the Assistant should respond and act
Start from a built-in template and adjust it, or write a new one from scratch.
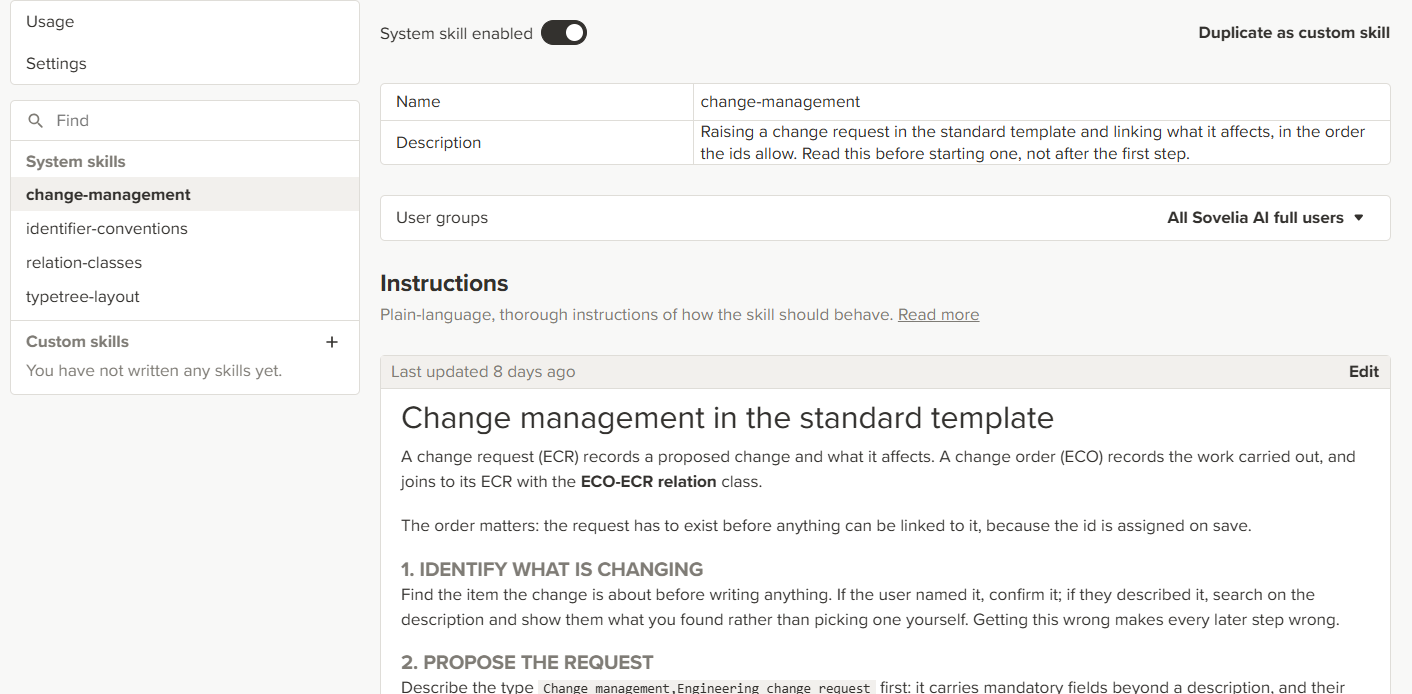
Note: Skill changes take effect immediately for every assigned user. Test changes before deploying them broadly.
Scoping tools and Skills by user group
Not every group needs the same level of access.
- Give some groups guidance-only access and others the full suggestion-and-action toolset.
- Assign each Skill only to the groups that need it rather than making every Skill available to all users.
- A practical starting point is to give most users guidance access and reserve action tools and specialized Skills for groups that perform the relevant work.
Usage monitoring
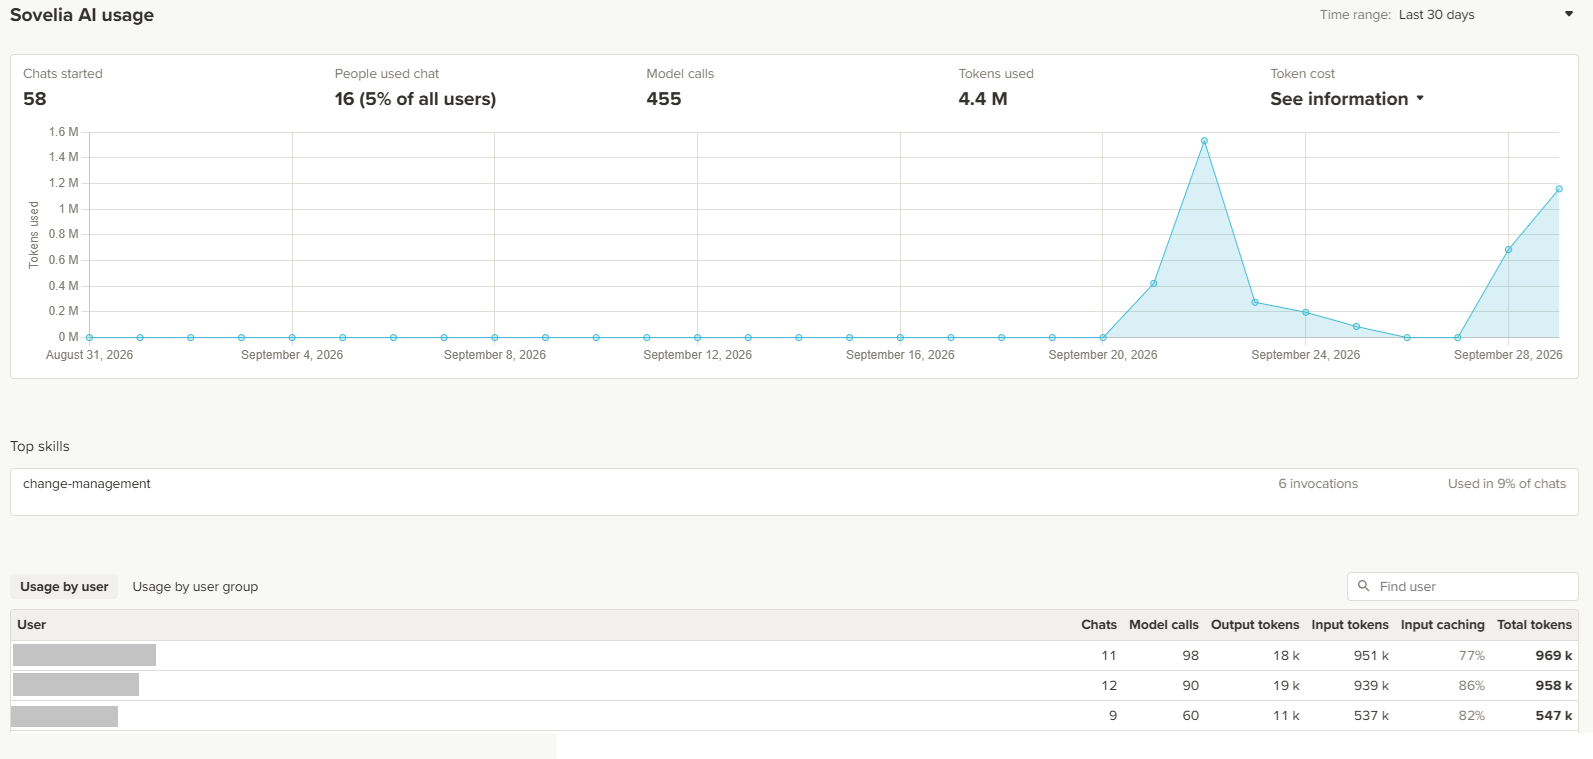
Use the Administration module to monitor how the AI Assistant is being used:
- Number of chats started and unique users
- Model calls, token consumption, and estimated token costs
- Skill adoption and usage frequency
- Usage patterns by user group