


This article describes how you can manage you licenses and users within the Symetri License portal.
The instructions below apply to Sovelia products
- Sovelia Inventor
- Sovelia Routing
- Sovelia Vault
- Sovelia AutoCAD
- Sovelia Plant
from the 2023 release onwards.
Content
License portal overview
- Licenses
- Users
- Creating Tags
- Permissions
How to invite users to your company (Admin only)
- Add users one-by-one
- Add users using CSV import
- Assign / unassign users to a license
- Unassign myself from a license
- Borrow a license
- Return a license
License portal overview
When you have created and/or logged in with your Symetri ID on https://my.symetri.com/ you will get this overview.
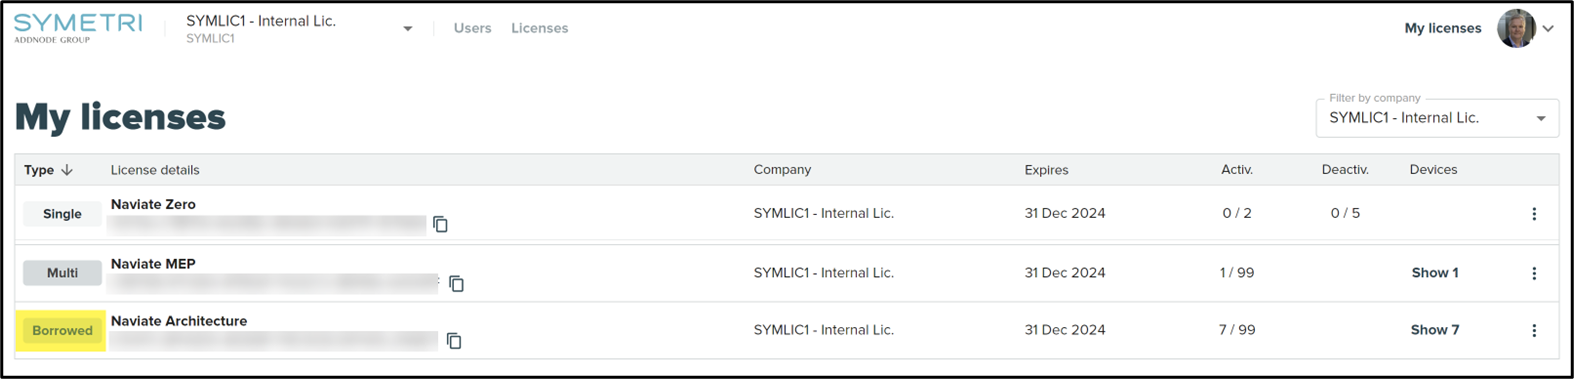
You will see “My license”. The Company licenses and Users are for admin only. There are 3 licenses types that could be available. Single-User, Borrowed, Multi-User.
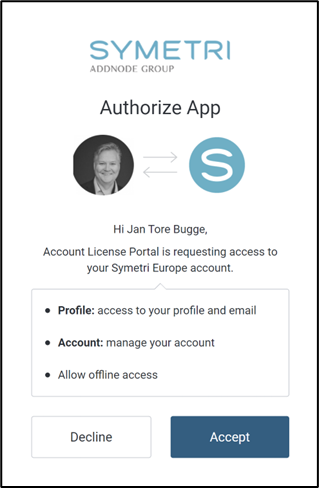
When you log in as an admin on the account you should get this dialogue presented. You need to click accept before entering the portal and get access to all the licenses for your company
Company overview (Admin only)
You have 2 different Tabs in the company overview.
Licenses
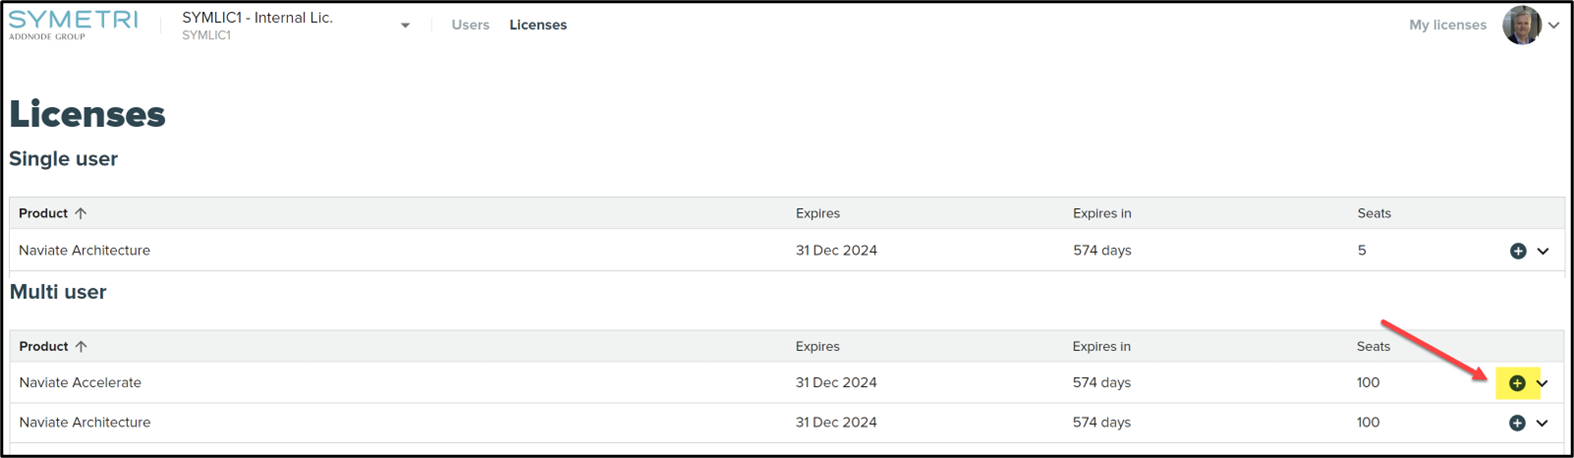
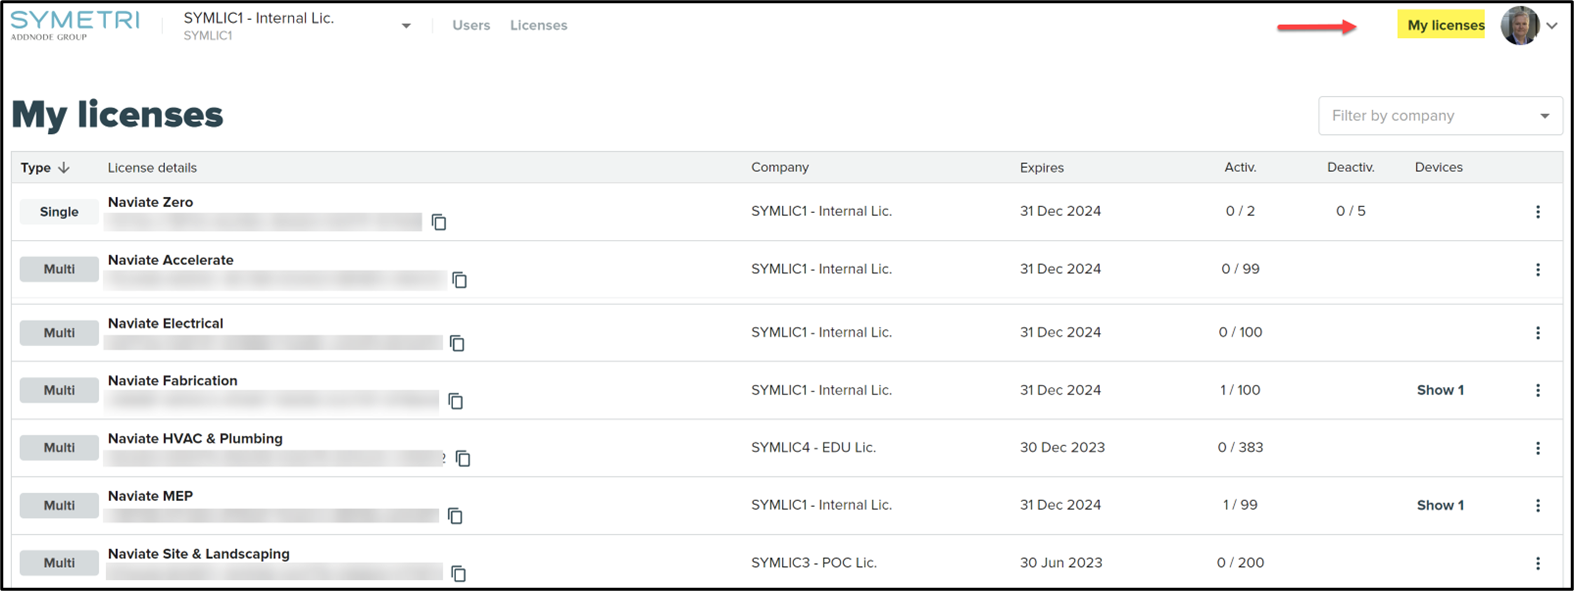
In the Licenses Tab you will see all licenses registered to your company, Single User licenses and Multi-User licenses (Network).
For each product you will see available license type, expiration date and total seats on that license.
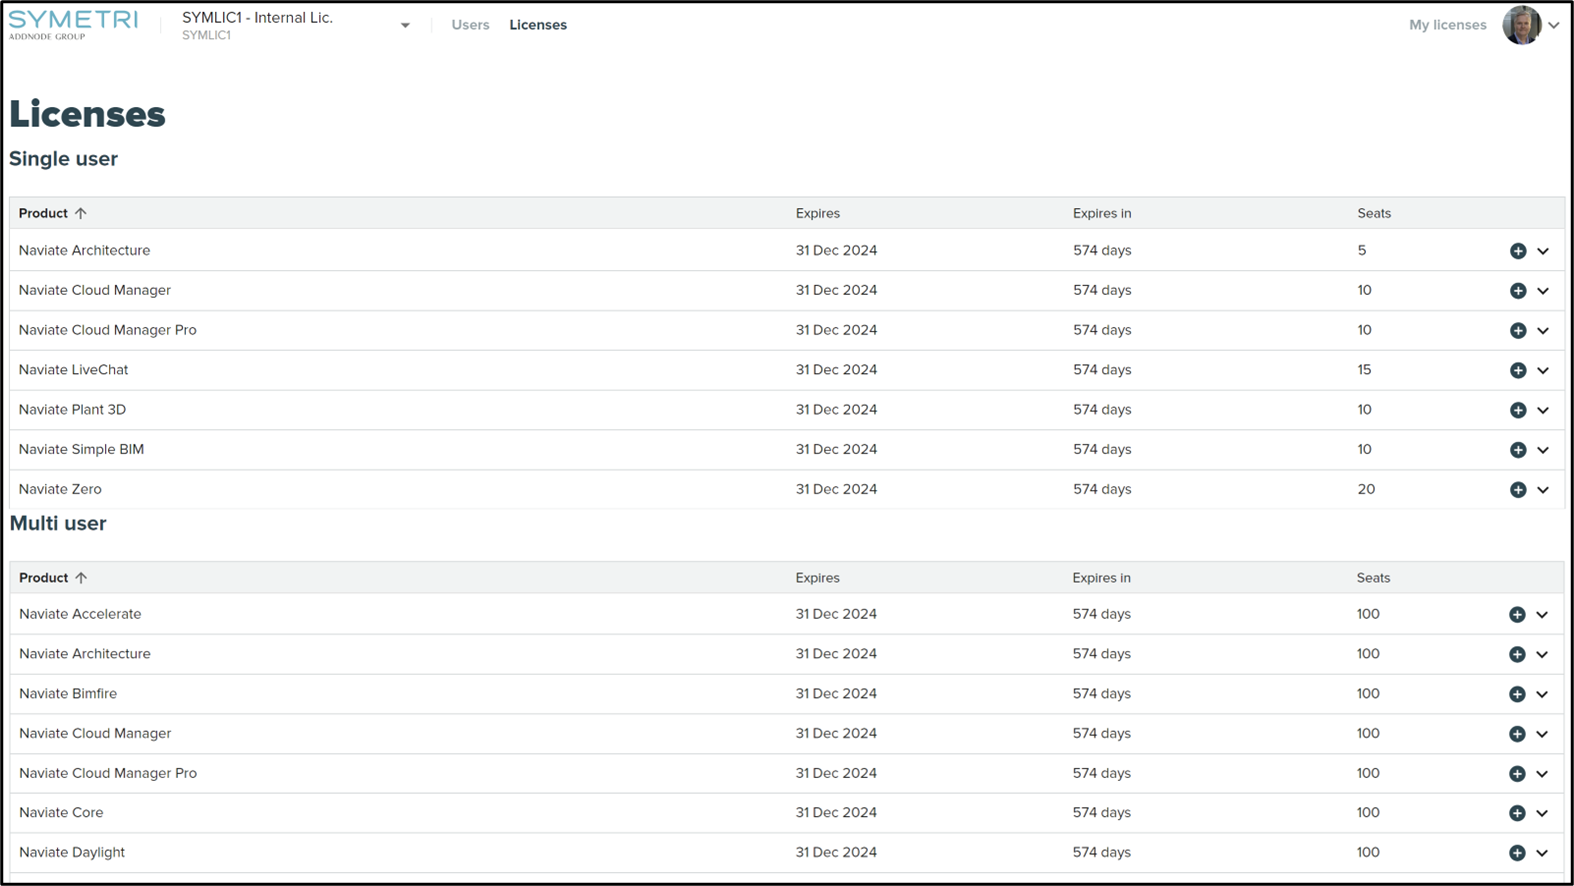
When you click the “+” icon on the left side, you will get more information about that specific license you click on.
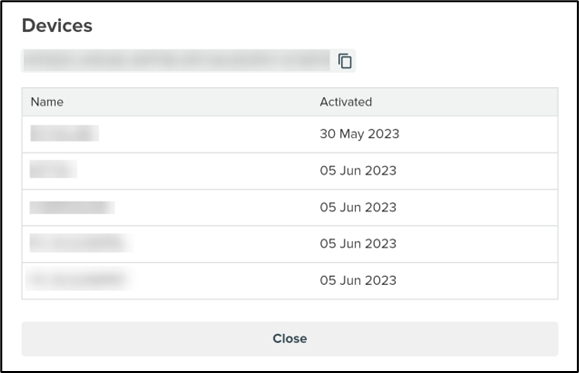
Information like Product, License Key, borrowed licenses, how many are activated (Multi-User), Assigned users and you can see which devices are using it.

Devices list looks like this when you click “Show,” computer name and when they activated the use of the license.
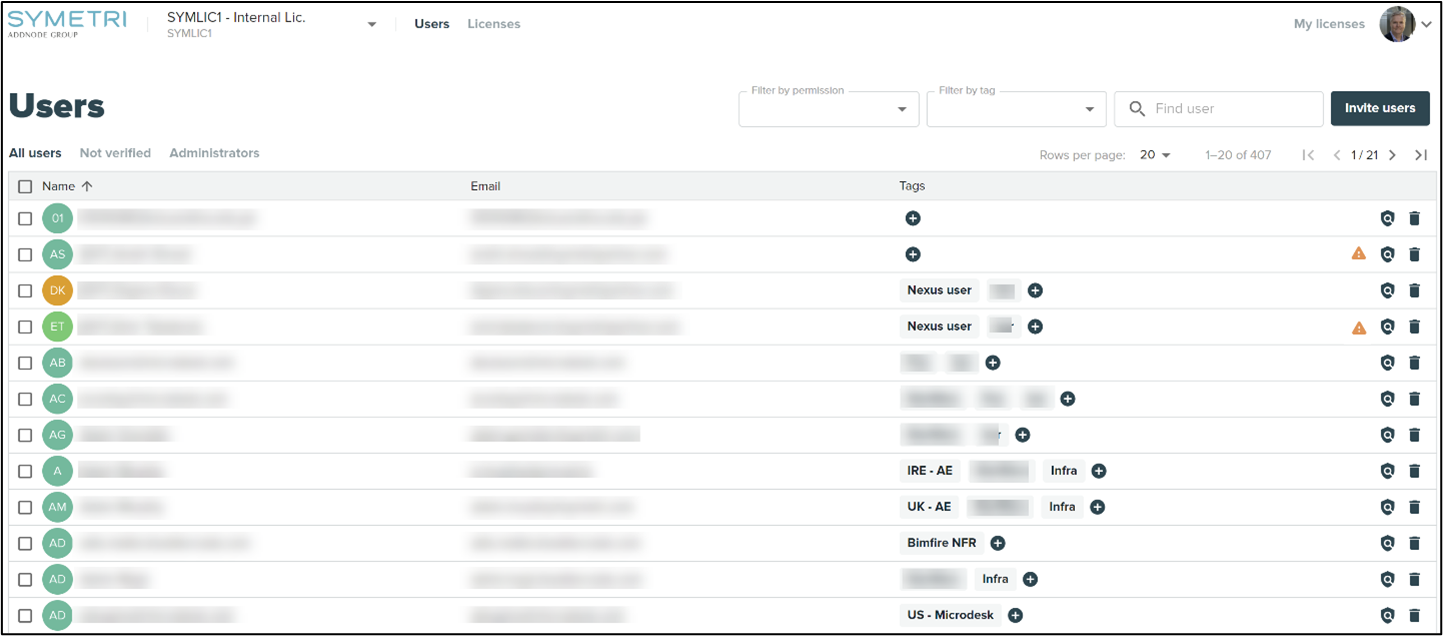
Users
This is an overview of existing users that have been added to your company. When you click here for the first time, it will only be you as an Admin that will be in this overview.
You can't assigthe same people to moe than one Multi user license for the same product. This does not work because we only check for license on the first Multi user License. To solve this, we have to divide the users between the different licenses.
Ideally there should not be several of the same Multi user licenses at the same company, but instead one Multi user with several seats
When you have an extensive list of users in your directory, you can filter them by using the search field next to your “Invite Users” button.
You will also ha views as “All users,” “Not Verified” and “Administrators” available as Quick Views in this overview.
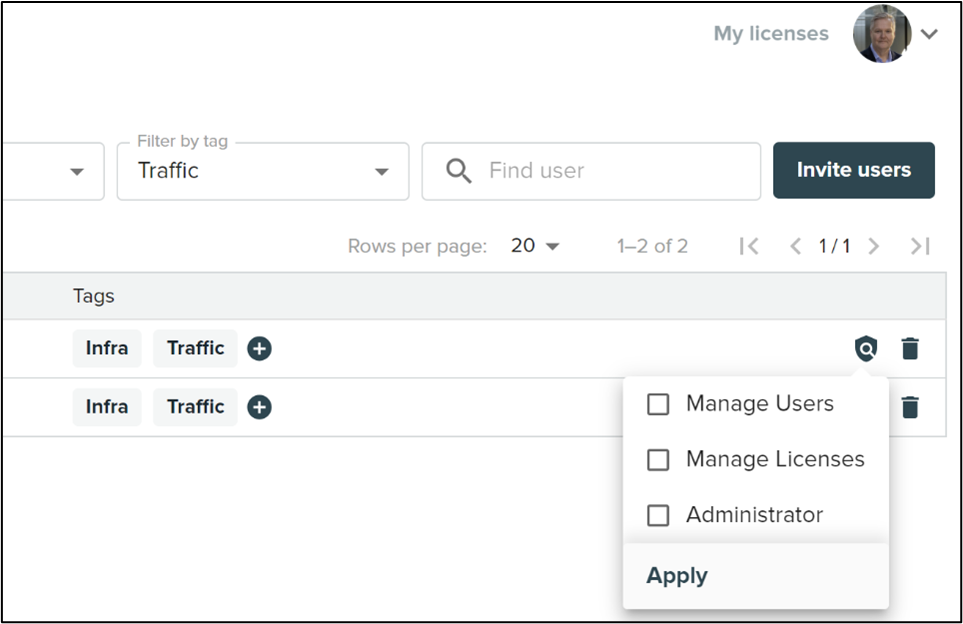
You have also filter option like “Filter by permission,” “Filter by tag” just next to the search field
Creating Tags
Go to “Filter by tag” and create the tags you need to. It could be whatever you would like to tag your users with. Like discipline, city, country or even department.
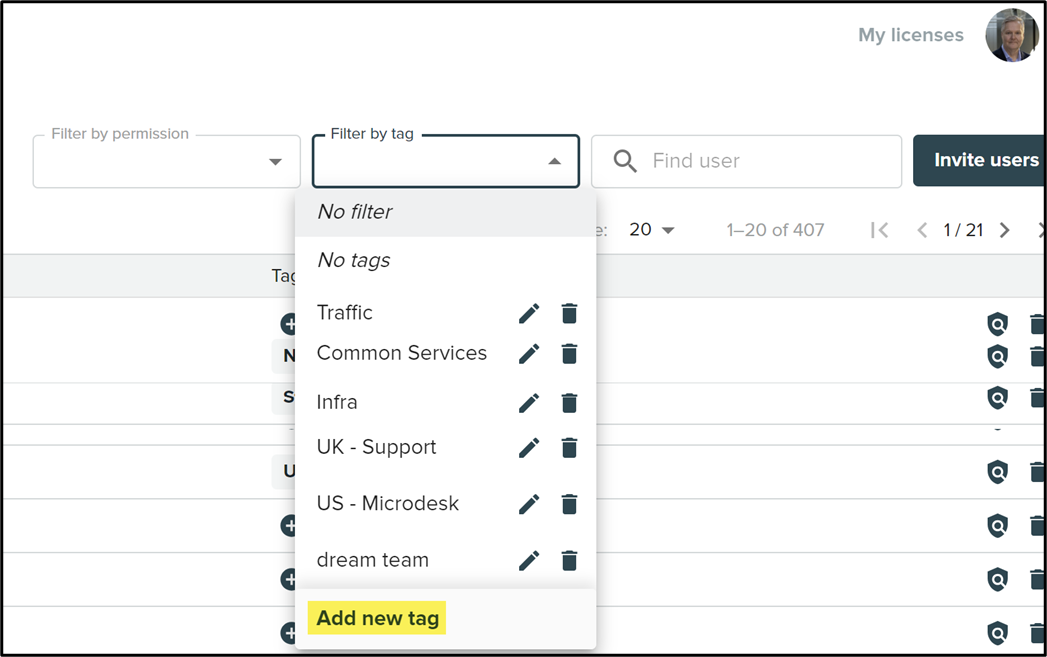
Permissons
By clicking this icon, you get access to the permissions you can assign your users. You can choose between “Access to Dashboard, Contracts, Users, Licenses or Administrator.
How to invite users to your company (Admin only)
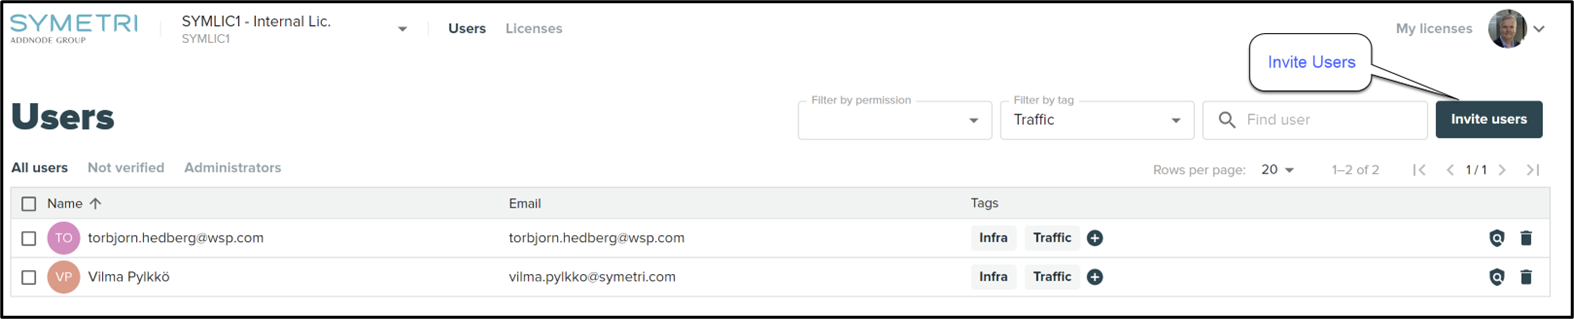
As an admin at your company, you will have the possibility to add users to your company. Click the “Invite Users” button in the Users overview
Add users one-by-one
When you have clicked the “Invite Users” button you will have two choices. This is the first one, adding users by typing their email addresses.
Type the email addresses on the users you would like to invite to your company and click the “+” icon, add another and do the same. When you are ready press the “Invite Users” button
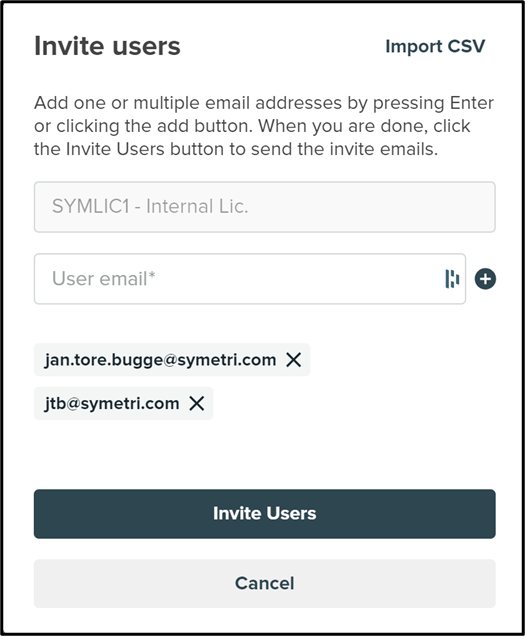
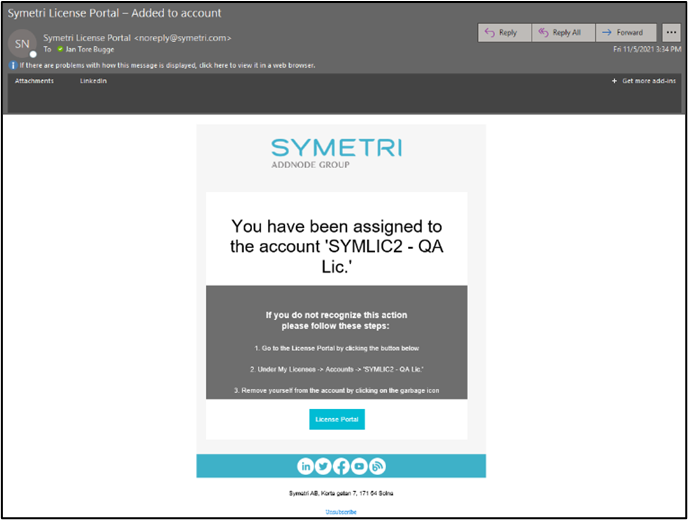
The users you have invited will now get a welcome email from Symetri that he or she must accept. The invitation is valid for 5 days. If the invited user fails to do so, you need to contact Symetri to help you re-send those invites.
Add users using CSV import.
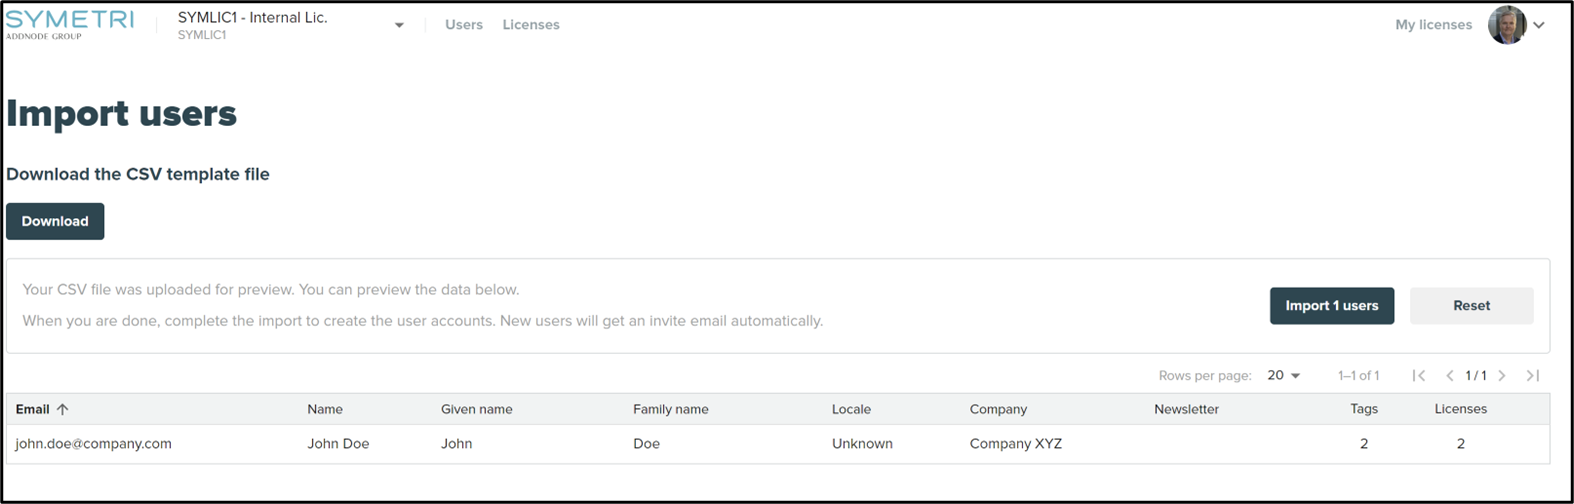
When you have a lot of users you would like to invite to your company, we would recommend using the “Import CSV” option.
Please download the CSV template file we have provided so you get the correct setup.
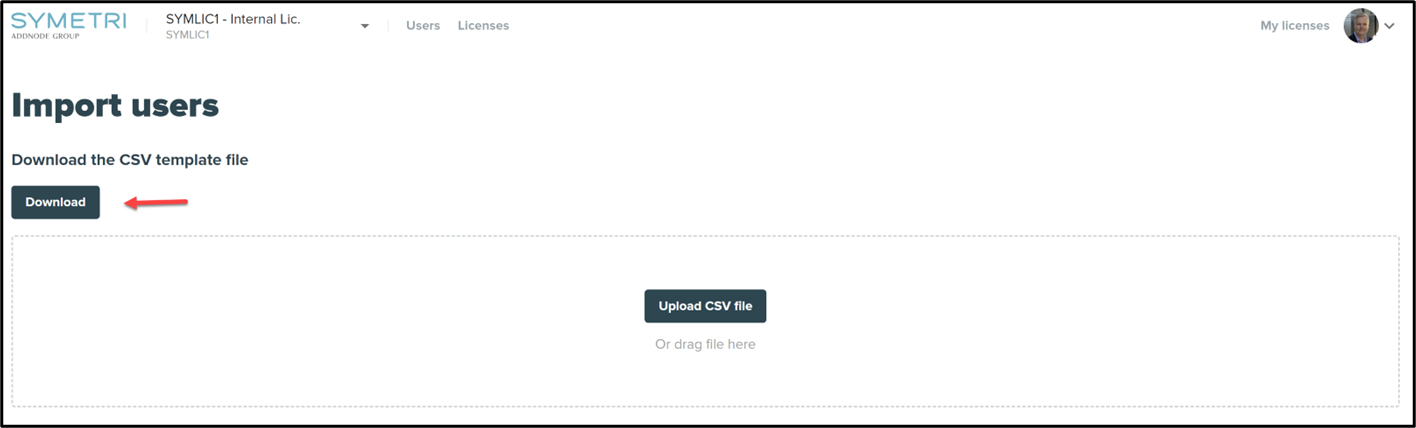
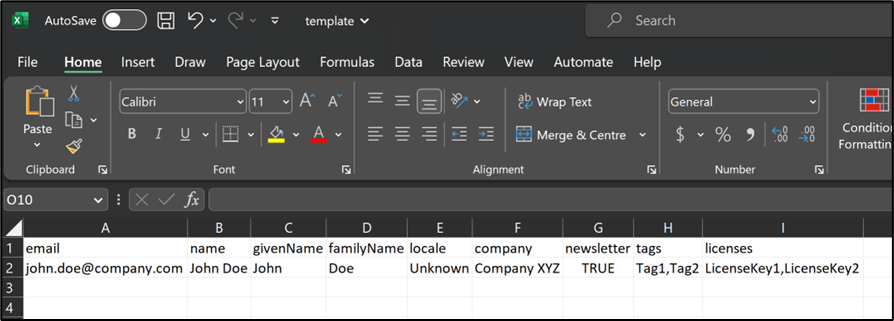
The template looks like this.
You need to write the email address as mandatory. The other fields can be left out if you do not want to use them. Then again having that information already in place when importing will save you a lot of time adding them to Tags or even a License during this invitation (import).
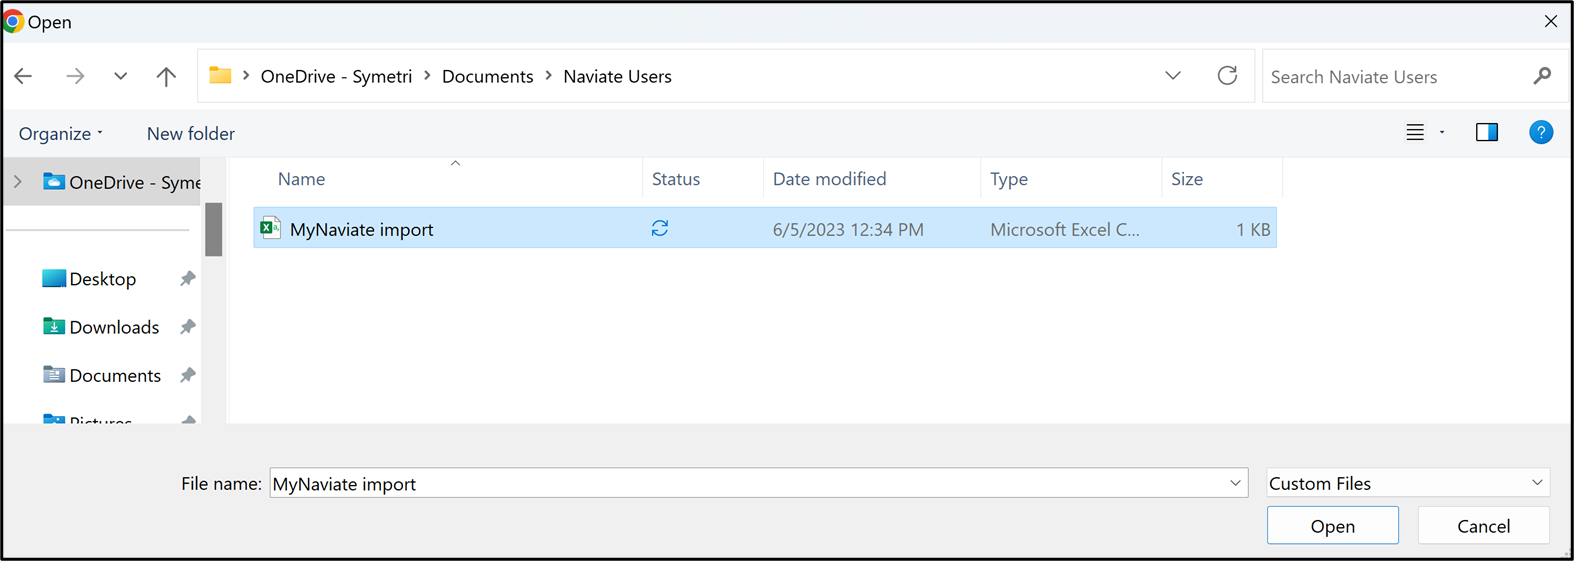
When that CSV file is done, you are now ready to do the upload.
You will get a preview before you decide to import the users, with the relevant fields populated according to what you have typed in the CSV file. So, you need to verify that it is as expected
All invited users will appear as not verified until they have accepted the invitation. As said earlier, it is valid for 5 days.

Company overview (Admin only)
Assign / unassign users to a license
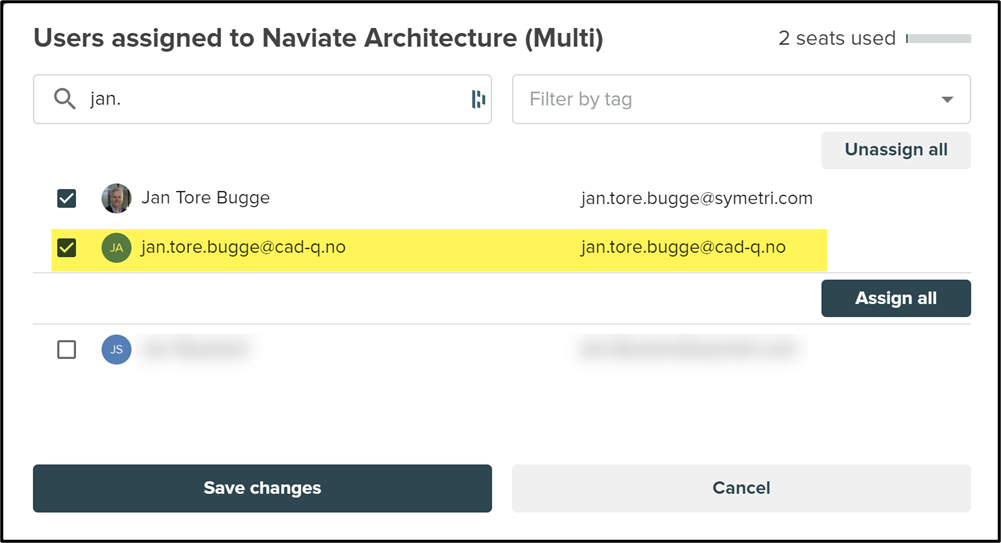
From the overview you choose the “Licenses” Tab and click on the arrow on the right side in the license overview.
When you have clicked you will be presented with this page. Here you can see assigned and not assigned user on that specific Naviate product. Use the search field to narrow down the list if you have many users.
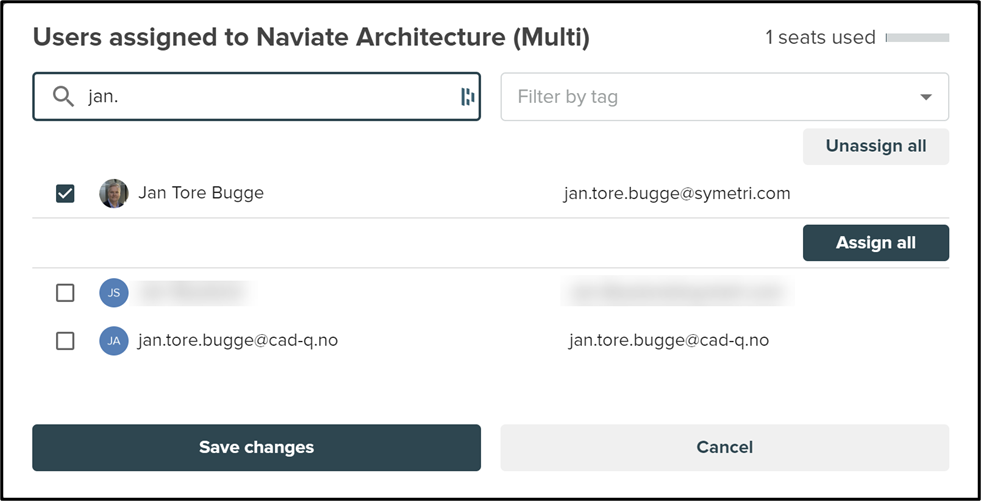
Choose users to add /remove by clicking the box next to the email address.
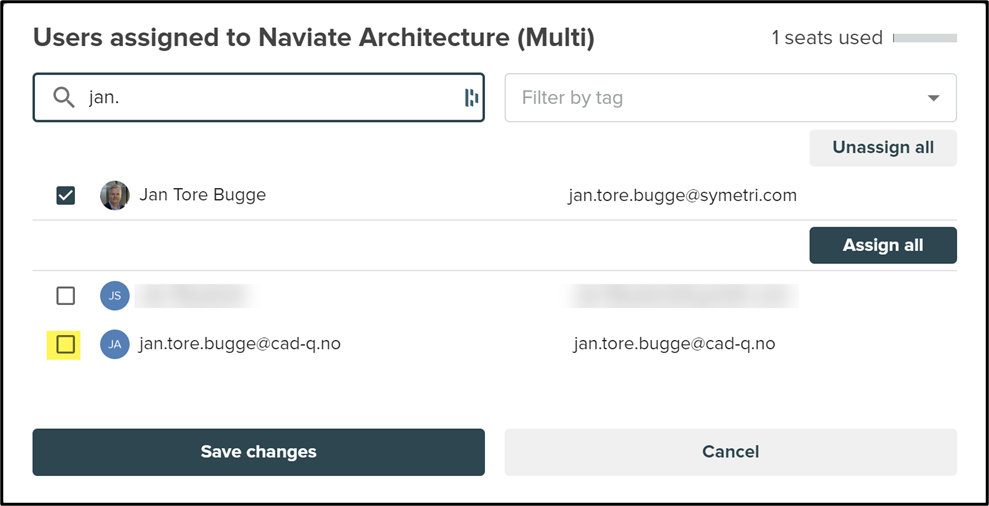
The user will automatically be assigned or unassigned by doing this operation.
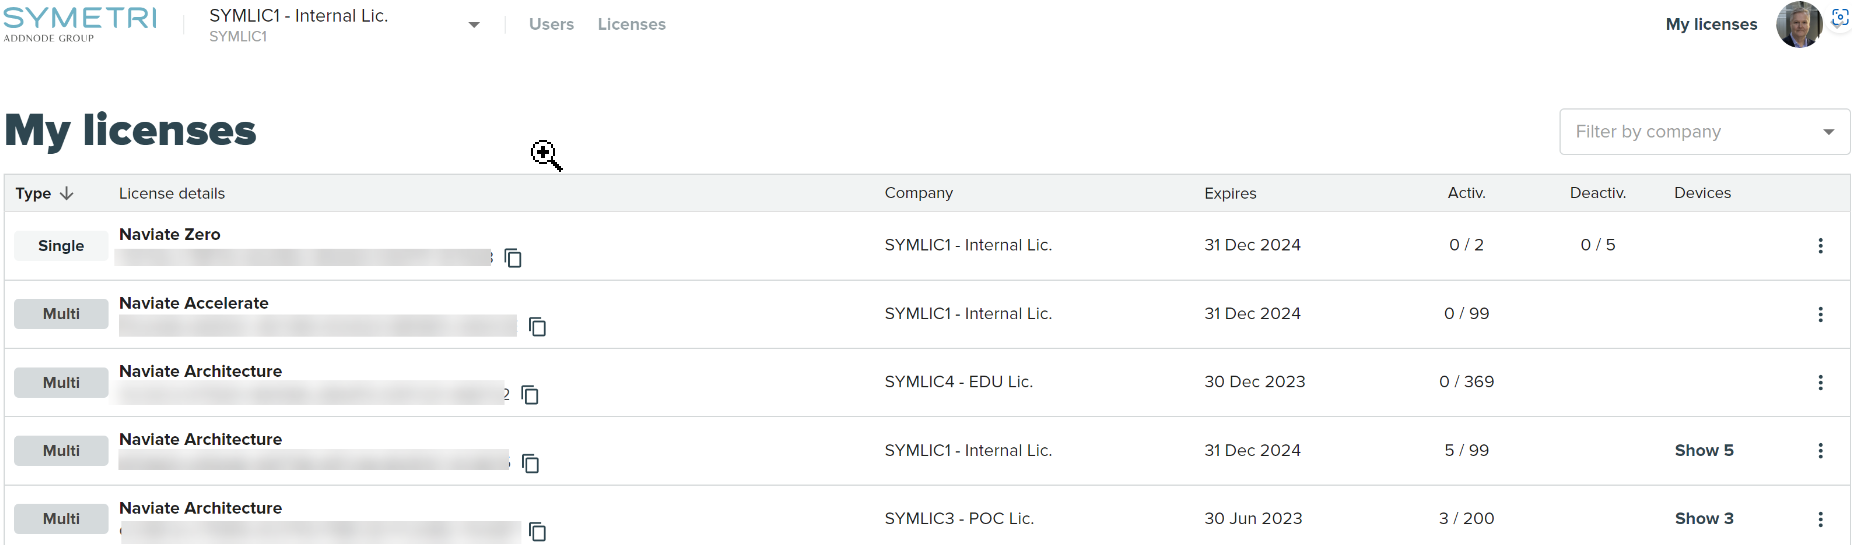
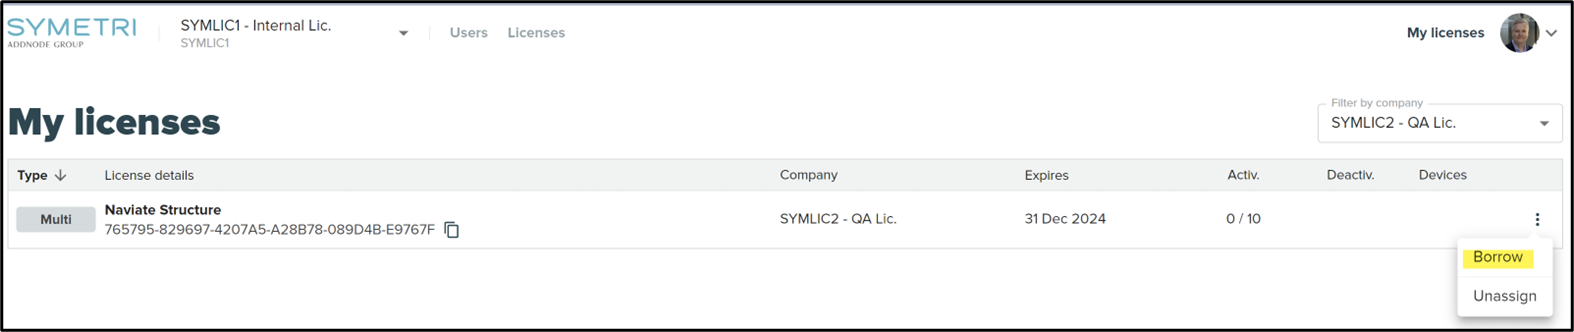
My licenses (All users)
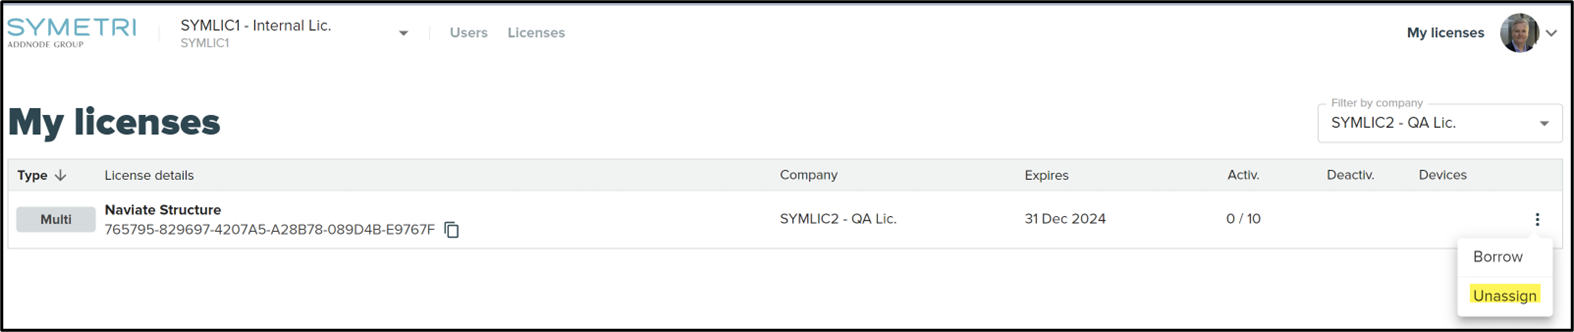
Every user has their own area named “My Licenses.”
This is the page where every user can have a quick overview of what type of licenses they have been assigned. It could be a Single-User, Multi-User, Borrowed. All that information is presented in one single view. If you have licenses from several companies, you can use the “Filter by Company” the get ones you would like to see.
Unassign myself from a license
You will in this view have the possibility to Unassign yourself from the license or borrow the license (Multi-User).
To Unassign yourself from this license if it is not needed or assigned you by mistake, go to “My Licenses” and click on the 3 dots far to the right side of the license. Then choose unassign.
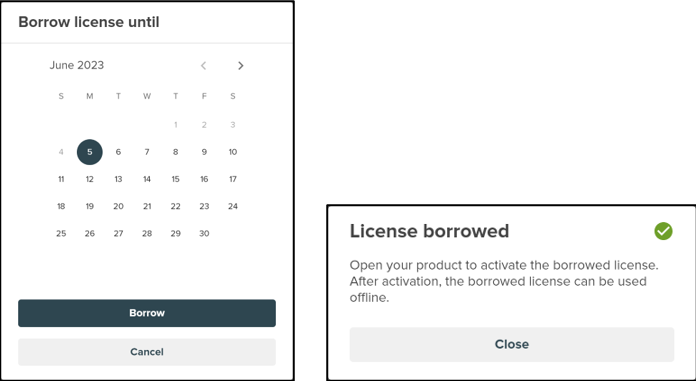
Borrow a license
In the same license view, you can borrow the licenses you have been assigned to.
You click the “Borrow License” button and pick the date for how long you would like to borrow the license. Max borrowing is set to the expiration of the Naviate Subscription contract.
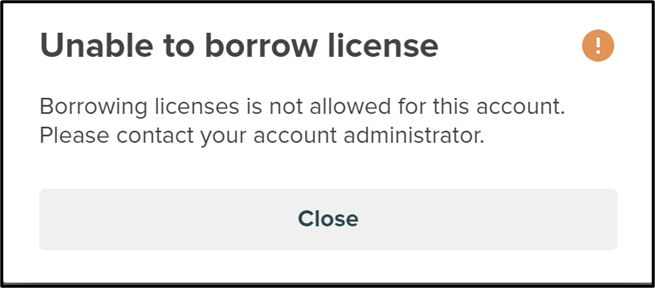
Depending on the company settings, borrowing might not be available. Then you will be presented with this message. So please contact one of the account admins.
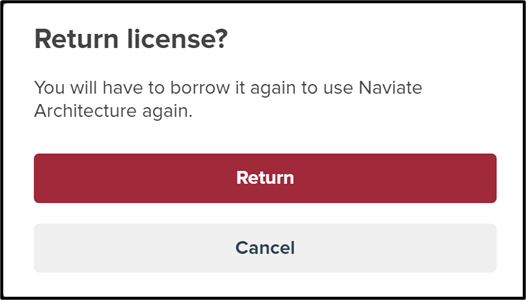
Return a license.
Repeat the same process as you did on borrowing a license to return the license. It will immediately be available for others to use in your company.

Resources
Download the guide here (PDF)