Currently it is not possible to convert the Sovelia template project included in the 2024.2 installation to an SQL multi user project. This is due to a unforeseen issue with a database column related to one of the Sovelia Plant calculations.
The issue does not affect the project if used as an SQL-lite project.
The issue will be fixed, but in the meantime a new template project where this issue has been fixed can be found on the Sovelia Plant dowloads page here.
Please download this project and follow the instructions included below to gain full multi user SQL functionality in your project.
1.0 Download and prepare from template project
The Sovelia Plant template projects for versions 2024.2 and 2025.1 are currently not configured to allow SQL conversion “out of the box”. This can be rectified by following a few simple steps:
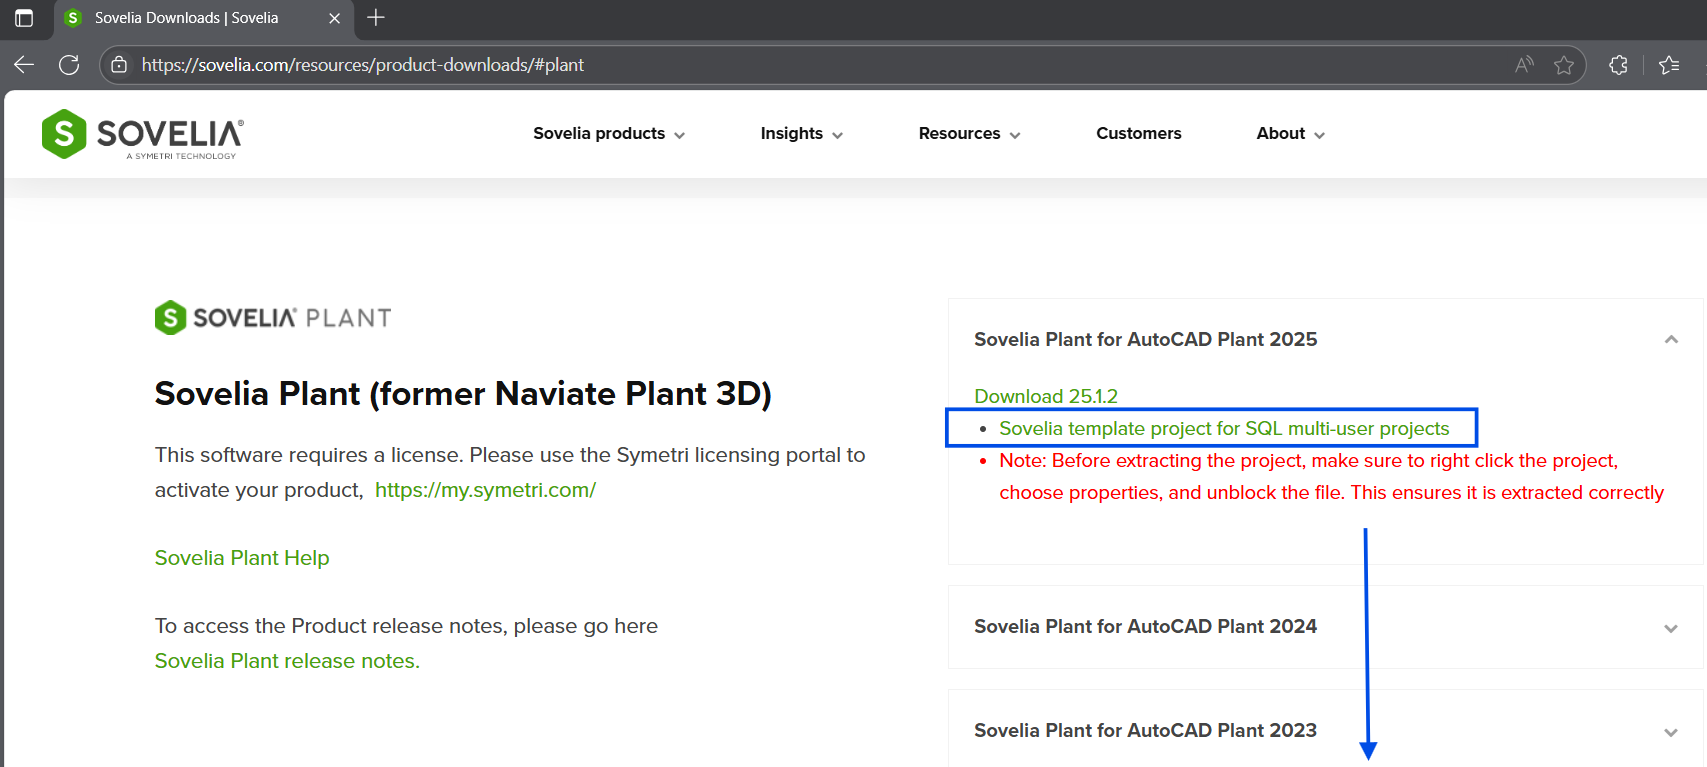
Start by downloading the template project which has been prepared for SQL conversion:
”Sovelia template project for SQL multi-user projects”. This template project can be retrieved from the following link: https://sovelia.com/resources/product-downloads/#plant
Note: This standalone project differs from the template project included in the installation of Sovelia plant. Currently SQL conversion only works with the standalone project.
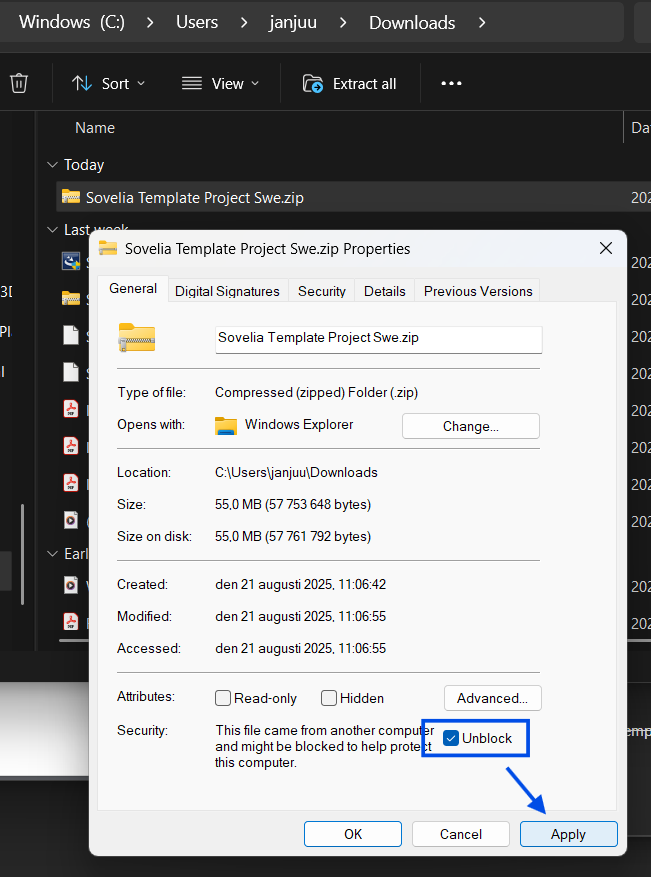
Remember to unblock the zip-file after the download is complete. Right click the file and choose “Properties”, followed by “Unblock” and lastly “Apply”.
Note: If the file is not unblocked there is a risk of the project not working as intended.
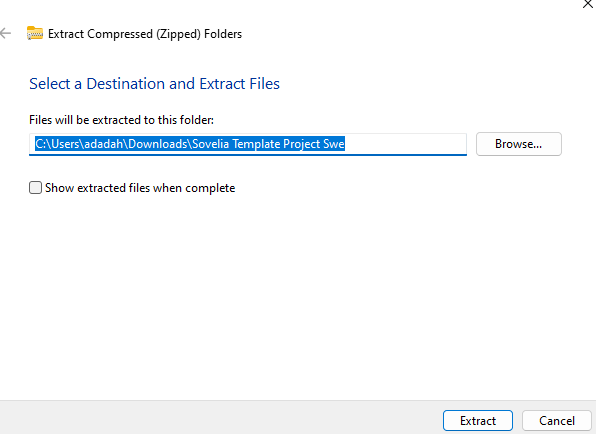
Right click the file again and choose ”Extract all”. Also choose where the extracted folder should be located.
The next step is to create a copy of the template project to continue the preparations for conversion, and later to work in.
Open Sovelia Plant and navigate to the Sovelia tab in the ribbon.

Use the function ”Rename/Copy project ”to create a new project. More information about this step can be found here.
The downloaded template project can be saved for future use when/if a new project needs to be converted to SQL.
2.0 Upload project to SQL server
Now the preparations are done, and the next step is to convert the project.
Make sure to close all instances of Plant 3D. Run the executable “PnPProjectMaintenance.exe“ from C:\Program Files\Autodesk\AutoCAD 20XX\PLNT3D.
Tip: The file path depends on which version is in use.
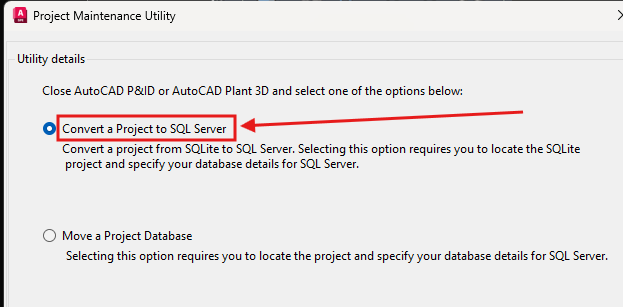
Choose ”Convert a Project to SQL Server” in the dialogue box.
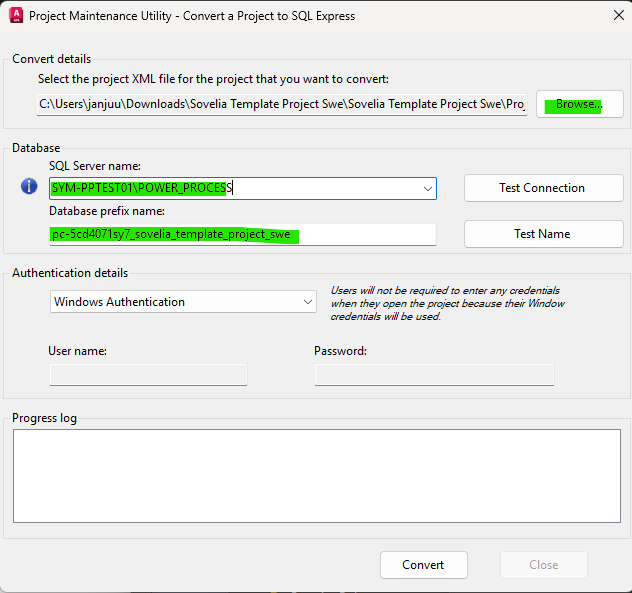
Navigate to the project by clicking ”Browse” and enter the SQL server name, as well as the Database prefix name.
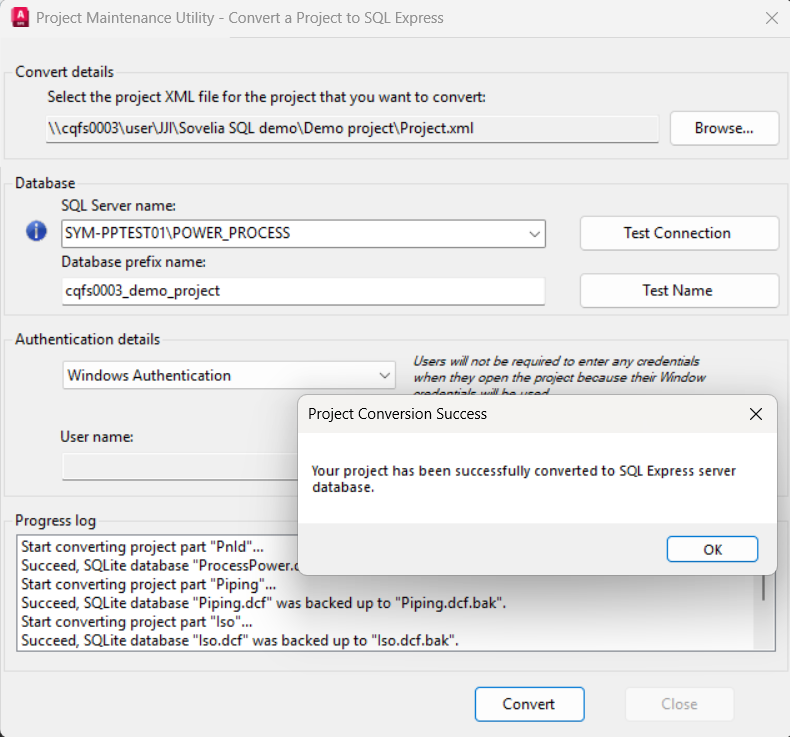
Now the project is converted , and can be used cooperatively via the server. However, there are a few more steps to achieve full functionality.
3.0 Use project without connection between P&ID and 3D-modeller
Plant 3D separates the modules for piping models (3D) and process line models (P&ID) in two separate databases. Sovelia Plant contains functionality to enable bidirectional communication between the databases.
Users who use this functionality should disregard this section 3.0 and continue from section 4.0-8.0.
Users who don’t use this functionality can easily disable the links between the databases, and section 7.0 can be disregarded. The following steps describe how to disable the data links:
Note: If the links are not disabled only one user at a time will be able to open and work in the project.
Start Sovelia Plant and open the new project which was copied from the template project.
Navigate to the Sovelia Plant tab and click the arrow in the function group “Sovelia Property Management”, followed by the “PlantLink” icon.

When the dialogue box opens choose on of the two links which manage the connection between the P3D and PID databases in SQLite projects. The links can either be disabled by ticking the boxes in the rightmost column, or removed with “Delete”.
Now the project is ready to be used on the server without links between P3D and P&ID.
4.0 Create SQL server tables
When a brand-new project is converted from SQLite to an SQL project the tables containing information about pipes and pipeline groups are not generated in the project databases. These tables are critical for a conversion to SQL server project.
The tables for pipe models and pipe schemas (Plant 3D and PID drawings) are generated as soon as a user created as soon as a user creates the respective drawings in the project and models a pipe section and a process line. As such the user must perform the steps described above to make sure the tables are generated to remedy this problem.
Note: If the project which is intended to be converted already contains drawings with pipe models (Plant 3D) and process lines (PID) this section can be disregarded.
5.0 Create UDL-files (If missing in the template project)
The project needs to contain two files with the file type ”.udl” for the conversion to work.
Start by opening the root folder of the project that is to be converted and navigate to [PP]\CQ\Settings.
Tip: [PP] is the general notation for the root folder of the project, in other words the top folder of the project. Root files like Project.xml are located here.
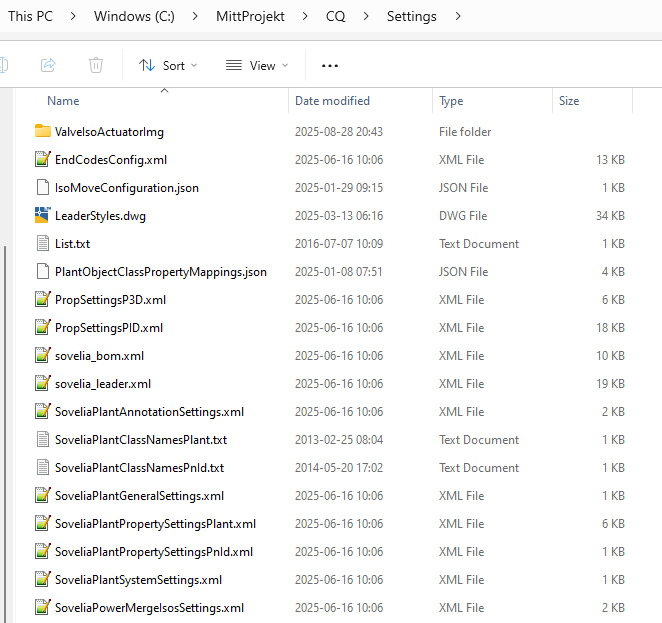
If the project is missing .udl-filer in the root folder these must be created. The procedure is as follows:
Create two text documents by right clicking the in the folder, chosing ”New”, and ”Text document”.
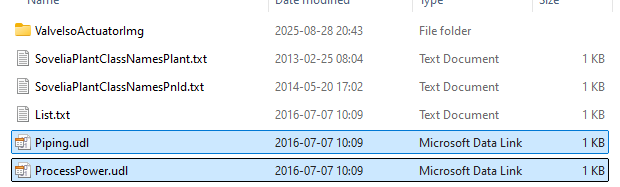
The documents should be named ”Piping” and ”ProcessPower” respectively.

Right click the first text document, click ”Properties” and change the file extension to ”.udl” in the editable field at the top of the dialogue window.
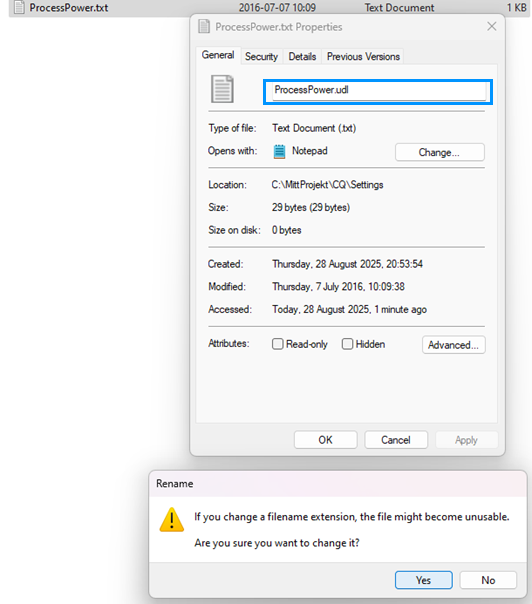
Confirm the change and repeat for the second document.
6.0 Update udl-files with server and database name.
The newly created udl-files must be updated with a server and database name. If this information is not readily available it can be retrieved by opening one of the files with the file extension “.dcf” located in the project root folder [PP].
Right click one of the files and choose “Edit in notepad”.
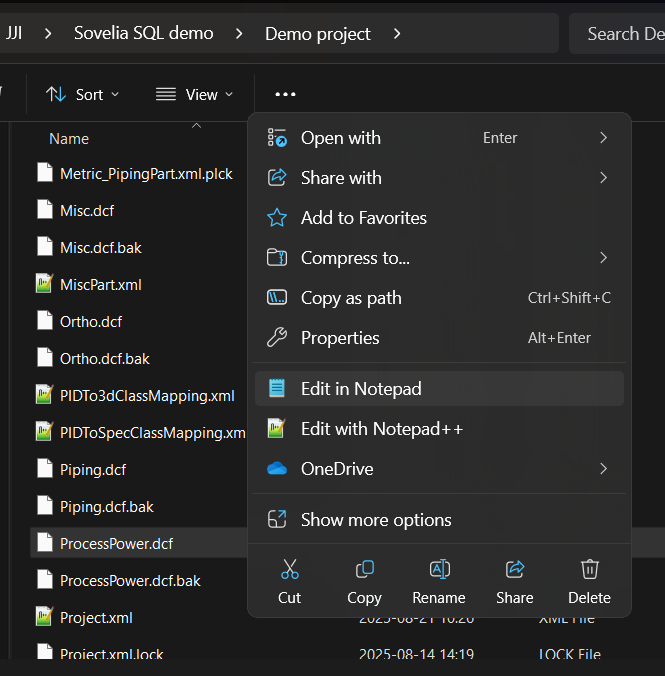
The necessary information is shown in the picture below:

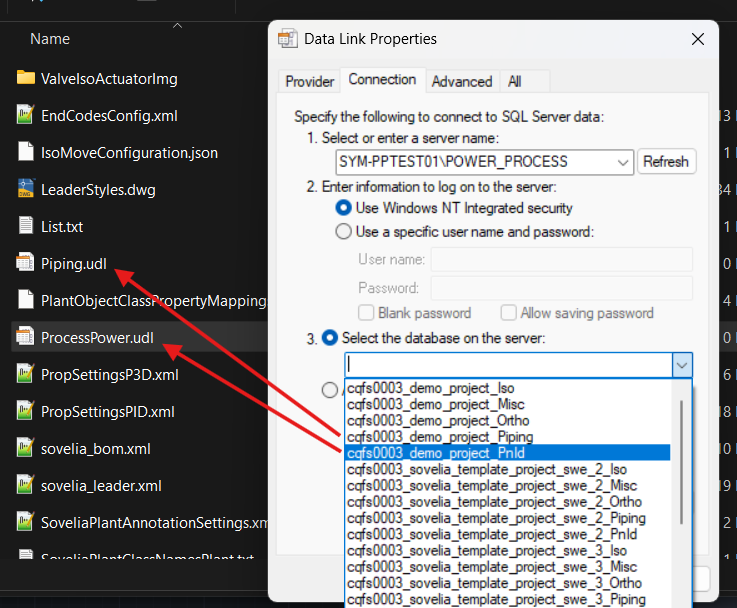
It is now time to update the new udl-files with the server information. Double click the files one after the other and enter the server name and the appropriate database for each file.
Tip: Firms handle their databases and IT environment differently. Contact your firms IT for questions regarding logins or access to databases.
The file ”ProcessPower.udl” has the database prefix ”_PnId”.
”Piping.udl” has the corresponding database prefix ”_Piping”
Test the connection with the “Test Connection” button to make sure that the information has given access to the server.
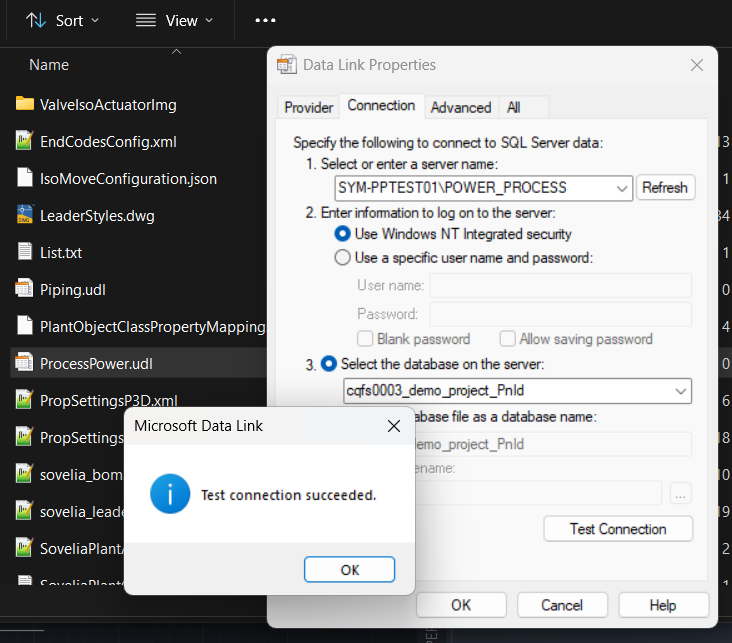
The project’s database-files are now connected to the databases on the server.
7.0 Update PlantLink configurations (If missing in the template project)
Plant 3D separates its data management in two distinct parts, the data which concerns pipe models (P3D), and the data which concerns process lines (PID). Some users alleviate this problem by using Plant Link- configurations to connect information from the two databases. To get this functionality to work in an SQL-project we follow the following steps:
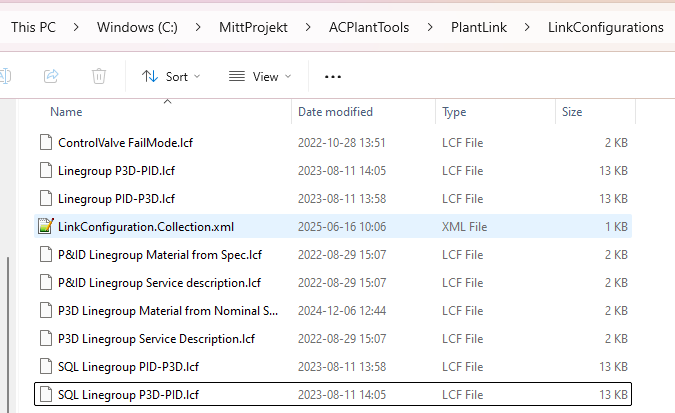
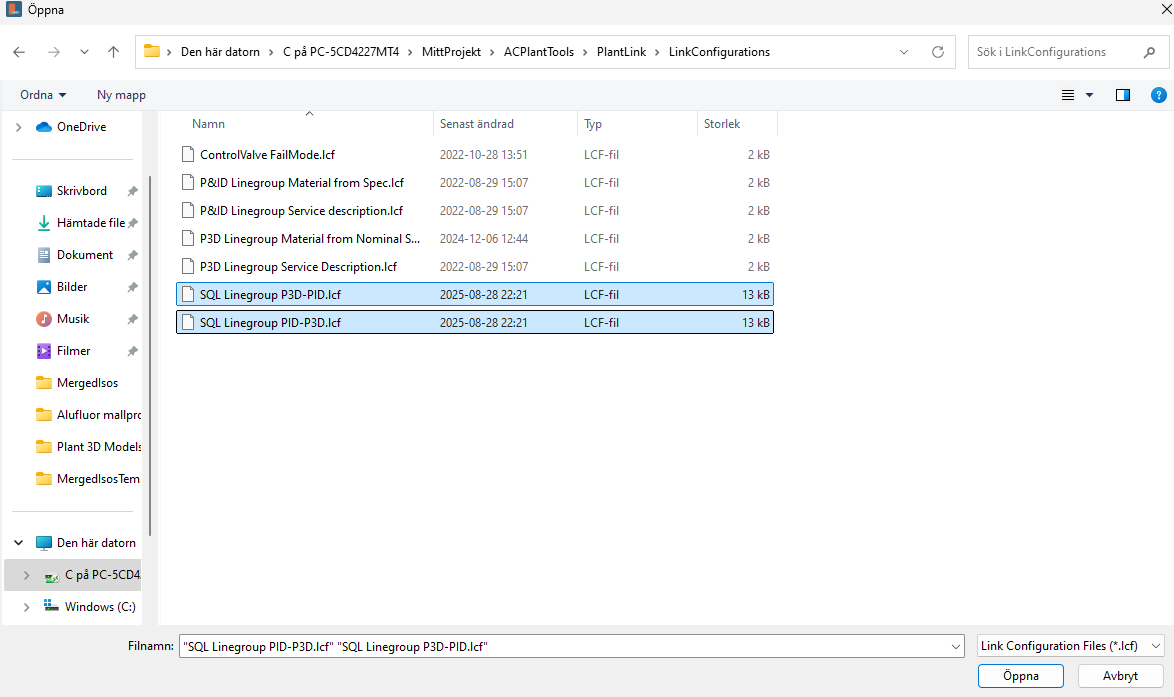
Navigate to [PP]\ACPlantTools\PlantLink\LinkConfigurations.
Create copies of the files “Linegroup PID-P3D.lcf” och “Linegroup P3D-PID.lcf”
Rename the new files to “SQL Linegroup PID-P3D.lcf” respektive “SQL Linegroup P3D-PID.lcf”.
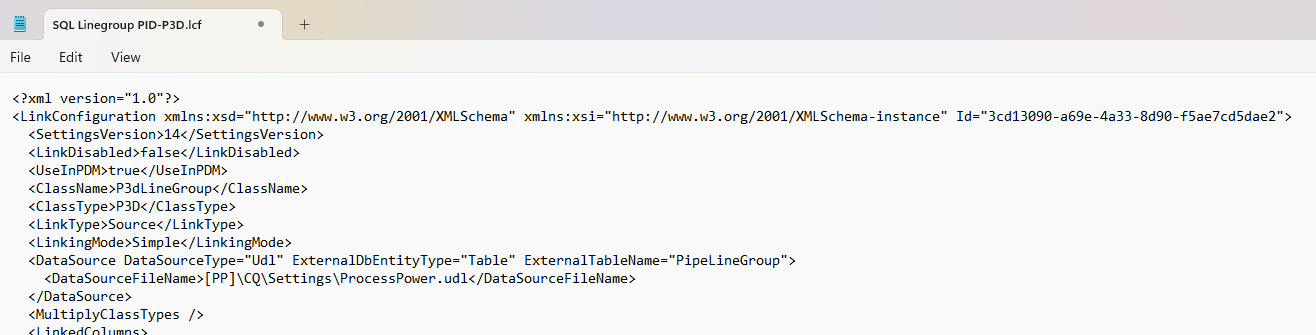
Open the new files in ”Notepad”. The table below shows the code that needs to be replaced.
Note: The file names are very similar, be sure to replace the correct piece of code in the correct file.
File name | Code | |
SQL Linegroup PID-P3D.lcf | Old (unconverted) | <DataSource DataSourceType="SQLite" ExternalDbEntityType="Table" ExternalTableName="PipeLineGroup"> <DataSourceFileName>[SQLPID]</DataSourceFileName> </DataSource> |
New (SQL converted) | <DataSource DataSourceType="Udl" ExternalDbEntityType="Table" ExternalTableName="PipeLineGroup"> <DataSourceFileName>[PP]\CQ\Settings\ProcessPower.udl</DataSourceFileName> </DataSource> | |
SQL Linegroup P3D-PID.lcf | Old (unconverted) | <DataSource DataSourceType="SQLite" ExternalDbEntityType="Table" ExternalTableName="P3dLineGroup"> <DataSourceFileName>[SQLP3D]</DataSourceFileName> </DataSource> |
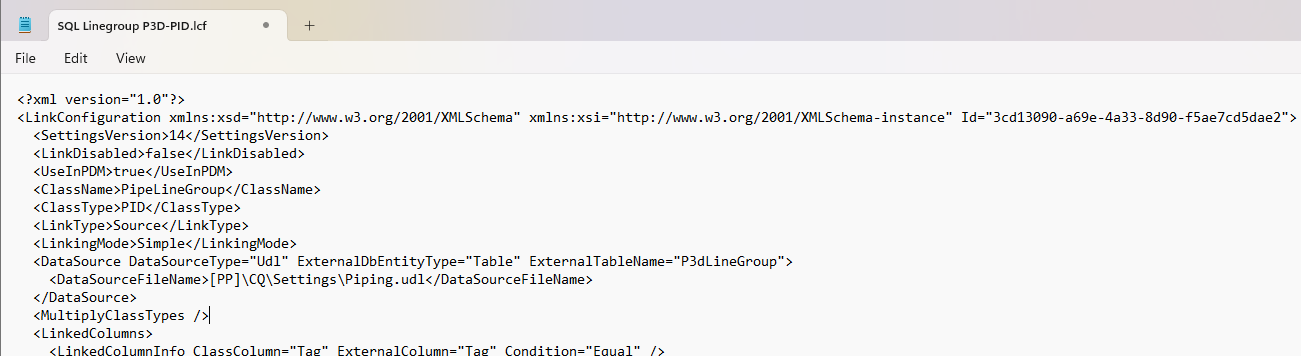
New (SQL converted) | <DataSource DataSourceType="Udl" ExternalDbEntityType="Table" ExternalTableName="P3dLineGroup"> <DataSourceFileName>[PP]\CQ\Settings\Piping.udl</DataSourceFileName> </DataSource> |
The pictures below show how the files should look afterwards:
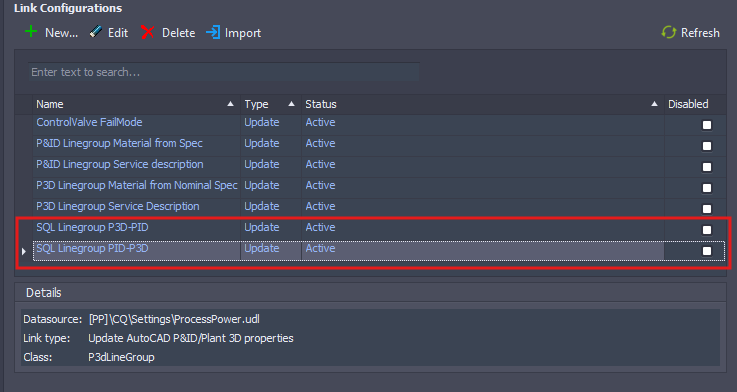
8.0 Activate Plant Link configurations
The next step is to activate the Plant Link configurations we want to have active. Start Sovelia Plant and open the project.
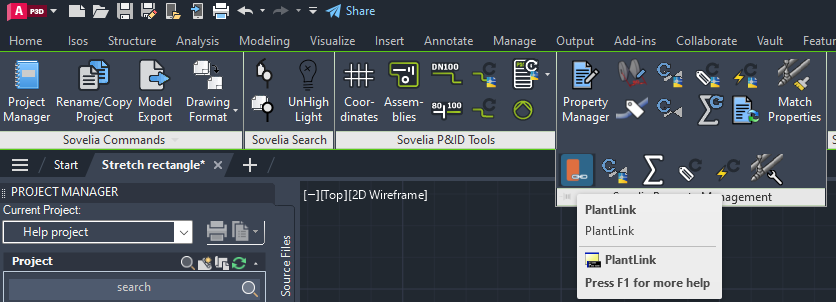
Navigate to the Sovelia Plant tab in the ribbon and click the arrow in the function group Sovelia Property Management, followed by the PlantLink icon.
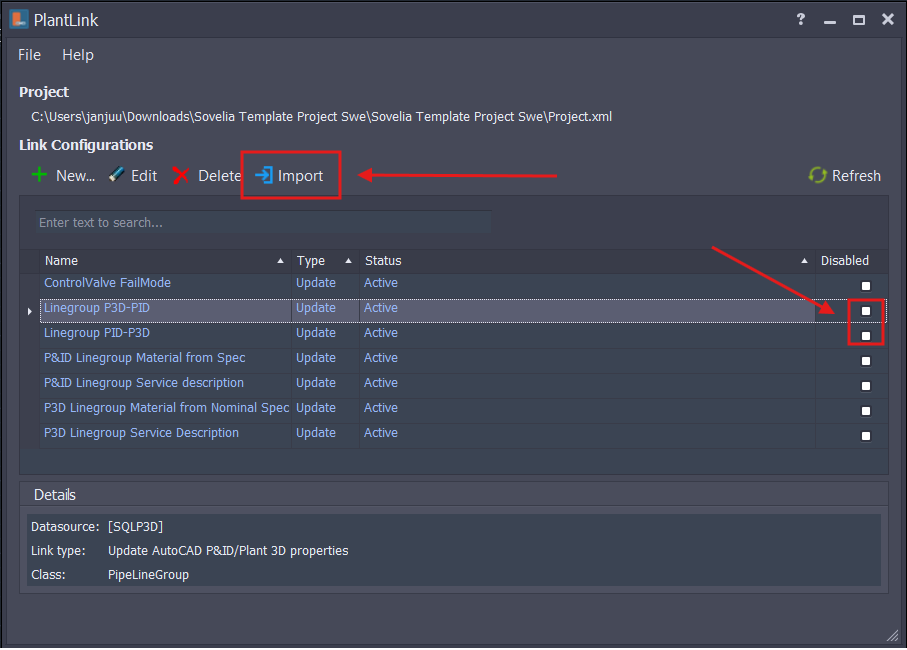
When the dialogue window for Plant Link has opened, choose one of the two links intended for SQLite projects. You can choose to disable the file by ticking the box in the ”Disabled” column or deleting it with “Delete”.

Import the new configurations for SQL project by clicking ”Import” and locating the new files. If the links are blue they are active and working.